

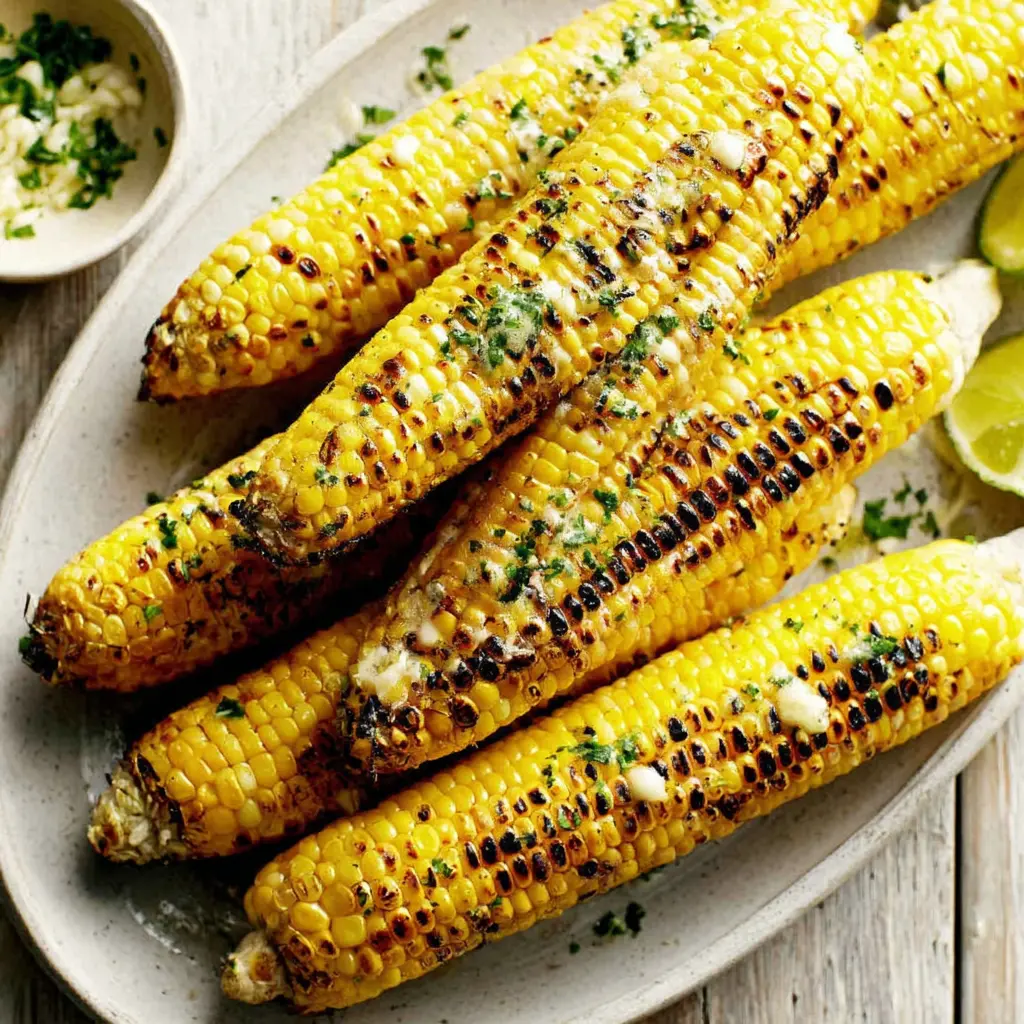
Classic Grilled Corn on the Cob in Foil Packets
Ingredients
Method
- Preheat your gas or charcoal grill to 400 degrees Fahrenheit.
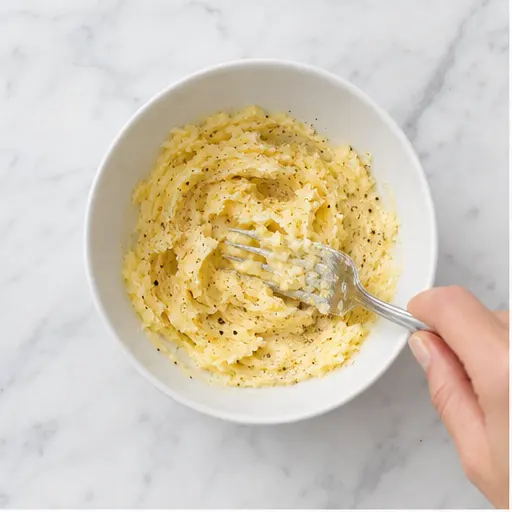
- In a small bowl, mash the softened butter together with the salt, garlic powder, and pepper until smooth and well combined.
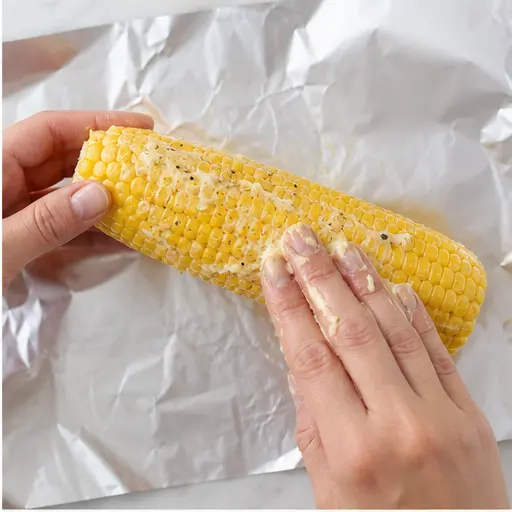
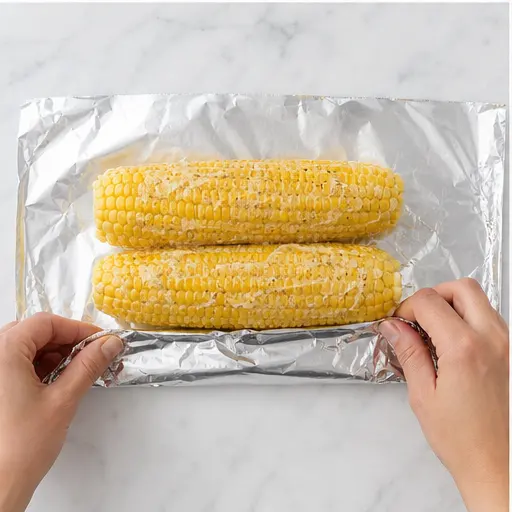
- Rub each ear of corn all over with the seasoned butter. Tear off large sheets of heavy-duty aluminum foil (or double-layer regular foil). Place 2 ears on each sheet, then fold the foil up and over the corn, crimping the edges tightly to create a sealed packet.
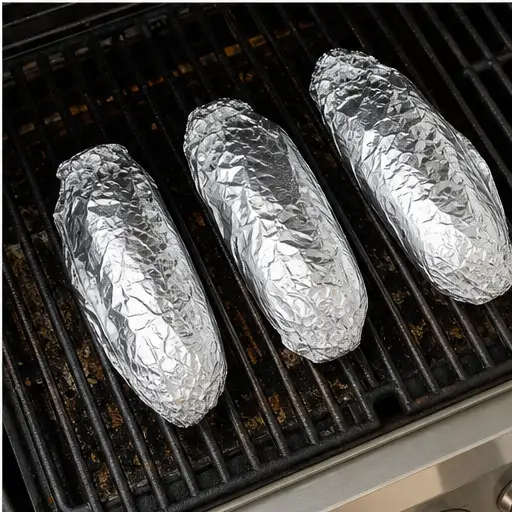
- Set the foil packets on the preheated grill, close the lid, and cook for 10 minutes.
- Carefully remove the packets from the grill. Open them slowly to avoid steam burns, then flip each ear of corn. Reseal the packets and return them to the grill.
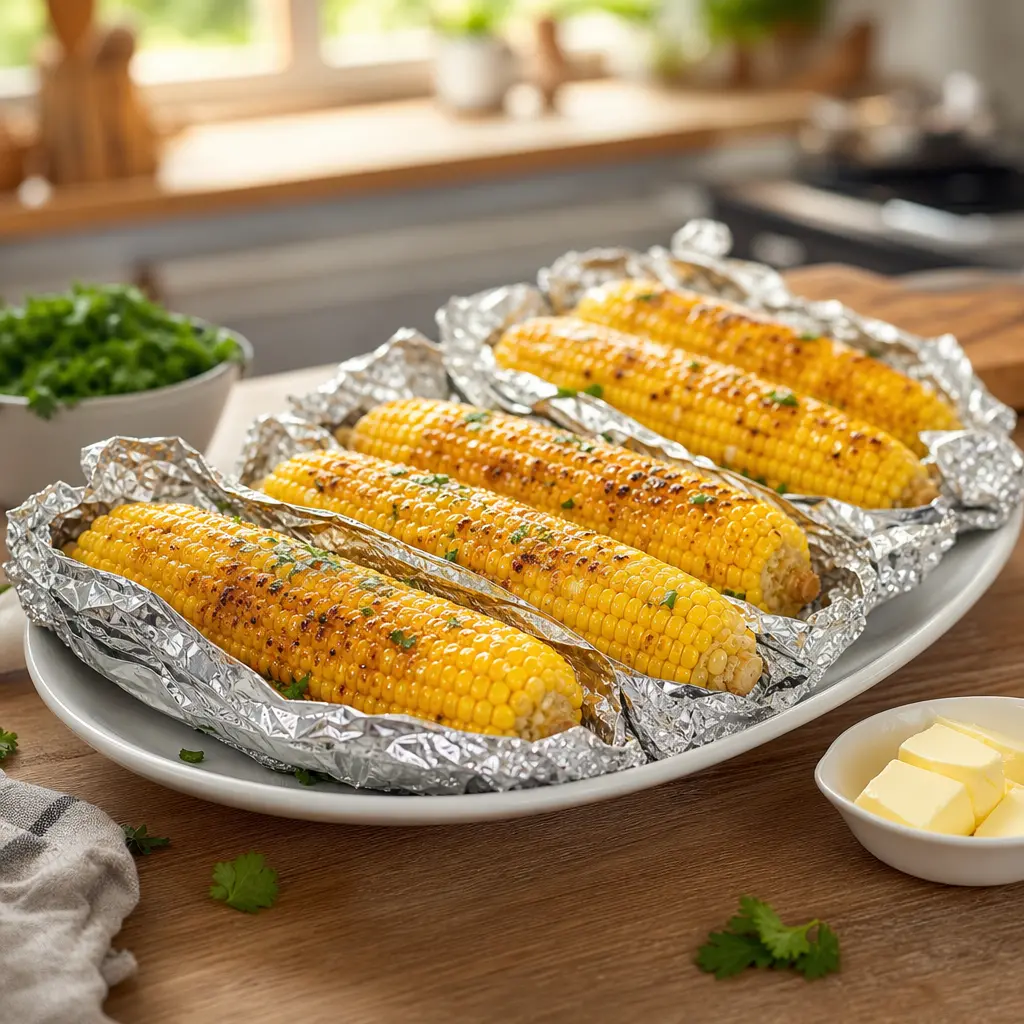
- Continue grilling for another 10 to 20 minutes, until the corn is tender and just beginning to brown in spots. Carefully open the packets, transfer the corn to a platter, and serve with extra butter and salt if desired.
Nutrition
Notes
Tried this recipe?
Let us know how it was!Why You’ll Love This Grilled Corn
Let me be real with you for a second. The first time I tried to grill corn on the cob, I set the husk on fire. I’m not kidding. There I was, thinking I was some kind of grill master, and suddenly I had a flaming torch on my barbecue tongs. My kids thought it was hilarious. My husband just sighed and handed me a beer (well, a soda). It was a mess.
But you know what? That disaster taught me everything I needed to know about how to grill corn the right way. And now, I’m here to save you from the same fate. This method for grilled corn on the cob is the one I turn to every single summer. It’s foolproof. It’s forgiving. And honestly? It’s the best way to grill corn without any stress.
The trick is the foil packet. You seal everything up tight, let the corn steam in its own buttery goodness, and then if you’re feeling brave you can give it a quick char at the end. The result is sweet, tender kernels that practically burst in your mouth. No dry, chewy bites. No burnt husks. Just pure, smoky perfection.
Plus, it’s a total weeknight hero. While you’re flipping burgers and chasing kids, this corn practically cooks itself. You just throw the packets on the grill, close the lid, and go about your business. Twenty-five minutes later? Dinner is ready.
Trust me on this one. I promise you’re gonna love it.
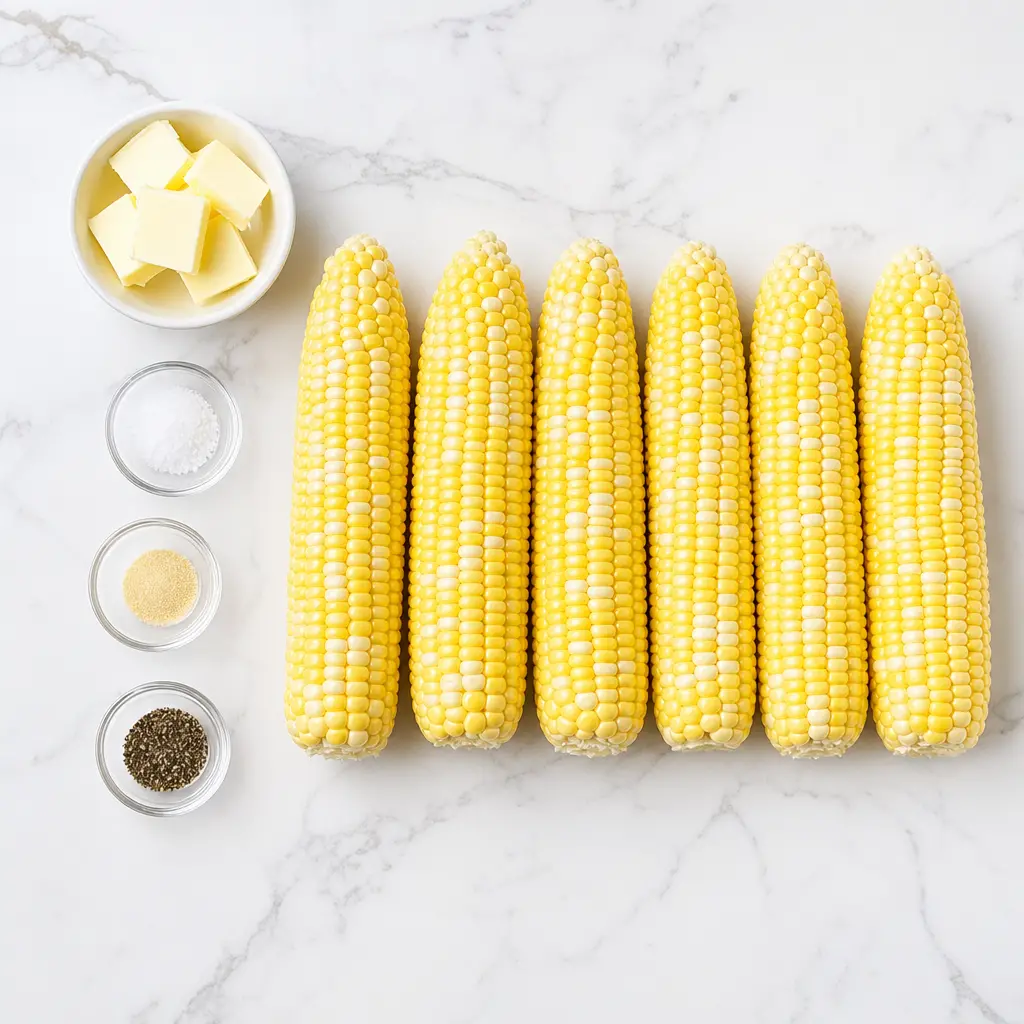
Ingredients for Grilled Corn
Here’s the thing about this recipe it’s almost embarrassingly simple. You probably have everything in your kitchen right now. No fancy ingredients, no weird spices. Just five things that come together to make something magical.
- Unsalted butter (4 tablespoons, softened): You want it soft so it spreads easily. I like unsalted because it lets me control the salt level. If all you have is salted butter, just skip the extra salt in the recipe.
- Salt (1/4 teaspoon fine sea salt): Fine sea salt dissolves better than coarse stuff. But honestly, use what you’ve got.
- Garlic powder (1/2 teaspoon): This is the secret weapon. It adds this subtle savory depth that makes people go, “What did you put on this corn?” It’s not overpowering, I swear.
- Freshly ground black pepper (1/8 teaspoon): Just a tiny bit for warmth. Skip it if you’re feeding picky kids.
- Fresh corn on the cob (6 ears): This is the star. Pick ears that feel heavy for their size, with bright green husks and plump kernels. If the silk is brown and sticky, it’s fresh. If it’s dry and brittle, move along.
That’s it. Five ingredients. I told you it was simple.
Budget Swap
Cheaper Option: Corn is usually cheapest at farmers markets in peak season (July through August). If you’re at a big grocery store like Ralphs or Vons, look for the bulk bins sometimes you can get 10 ears for a steal. Frozen corn on the cob works in a pinch, but fresh gives you that sweet, snappy texture that makes this dish shine.
How to Grill Corn in Foil Packets
Okay, let’s get into the actual process. I’m going to walk you through the four big stages here. Each one has a little tip I’ve learned from, uh, trial and error. You know what I mean.
Stage 1: Make the butter mixture. Grab a small bowl and mash your softened butter with the salt, garlic powder, and pepper. Use a fork. Just stir it all together until it’s smooth and evenly mixed. The garlic powder should be totally incorporated no white streaks left. This takes about 30 seconds. Easy, right?
The smell is already incredible. That garlic and butter combo? It’s going to infuse every single kernel.
Stage 2: Butter the corn and make the packets. Take each ear of corn and rub it all over with the seasoned butter. Don’t be shy. Get it in every crevice. I like to use my hands it’s messy but so satisfying. Then tear off large sheets of heavy-duty aluminum foil. If you’re using regular foil, double it up. Place two ears on each sheet, then fold the foil up and over the corn. Crimp the edges tightly to create a sealed packet. You want it airtight so the steam stays inside.
This is where the magic happens. The butter melts and coats every kernel while the corn steams to tender perfection.
Stage 3: Grill the packets. Set the foil packets on your preheated grill (400 degrees Fahrenheit is the sweet spot). Close the lid and let them cook for 10 minutes. Then, carefully remove the packets use tongs, those things are hot and open them slowly. There will be a rush of steam, so tilt the opening away from your face. Flip each ear of corn over, reseal the packets, and put them back on the grill.
This flipping step is important. It ensures even cooking. The bottom of the corn gets direct heat while the top steams, and flipping it evens things out.
Stage 4: Finish and serve. Continue grilling for another 10 to 20 minutes. The total time depends on your grill’s heat and how tender you like your corn. Start checking at the 20-minute mark (10 + 10). The corn is done when it’s tender and just beginning to brown in spots. If you want a little char, you can remove the corn from the foil and place it directly on the grates for 1-2 minutes per side. But honestly? It’s perfect as is.
Carefully open the packets one more time, transfer the corn to a platter, and serve with extra butter and salt if you’re feeling indulgent. I always am.
Tips for Perfect Grilled Corn
I’ve made this recipe more times than I can count, and I’ve made every mistake in the book. Here’s what I’ve learned so you don’t have to repeat my errors.
- Don’t skip the flip. I know it’s tempting to just let the packets sit there and forget about them. But flipping the corn halfway through ensures every kernel gets equal love. Trust me on this one.
- Watch your heat. 400°F is ideal. If your grill runs hot (some gas grills are aggressive), start checking at the 18-minute mark. You want tender corn, not mushy corn.
- Use heavy-duty foil. Regular foil tears too easily when you’re crimping the edges. Double it up if that’s all you have. The last thing you want is a butter puddle leaking onto your grill grates.
- Let the steam out carefully. I learned this one the hard way. That first burst of steam is intense. Open the packets away from your face and hands. Your eyebrows will thank you.
- If you burn a few kernels, just peel them off. Seriously. Nobody will know. The rest of the corn is still perfect.
Oh, and one more thing if your grill is full of burgers and ribs, you can also bake these packets in a 400°F oven for 25-30 minutes, flipping once halfway. It’s not quite the same smoky flavor, but it’s still delicious.
Flavored Butters for Grilled Corn
Look, the classic butter-garlic-salt combo is amazing. But sometimes you want to mix things up. Here are a few compound butter ideas that take this grilled corn on the cob to the next level. Just mash the ingredients into softened butter and follow the same recipe.
- Cilantro Lime Butter: Add 2 tablespoons of finely chopped fresh cilantro, 1/4 teaspoon of lime zest, and an extra pinch of salt to the butter. It’s bright, fresh, and perfect for summer.
- Chili and Lime Butter: Mix in 1/2 teaspoon of chili powder and 1/4 teaspoon of lime zest. This gives you that Mexican street corn vibe without the mayo. Sprinkle with a little Cotija cheese at the end if you’re feeling fancy.
- Honey Butter: Add 1 tablespoon of honey and a pinch of cayenne (optional) to the butter. Sweet and spicy? Yes, please.
- Herb Butter: Stir in 1 tablespoon each of fresh chopped parsley and chives. It’s subtle but elegant.
These are all optional additions, of course. The base recipe is perfect as is. But if you want to impress your guests? Whip up one of these butters. They’ll think you spent hours in the kitchen.
How to Store Leftover Grilled Corn
If you somehow have leftovers which, honestly, rarely happens in my house here’s what to do. Let the corn cool completely, then wrap each ear tightly in plastic wrap or aluminum foil. Store them in an airtight container in the fridge for up to 3 days.
The best part? Leftover grilled corn is amazing cold. I love cutting the kernels off the cob and tossing them into salads, salsas, or even just eating them straight from the bowl. The smoky flavor is incredible.
You can also freeze the kernels. Cut them off the cob, spread them on a baking sheet in a single layer, and freeze until solid. Then transfer to a freezer-safe bag or container. They’ll keep for up to 3 months. Thaw in the fridge overnight before using.
To reheat, just pop the corn in a hot skillet for a few minutes, or microwave it with a damp paper towel. Easy.
Serving Suggestions
This grilled corn on the cob is the ultimate summer side dish. It goes with pretty much everything you’re grilling. Here are some of my favorite pairings.
- Burgers and hot dogs: Classic BBQ combo. The sweet corn balances out the savory meat perfectly.
- Grilled chicken or ribs: The smoky char on the corn complements the barbecue sauce on the meat. It’s a match made in heaven.
- Fish tacos: Cut the kernels off the cob and sprinkle them over your tacos. It adds sweetness and crunch.
- Potato salad or coleslaw: Cold sides + hot corn = the perfect plate.
- Mexican street corn style: Slather with mayo, dust with chili powder, squeeze lime juice, and sprinkle with Cotija cheese. It’s a whole meal on its own.
Honestly, you can serve this alongside anything. It’s that versatile.
More Favorite Corn Recipes
If you love this grilled corn on the cob as much as I think you will, here are a few more corn recipes to try. Because once you start, you won’t be able to stop.
- Corn and Tomato Salad with Basil Vinaigrette
- Spicy Corn Fritters with Chipotle Mayo
- Corn and Black Bean Tacos with Avocado Crema
- Corn Chowder with Crispy Bacon (well, crispy tempeh for a veggie version)
- Elote Pasta Salad with Cotija and Lime
Summer is corn season, so take advantage of it while it lasts. Trust me, you’ll be sad when it’s gone.
Frequently Asked Questions
Alright, that’s everything I know about how to grill corn on the cob. I hope this recipe becomes a staple in your summer rotation like it has in mine. Tag me when you make it I want to see your beautiful char! And if you want more summer inspiration, check out my Pinterest board for all things grilled. Happy grilling!
Source: Health & Nutrition Research
Leave a Reply