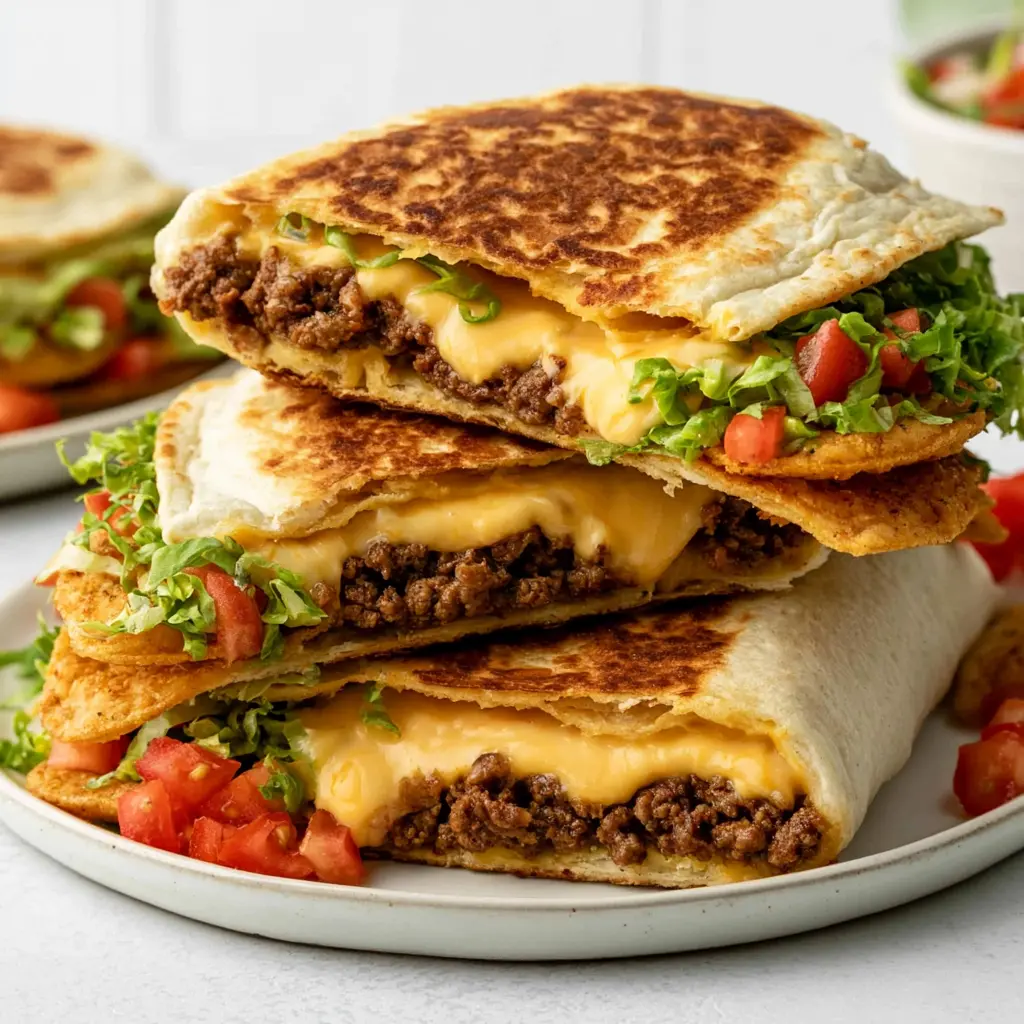
Why You’ll Love These Chalupa Nachos
It’s 5:30 on a Tuesday, homework is spread across the table, and somebody just said the words Taco Bell. Again. No judgment here, trust me. We’ve all been there. That’s exactly why I started making these chalupa nachos at home. You get all that drive-thru craving satisfaction, the crispy, cheesy, loaded goodness, but with better flavor and a fraction of the guilt. This has become our go-to family recipe for nights when takeout feels way too tempting. Here’s the payoff: a golden flour tortilla crisped to a shatter, wrapped around seasoned ground beef, warm nacho cheese sauce, and a tostada shell that snaps with every single bite. Served warm, cut in half, with the fillings spilling out just enough to make you grab a fork for the stragglers. And honestly? It’s easier than you think. One skillet, a few smart shortcuts, and about 30 minutes of active work. You’ll feel like the hero parent who pulled off a restaurant-level dinner on a random weeknight.What Exactly Are Chalupa Nachos?
Let’s clear this up first. A traditional chalupa is a corn tortilla that gets fried until golden and crisp, usually in a little boat shape. The fried tortilla base is what separates a chalupa from a taco. Taco Bell made their version famous with a crispy-yet-soft shell, filled with seasoned beef, shredded lettuce, cheese, and sauce. These chalupa nachos take that concept and give it a crunch wrap makeover. Instead of an open boat, I fold a crispy tostada shell, which is basically a fried corn tortilla, right into a large flour tortilla with all the best nacho toppings tucked inside. You get loaded nachos in a portable, hand-held form. The tostada shells deliver that fried tortilla base crunch in every bite. The difference between a tortilla and a chalupa? A tortilla is the soft, flexible base. A chalupa is what happens when that tortilla meets hot oil and turns golden and crisp. This recipe gives you both textures stacked together, which is honestly the best of both worlds.Ingredients That Make This Work
The genius of this chalupa nachos recipe is that it leans on smart shortcuts without tasting like it. Here’s the lineup: – Seasoned ground beef. The hearty center. Use a 93% lean pound so you don’t end up with a greasy mess, then hit it with taco seasoning. – Large flour tortillas. Burrito-sized, because you need room to fold and pleat. – Tostada shells. The crunchy corn discs that give the whole thing its signature crisp texture. – Prepared nacho cheese sauce. Warm, melty, and ready when you are. No need to make a roux on a weeknight. – Sour cream, shredded lettuce, diced tomatoes, taco sauce, and a generous pile of shredded cheddar or Mexican blend. Nothing fancy, right? The magic is all in how you layer them. And if you’ve ever stared at a can of refried beans wondering what to do with it, it swaps beautifully for the beef in a vegetarian take.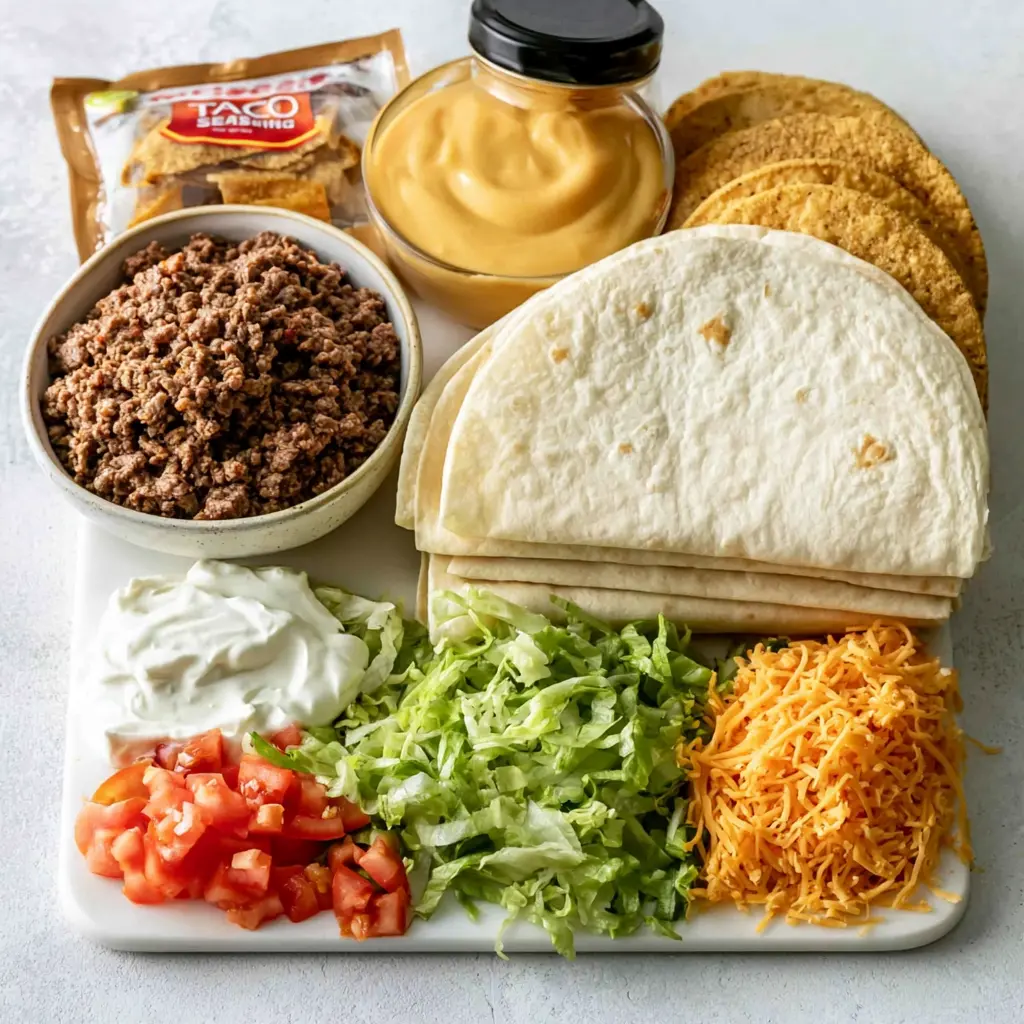
How to Make Chalupa Nachos
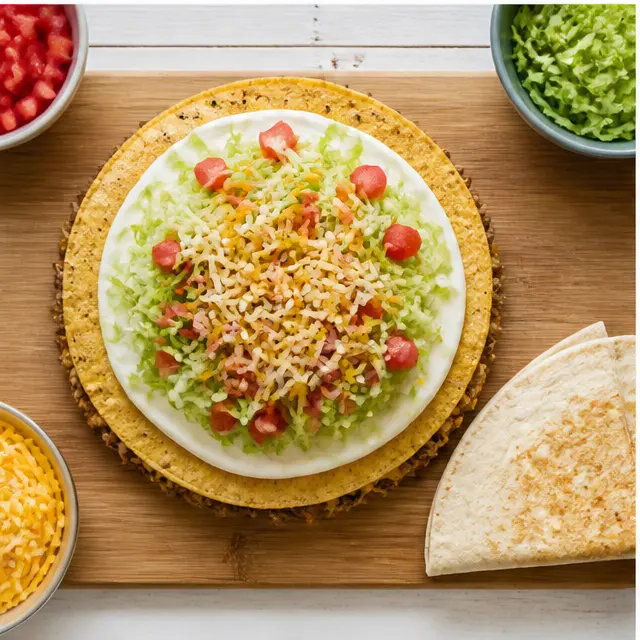
Let’s walk through the four big stages. The full recipe card is waiting for you below, but here’s the why behind each move. Brown the beef and season it. Start with a large skillet over medium heat. Cook the ground beef until it’s browned with no pink remaining, then drain off the excess grease. Stir in the taco seasoning with a splash of water and let it simmer for 2 to 3 minutes. That little simmer is what makes the seasoning actually cling to the meat instead of dusting off. Transfer the beef to a bowl and wipe the skillet clean for the finishing step.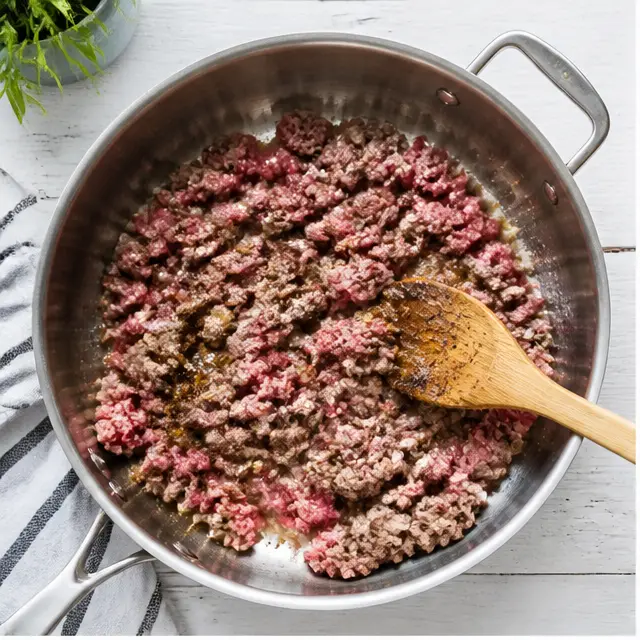
Tips for the Best Crunch Wraps
I learned these the hard way, including one very sad, soggy first attempt. You don’t have to repeat my mistakes. Trust me on these: – Warm your tortillas first. A quick 10 seconds in the microwave or a dry skillet makes them pliable. Cold tortillas crack when you pleat them, and cracked tortillas mean a messy dinner. – Respect the moisture. Sour cream, tomatoes, and taco sauce are all wet ingredients. That’s exactly why the tostada shell sits in the middle, it forms a crunchy barrier between the beef and the fresh toppings. Keep that layer intact. – Pleat like you mean it. Fold the tortilla edge over the small tortilla in tight pleats, like wrapping a gift. The tighter the seal, the fewer leaks. – Rest before you slice. If you cut into the wraps straight out of the pan, the filling will slide everywhere. Give them 60 seconds to settle. Mistakes I’ve made so you don’t have to: ❌ Cranking the heat to speed things up. The outside scorches, the inside stays lukewarm. ✅ Stick with medium heat and give each side a solid 3 to 4 minutes. ❌ Overloading the wraps with toppings. They won’t seal, and you’ll be eating the evidence with a fork. Not that there’s anything wrong with that. ✅ Keep the filling generous but manageable. About 1/2 cup of beef per wrap is the sweet spot.Chalupa Nachos Variations Worth Trying
One of the best things about this chalupa nachos recipe is how flexible it becomes once you’ve made it once. It’s really a formula that keeps showing up for family dinner night after night: – Swap the protein. Ground turkey, shredded chicken, or even well-seasoned beans all work. Just make sure whatever you use is thoroughly seasoned, that’s the entire flavor game. – Go vegetarian. Refried beans or black beans in place of the seasoned ground beef, and you’ve got a meatless version that still delivers. – Switch up the cheese. Pepper Jack adds a gentle kick, Colby Jack is milder, and a Mexican blend is the classic choice. – Lighten the sour cream. Plain Greek yogurt swaps in cleanly if you want extra protein. – Add optional extras on top. Guacamole, pico de gallo, or pickled jalapeños are all fantastic as a garnish after cooking. Keep them on top so the wrap underneath stays crisp. For the kids at your table, leave the tomatoes on the side or dial back the taco sauce. My own rule is simple: keep the base recipe the same and let everyone customize their own plate.Storage and Serving Ideas
These chalupa nachos are absolutely best warm and fresh, right when the crunch is at its peak. But leftovers happen, and they reheat better than you’d think. Store the cooked wraps in an airtight container in the fridge for up to 2 days. Keep wet toppings like sour cream, lettuce, and tomatoes separate so they don’t turn the tortilla into mush. Nobody wants a soggy leftover. To restore that crispy texture, skip the microwave completely. That’s a one-way trip to chewy, sad territory. Instead, reheat in a dry skillet over medium heat, or pop them in an air fryer at 350°F for about 3 minutes. A quick broil works in a pinch too, just keep a close eye on them. You want the outside crisp and the cheese melty again. For serving, these shine at casual gatherings. Set up a self-serve bar with hot sauce on the side and let guests load up their own wraps. They work great as a game-day appetizer, a fun weekend lunch, or the easy weeknight dinner that gets everyone to the table fast.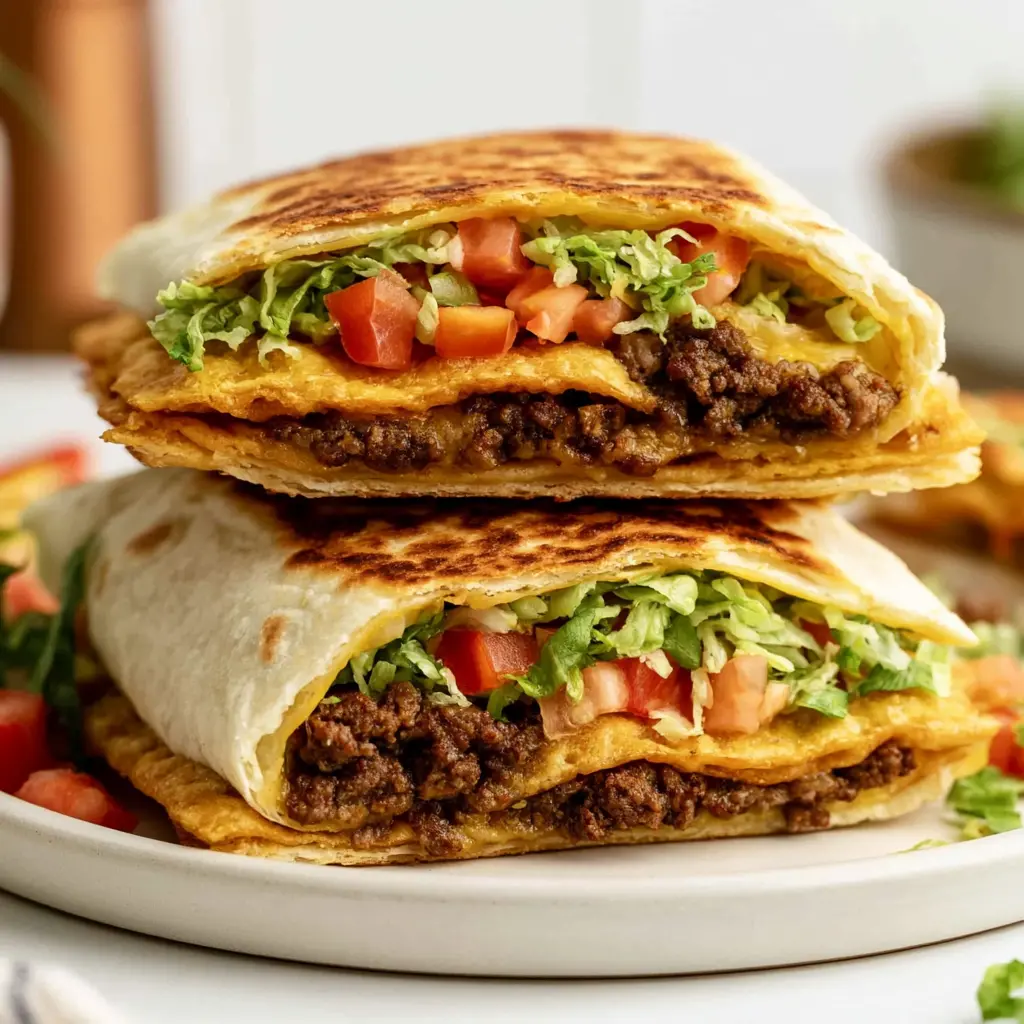
When you pull these chalupa nachos out of the skillet, golden and smelling like the best taco night of your life, you’ll be amazed you almost settled for the drive-thru. Pair them with your favorite hot sauce and a cold drink, and watch the whole family reach for seconds. If you’re looking for more loaded nacho inspiration, I share all my favorite builds over on my Pinterest recipe board. Go take a look and tell me what you’d pile on top.
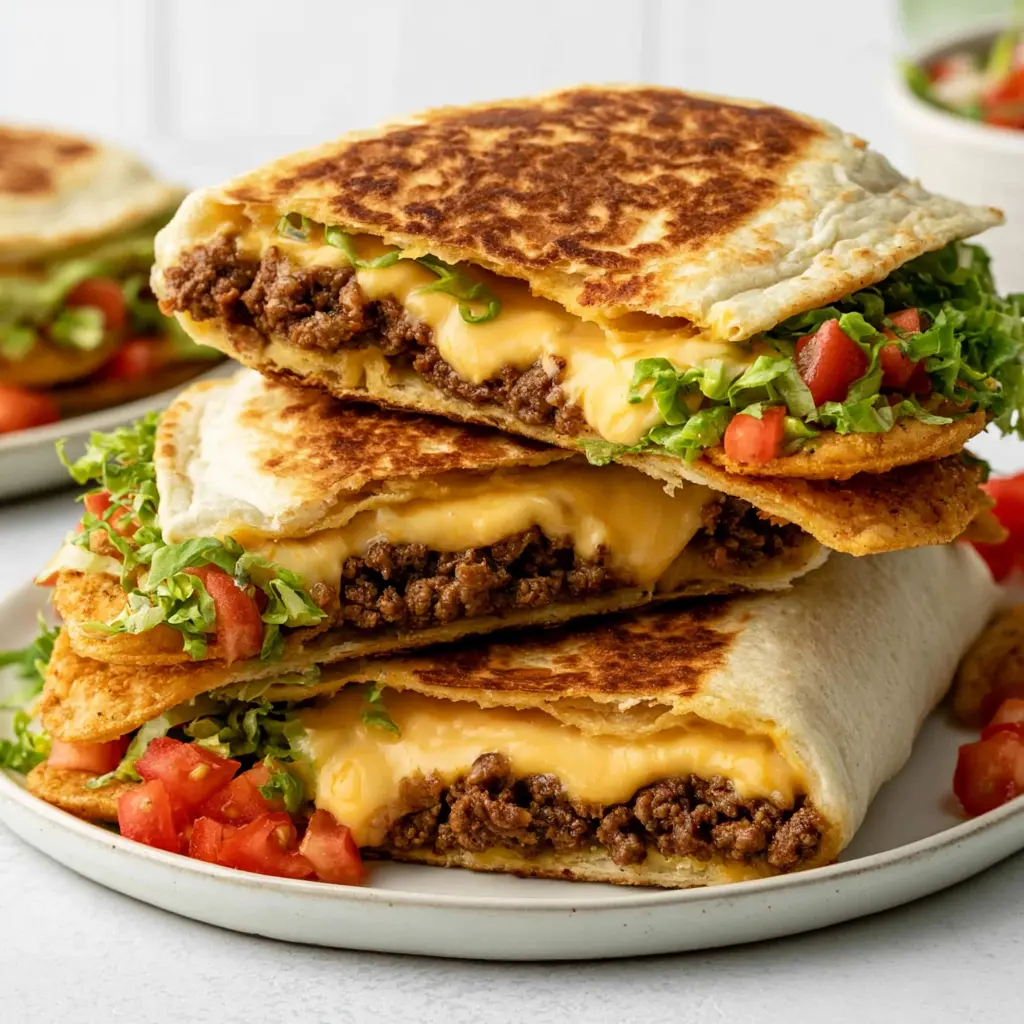
Crunch Wrap Chalupa Nachos
Crispy flour tortilla crunch wraps stuffed with taco beef, melty nacho cheese, and crunchy tostada shells. Your new go-to chalupa nachos dinner.
Ingredients
Method
Cooking Steps
- In a large skillet over medium heat, cook the ground beef until browned and no pink remains. Drain off any excess grease, then stir in the taco seasoning and 1/4 cup water. Simmer for 2 to 3 minutes until the liquid is absorbed.
- Transfer the seasoned beef to a bowl and set aside.
- Wipe the skillet clean with a paper towel to remove leftover grease and bits.
- Set up an assembly station on the counter with all of the prepared ingredients within reach.
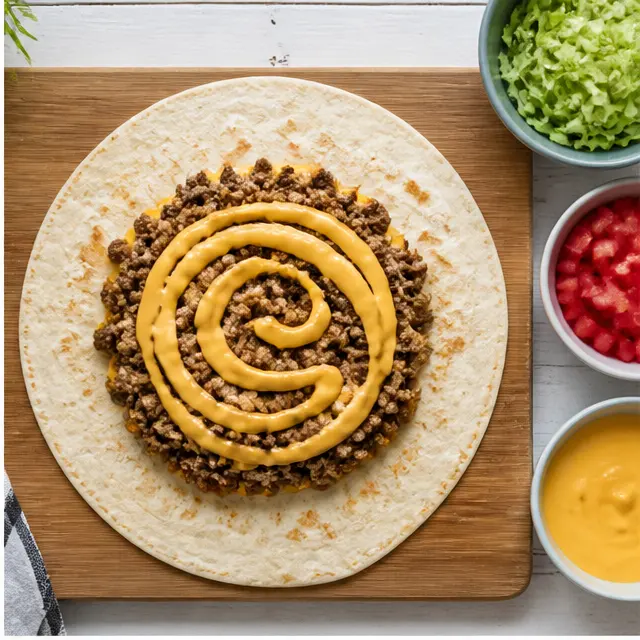
- Lay the 4 large tortillas on the work surface. Divide the beef evenly between them, about 1/2 cup in the center of each, and drizzle 2 tablespoons of the warm nacho cheese sauce over the beef.
- Spread 1 to 2 tablespoons of sour cream onto each tostada shell. Place the tostada over the beef, then top with 1/2 cup shredded lettuce, chopped tomatoes, about 1/3 cup shredded cheese, and a drizzle of taco sauce.
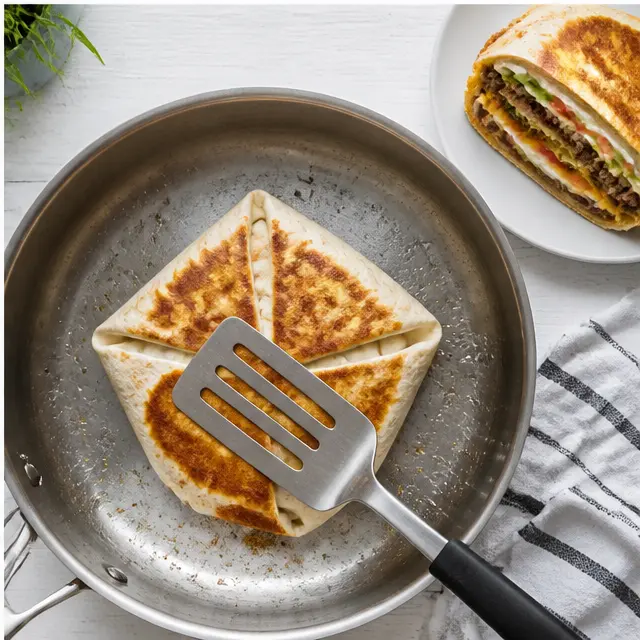
- Place a small tortilla on top of each stack. Fold the large tortilla up over the small tortilla, pleating the edges tightly to seal. Flip each wrap over so the seam is on the bottom.
- Heat about 1 tablespoon of oil in the cleaned skillet over medium heat. Cook 1 or 2 wraps at a time, seam side down, for 3 to 4 minutes until golden brown. Flip and cook 3 to 4 minutes more on the other side.
- Cut the wraps in half and serve warm.
Nutrition
Notes
Swap the ground beef for shredded chicken or seasoned black beans for a chicken or vegetarian version.
Warm the large tortillas in a dry skillet or microwave before folding so they don't crack.
Keep the wraps seam side down and press gently with a spatula while crisping for an even golden crust.
No tostada shells on hand? Fry corn tortillas until crisp or use sturdy tortilla chips.
Assemble the wraps ahead and refrigerate for up to 2 days; reheat in a skillet or air fryer to restore crunch.
Top with sliced California Hass avocado or a squeeze of lime before serving for a fresh, regional finish.
Don't overfill the wraps, or the pleats may burst open during cooking.
Tried this recipe?
Let us know how it was!Frequently Asked Questions
Source: Learn More About This Dish
What’s the difference between a taco and a chalupa?
A taco uses a soft or crispy tortilla folded around the filling. A chalupa starts with a corn tortilla that’s fried until golden and crisp, giving it a thicker, sturdier base. The frying process is what creates that signature crunch, and it holds heavier toppings without falling apart.
What are chalupas?
Chalupas are a Tex-Mex classic made from a corn tortilla fried until golden and crisp, then topped with seasoned meat, cheese, lettuce, and sauce. The name comes from a small boat in Spanish, which perfectly describes the shape. They’re essentially a sturdier, fried cousin of the taco.
Can I eat chalupas flat?
Yes, flat is actually the traditional style. Layered like a tostada with toppings piled right on top of the fried tortilla. But in these crunch wrap chalupa nachos, we fold everything together so the crispy layers stay tucked inside, which makes them way easier to eat on a busy weeknight.
Can I substitute store-bought taco seasoning?
Absolutely. Use roughly 1 tablespoon plus 1 teaspoon of store-bought taco seasoning in place of the homemade blend. Just know that flavor varies by brand, so taste the beef as it simmers and add a little more if needed. Some brands are saltier than others, so adjust accordingly.
How can I reheat the chalupa shells?
Skip the microwave entirely. Reheat the shells in a dry skillet over medium heat or in an air fryer at 350°F for about 3 minutes until the crispness returns. A broiler also works for a minute or two. The goal is to bring back that crunchy texture without drying out the filling.
Can I use other meats for homemade chalupas?
Definitely. Lean ground turkey, shredded chicken, or ground chicken all work beautifully. Just follow the same taco seasoning method and make sure the meat is well seasoned. For a vegetarian version, seasoned black beans or refried beans are an easy, filling swap that keeps the flavor bold.
How to make it ahead of time?
You can assemble the wraps up to 2 days ahead and keep them seam-side down in an airtight container in the fridge. When you’re ready, sear them in a skillet over medium heat until golden and heated through. Just avoid frying them too far in advance, because they’ll lose that crispy texture.
What is Chalupa?
Chalupa is a traditional Mexican dish made from a thin corn tortilla that’s fried until crisp and golden. In this recipe, chalupa nachos give that classic a modern twist by layering a tostada shell inside a folded flour tortilla with seasoned beef, nacho cheese sauce, and fresh toppings.