
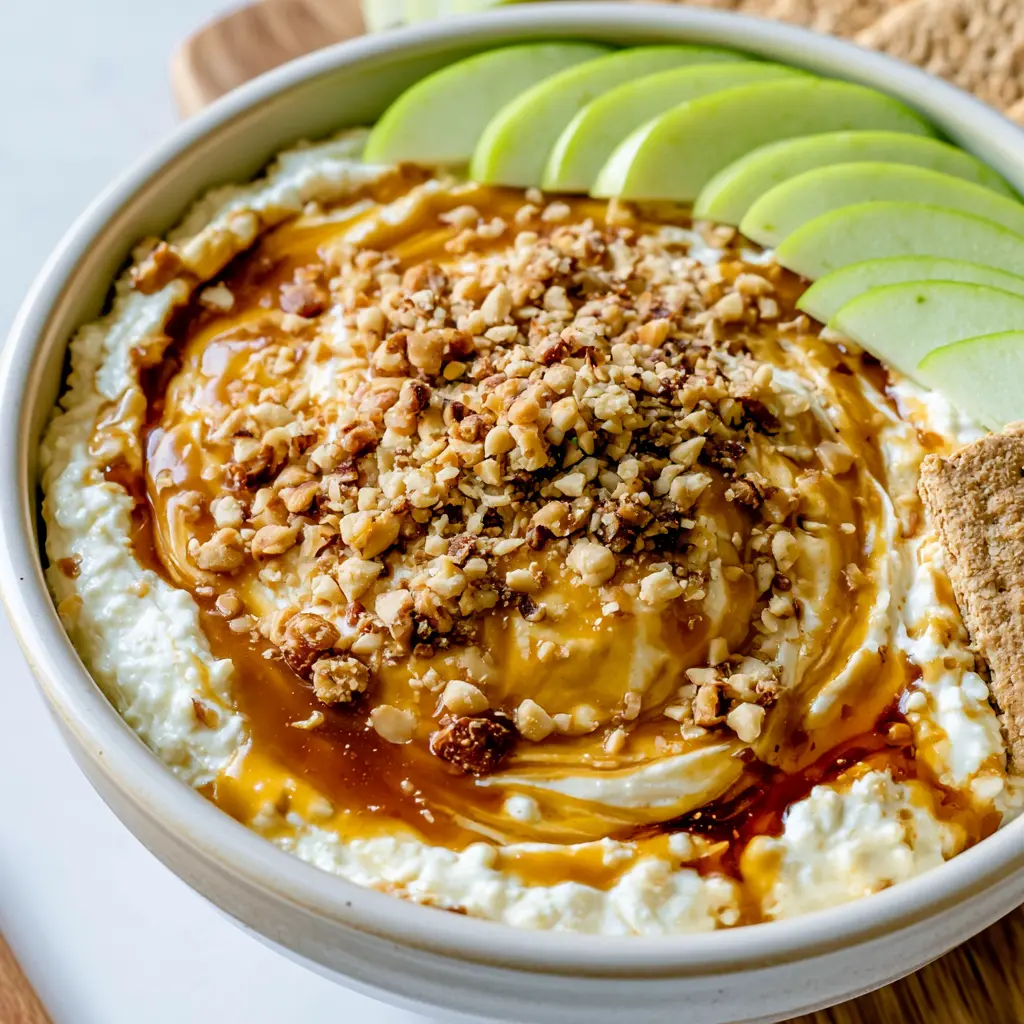
No-Bake Caramel Apple Cheesecake Dip
Ingredients
Method
- Scoop the no-bake cheesecake filling into your serving dish and spread it into a smooth, even layer.
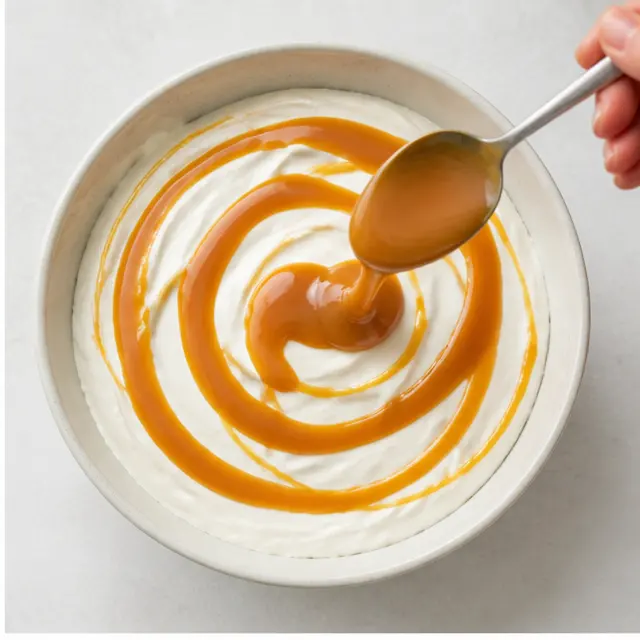
- Drizzle the caramel sauce across the top and gently spread it to cover the cheesecake base.
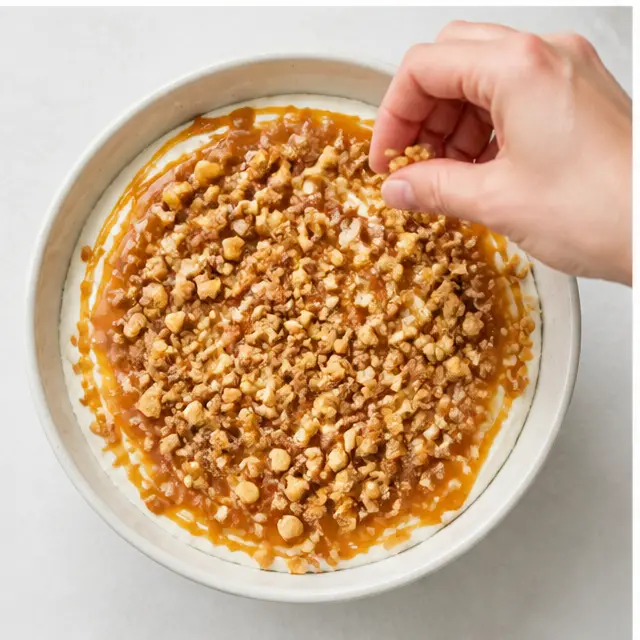
- Sprinkle the crushed peanuts evenly over the caramel.
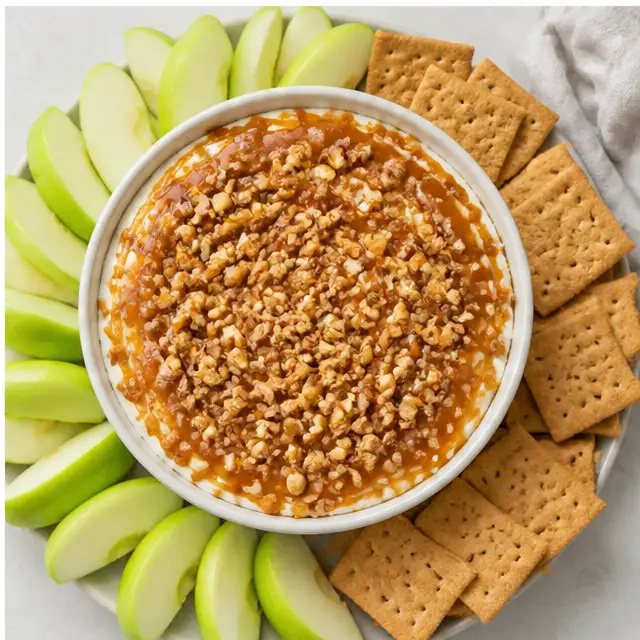
- Chill for 15 minutes to let the layers set, then serve with apple slices, pretzels, or cookies.
Nutrition
Notes
Tried this recipe?
Let us know how it was!Why You’ll Love This Caramel Apple Cheesecake Dip
It’s 4 PM on a Saturday. Your phone buzzes with a text from your friend: “Hey! Bringing something tonight?” Your mind goes completely blank. You’ve got zero time, zero energy, and honestly, zero desire to turn on the oven in this August heat. I’ve been there more times than I can count.
This caramel apple cheesecake dip is the exact recipe I turn to when I need to look like a kitchen hero in under five minutes. It’s a no-bake dessert that tastes like fall in a bowl, but it’s cool, creamy, and perfect for summer get-togethers too.
Here’s the magic: It uses just three base ingredients. No baking. No complicated techniques. No endless dishes to wash. Just a silky, dreamy cream cheese dip topped with a glossy caramel sauce and a satisfying crunch. I promise, it’s the easiest thing you’ll make all season.
The best part? You can make it ahead, it travels well, and it vanishes every single time. Trust me on this. I’m talking about the kind of dish where people hover over the bowl, scraping the edges with apple slices long after they’re full.
Ingredients & Equipment
This is where I admit that my favorite recipes are the ones with a super short shopping list. This caramel apple cheesecake dip doesn’t need anything fancy or hard to find. In fact, you can grab everything at your local Ralphs or Vons on the way to the party.
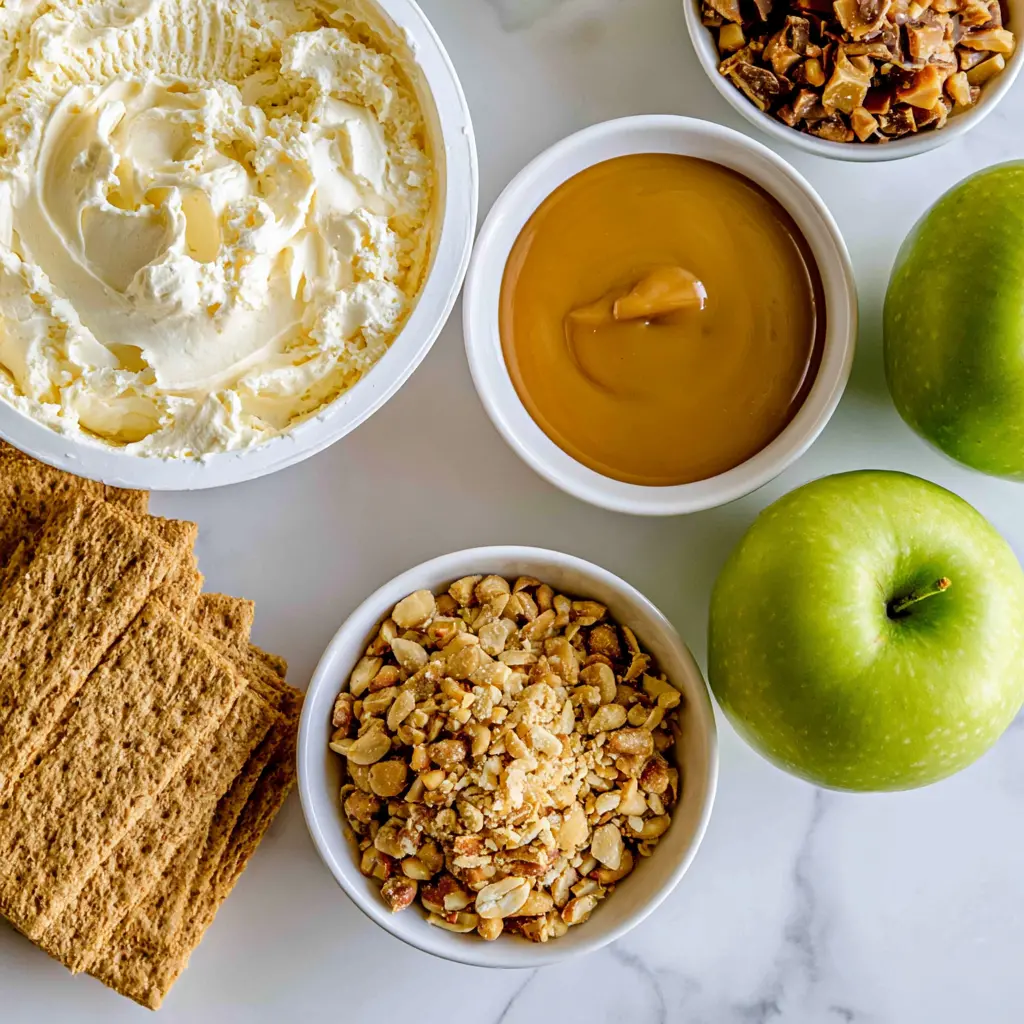
Here’s what you’ll need:
- Prepared no-bake cheesecake filling (8 oz tub): This is your creamy, cloud-like base. Look for it in the bakery or dairy section. It’s thicker and fluffier than regular frosting, which makes it perfect for dipping.
- Caramel sauce (1/3 cup): Go for the thick, indulgent kind. We’re talking dulce de leche consistency. Not the runny ice cream topping. Trust me on this one, I’ll explain below.
- Crushed salted roasted peanuts (1/4 cup): These add that essential salty crunch that balances all the sweetness. It’s the same reason we love caramel apples with nuts.
You can also grab some graham cracker crumbs and toffee bits for topping. They’re totally optional, but they add a lovely texture and make the dip look extra pretty on the table.
As for equipment, you’re golden. You just need a serving dish (a wide, shallow bowl is best), a spoon or spatula for spreading, and a fork to crush the peanuts if they aren’t pre-crushed. That’s it. No stand mixer. No food processor. No fancy gadgets.
How To Make Caramel Apple Cheesecake Dip
Okay, let’s get into it. The steps are almost laughably simple, but a few little techniques make the difference between a good dip and a great one. I’ll walk you through the four stages so you can nail it.
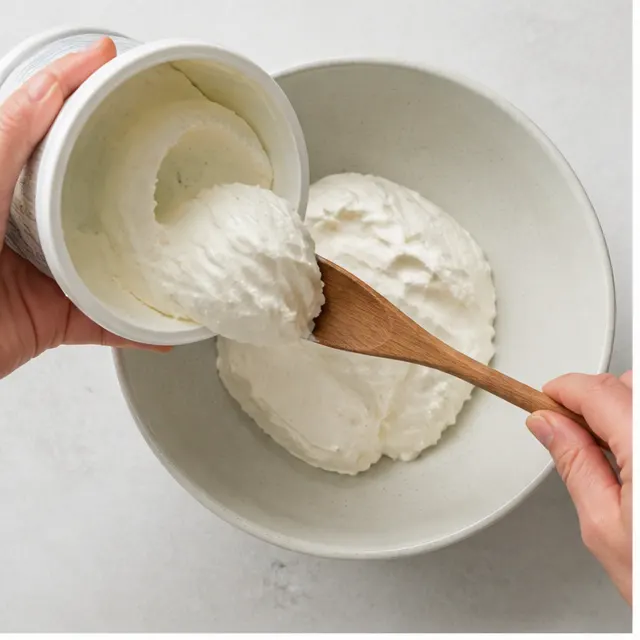
Spread the cheesecake base. First, scoop the entire tub of no-bake cheesecake filling into your serving dish. Use the back of your spoon or a spatula to spread it into a smooth, even layer. Don’t worry about making it perfect. It’s supposed to look rustic and inviting. The smell at this stage is incredible. That sweet, tangy, vanilla-like creaminess that makes you want to stick a finger in. Go ahead, taste test it. I won’t tell.
Drizzle the caramel sauce. Now for the good stuff. Take your thick caramel sauce and drizzle it generously over the cheesecake base. Then, gently spread it to the edges, making sure to leave some beautiful swirls behind. You want it to look like a glossy caramel river running through white marble. This is where that thick, high-quality caramel matters. If your sauce is too thin, it will just sink into the cheesecake and disappear instead of creating that stunning layered effect.
Sprinkle with crushed peanuts. Evenly sprinkle the crushed salted roasted peanuts all over the caramel layer. This isn’t just for looks. The salty, crunchy peanuts cut straight through the sweet, creamy richness and create that perfect contrast that keeps people coming back for more. If you’re using the graham cracker crumbs and toffee bits, now’s the time to sprinkle those on too for an extra layer of texture.
Chill and serve. Pop the dip in the fridge for about 15 minutes. This is a crucial step! It allows the layers to set slightly, so when you scoop into it, you get those distinct, beautiful ribbons of cheesecake and caramel. Don’t skip it and don’t leave it longer. 15 minutes is just right. Then, bring it out, surround it with your dippers, and watch it disappear.
Pro Tips For The Best No-Bake Dip
Over the years, I’ve made this a lot. Like, a lot. I’ve learned a few things the hard way so you don’t have to. First and most important: use thick caramel sauce.
I remember this one time, I was in a rush and grabbed a bottle of runny caramel ice cream topping instead. Big mistake. I poured it on, and within minutes, it had completely soaked into the cheesecake filling, turning my beautiful dip into a soupy mess. It still tasted okay, but the texture was all wrong. So yes, trust me on this. Thick caramel sauce is non-negotiable.
Here are a few more tips to make sure your dip is perfect every time:
- Don’t over-chill. If you leave it in the fridge for hours, the caramel layer will firm up too much and become chewy. If this happens, just let it sit at room temperature for 10 minutes before serving to soften it up.
- Stir before serving (if it firmed up). A quick stir will bring back that creamy, scoopable texture.
- Choose your apples wisely. For dipping, you want a crisp, tart apple. Granny Smith apples are the classic choice because their sharpness perfectly balances the sweet, rich dip. Honeycrisp is also great if you prefer something a little sweeter.
- Prep your apple slices ahead. To keep your apple slices from browning, toss them with a little orange or pineapple juice instead of lemon. It’s gentler on the flavor and works like a charm.
Caramel Apple Cheesecake Dip Variations
This recipe is a fantastic starting point, and it’s so easy to customize. I love experimenting with different textures and flavors depending on the occasion. Here are some of my favorite ways to switch it up.
Swap the nuts. Not a peanut fan? No problem. Swap the crushed peanuts with almond slivers or candied pecans. Toasting them lightly in a dry skillet first brings out even more of their flavor and crunch.
Go homemade with the caramel. Want to get a little fancy? Make your own date caramel. Blend pitted Medjool dates with a splash of warm milk until completely smooth. It’s naturally sweet, sticky, and absolutely divine with the creamy cheesecake. Plus, it’s a fun one to mention when people ask for the recipe.
Make it a pie. Spread the same layers into a pre-made graham cracker pie crust and refrigerate for a no-bake caramel apple cheesecake pie. It’s the same flavors but in a sliceable, even more impressive party format.
Spice it up. If you want to lean into a fall dessert recipe vibe, add a tiny pinch of cinnamon or nutmeg to the cheesecake filling before spreading it. This apple dip is fantastic with a touch of warmth.
Stir instead of layer. For a completely seamless dip, stir the caramel sauce directly into the cheesecake filling until it’s smooth and swirled. It creates a different, but equally delicious, uniformly caramel-flavored cream cheese dip.
Serving Ideas For This Apple Dip
Half the fun of this caramel apple cheesecake dip is choosing what to dunk into it. The creamy texture begs for something with a good crunch to scoop it up. While the perfect Granny Smith apple slices are the obvious star, don’t be afraid to mix up the dippers to create a beautiful party board.
Here are some winning combinations:
- Apple slices: The classic. Granny Smith and Honeycrisp both work beautifully.
- Graham crackers: Their honeyed, crumbly texture is a natural match for cheesecake.
- Pretzel sticks or pretzel chips: The salty, crispy crunch takes this to the next level. The sweet and salty combo is absolutely addictive.
- Gingersnap cookies: If you are serving this at a fall get-together, the spicy ginger flavor is incredible with the caramel and apple.
- Vanilla wafers or shortbread cookies: For a soft, buttery scoop that feels extra indulgent.
- Fresh strawberries or sliced pears: These add a refreshing, juicy contrast to the rich dip.
For parties, I love serving this in a wide, shallow bowl. It gives everyone plenty of room to reach in and makes the beautiful layers the centerpiece of the dessert table. Place it on a wooden board surrounded by apple slices, pretzels, and cookies for a stunning, effortless spread.
Storage & Make-Ahead
This dip is a lifesaver for busy weeks and party prep. You can get so much of it done ahead of time, but there are a couple of key rules to follow to keep it looking and tasting its best.
How to store leftovers. Transfer any leftover dip to an airtight container and refrigerate. It will keep beautifully for up to 3 days. Before serving the leftovers, give it a good stir to bring back that creamy, smooth texture.
Should you refrigerate it? Yes, absolutely. Because of the dairy, you should not leave this dip sitting out at room temperature for extended periods. Bring it out right before your guests arrive.
Making it ahead of time. The best strategy is to assemble the base dip (the cheesecake and caramel layers) up to 1 day in advance. Cover it tightly and keep it chilled. Wait to add the crushed peanuts, graham cracker crumbs, and toffee bits until just before serving. This keeps them perfectly crisp and crunchy instead of getting soft and soggy.
A quick reminder: If the dip has been in the fridge for a while, let it sit at room temperature for about 10 minutes before you bring it out to serve. This will soften the caramel layer perfectly, making it scoopable and smooth.
Frequently Asked Questions
Guys, I know the struggle of potluck season all too well. The pressure to bring something good, something memorable. This dip is my secret weapon. It’s the one that gets the “What’s in this?!” and the “Can I get this recipe?” questions all night long. And the only thing better than the compliments is the empty plate you’ll be bringing home.
If you’re looking for more easy, crowd-pleasing inspiration, I’d love for you to save this idea for later. You can find more of my favorite recipes and party tricks on my Pinterest board. Come say hi over there, and happy dipping!
Find more delicious no-bake recipes here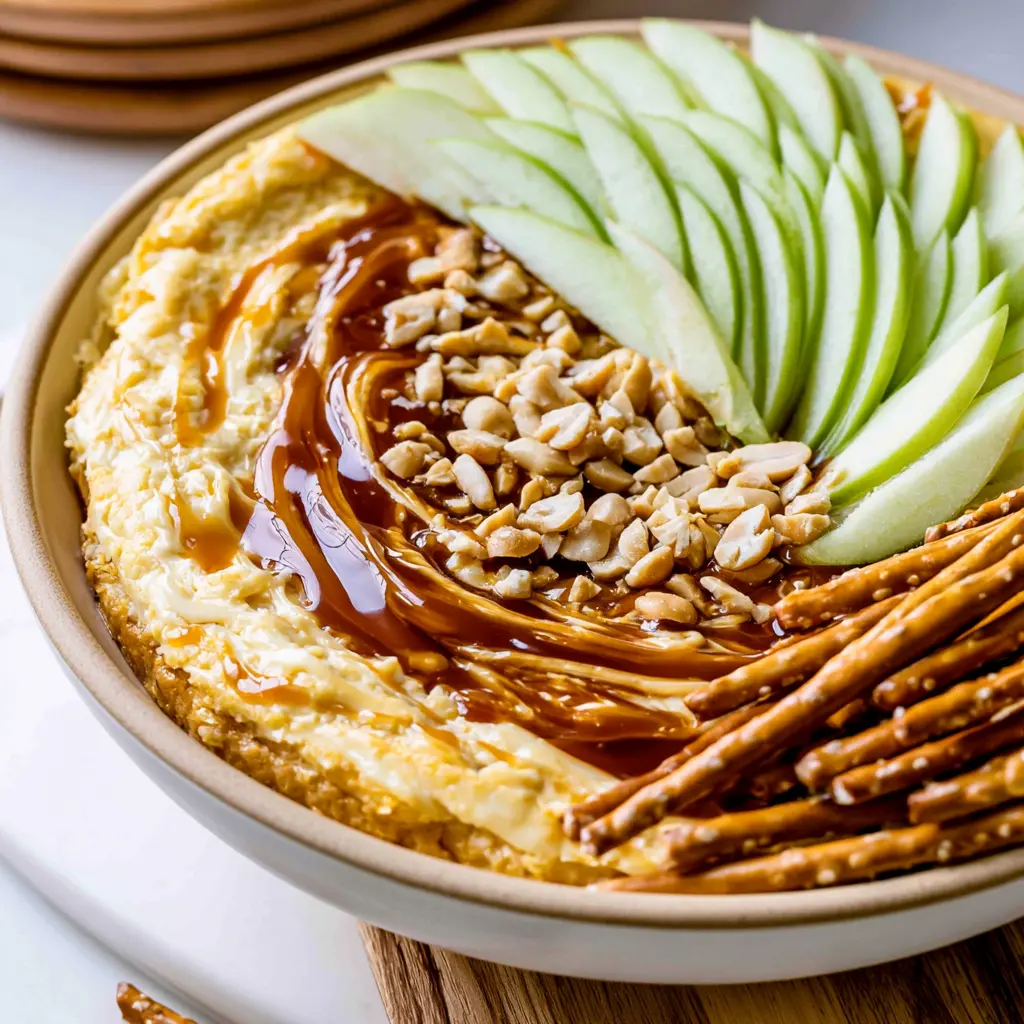
Source: Learn More About This Dish













3 responses to “How to Make the Best Caramel Apple Cheesecake Dip”
This dip looks amazing! Can I use regular cream cheese instead of the no-bake cheesecake tub? I can never find that brand. Also, would it work with crushed walnuts instead of peanuts?
Great question, Danielle! Yes, you can absolutely use 8 oz of softened regular cream cheese mixed with a bit of powdered sugar (about 1/2 cup) to mimic the sweetness. And crushed walnuts are a fantastic swap for peanuts—I love the texture they add. Enjoy!
Made this for a girls’ night and it was gone in 10 minutes! I used the date caramel option and it was incredible. So easy and the Granny Smith apples really make it. Will definitely be making this again!