

Why These Glazed Carrots Are My Go-To Side Dish
You know those nights when you need a side dish that practically makes itself? The ones where you’re already juggling a main course, maybe a salad, and the kids are asking when dinner’s ready for the fifth time? That’s exactly when I reach for this glazed carrots recipe.
I’ve been making these brown sugar glazed carrots for years now. And I’ll be honest with you I’ve definitely burned the sugar before. Like, more than once. The first time I made them, I walked away to check on the chicken and came back to a skillet that smelled more like a campfire than a side dish. So trust me when I say I’ve learned a few tricks along the way.
These glazed carrots are sweet, buttery, and come together in about 20 minutes flat. They’re the kind of easy glazed carrots that look like you spent way more effort than you actually did. And honestly? That’s my favorite kind of recipe.
Whether you need a quick side dish recipe for a busy Tuesday or something special for a July 4th side dish spread, these carrots deliver. Plus, they’re totally kid-friendly vegetables even my picky eater goes back for seconds.
What Makes These Glazed Carrots Special
So what’s the deal with this particular recipe? I mean, there are a million ways to make glazed carrots, right? Here’s why I keep coming back to this one.
One pan, minimal cleanup. Everything happens in a single skillet. No boiling water to drain, no separate bowl for the glaze, no baking sheet to scrub. Just one pan and you’re done.
Stovetop method keeps your kitchen cool. It’s summer right now, and the last thing I want is my oven blasting heat for 45 minutes. These stovetop glazed carrots come together on the burner without heating up the whole house.
Perfect tenderness without mushiness. The covered simmering step steams the carrots just enough to soften them, then the uncovered finish lets the glaze thicken without overcooking. I promise, no sad mushy carrots here.
The glaze is foolproof. Brown sugar, butter, a little water, and some garlic. That’s it. The water helps the sugar dissolve evenly, so you don’t end up with burnt patches. And the garlic? It adds just enough savory depth to balance the sweetness.
Ingredients You’ll Need
Let’s talk about what goes into these brown sugar glazed carrots. The ingredient list is short, which is exactly what I want on a busy night.
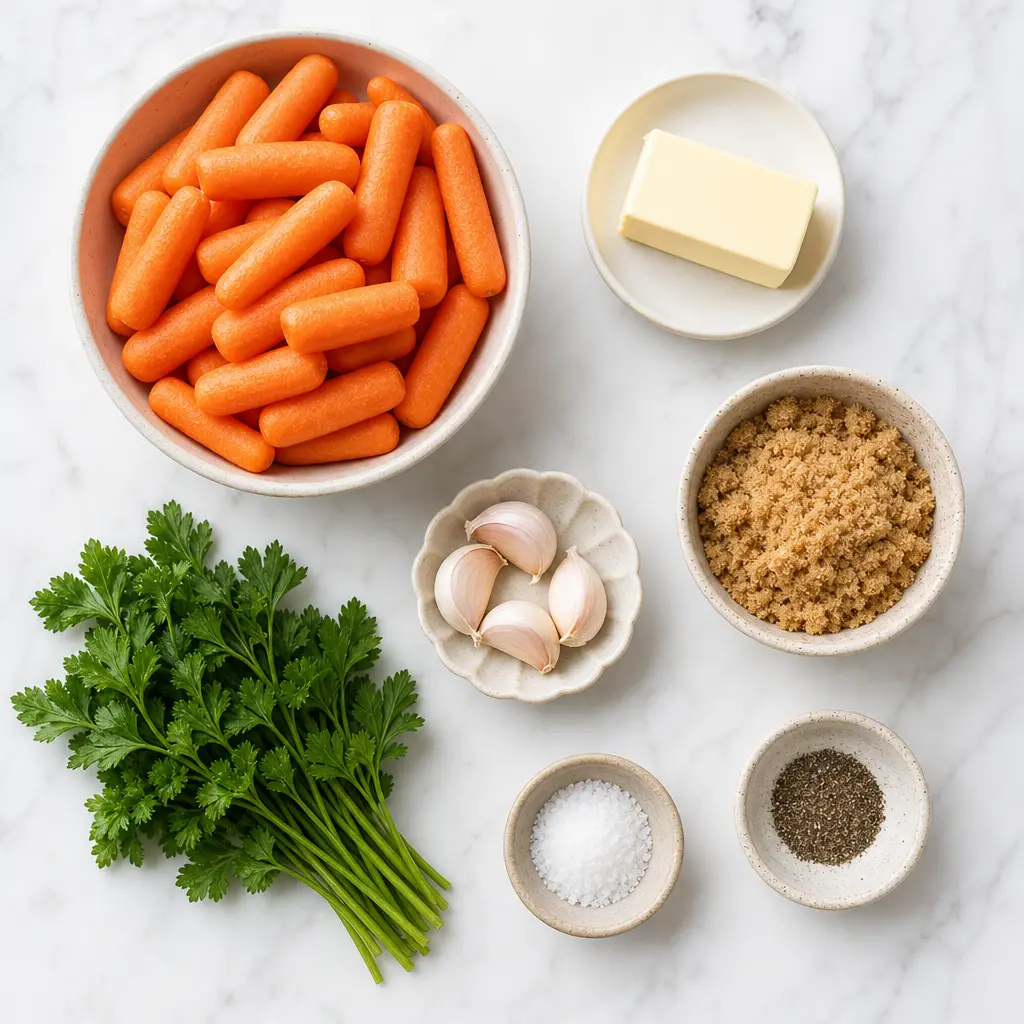
- Baby carrots 1 ½ pounds. I use the pre-bagged baby carrots from the store because they’re already peeled and uniform in size. If you want to use whole carrots, go for it, just peel and cut them into similar-sized pieces so they cook evenly.
- Unsalted butter 3 tablespoons. Unsalted lets you control the salt level. If all you have is salted butter, just reduce the added salt a bit.
- Light brown sugar 3 tablespoons. This is what gives the carrots that gorgeous caramelized sweetness. Dark brown sugar works too if that’s what you’ve got, it’ll just have a deeper molasses flavor.
- Garlic 2 cloves, minced. I know garlic might seem unusual in a sweet glazed carrot recipe, but trust me on this one. It adds a subtle savory note that makes the whole dish more interesting.
- Water ¼ cup. This helps the sugar dissolve and creates steam for cooking the carrots.
- Fresh parsley 1 tablespoon, chopped. For a pop of color and freshness at the end.
- Salt and pepper ½ teaspoon salt, ⅛ teaspoon freshly ground black pepper. Simple seasonings that tie everything together.
That’s it. Eight ingredients, most of which you probably already have in your kitchen. This is truly a simple carrot recipe at its core.
How to Make Glazed Carrots
Alright, let’s get cooking. I’m going to walk you through the four main stages of making these glazed carrots. Each stage has its own little tips and tricks I’ve picked up along the way.
Stage 1: Get Everything in the Pan
Start by placing your baby carrots, butter, brown sugar, minced garlic, and water in a large skillet. I use a 12-inch skillet for this, but anything around that size works great. Set it over medium heat and stir everything together until the butter melts and the sugar starts to dissolve.
You’ll see the butter turning into a golden pool, the brown sugar melting into it, and the garlic releasing its fragrance. It smells amazing already. Let the liquid come to a gentle simmer you want small bubbles, not a rolling boil.
Stage 2: Cover and Steam
Once everything is simmering, cover the skillet with a lid. This is the key to getting perfectly tender carrots without boiling them in a separate pot. The steam trapped inside cooks the carrots gently and evenly.
Let them cook for 10 minutes, stirring once halfway through. I set a timer on my phone because I always forget otherwise. When you stir, just give them a quick toss to make sure the carrots on the bottom aren’t cooking faster than the ones on top.
During this stage, the carrots will soften and start absorbing all that buttery, sugary goodness. The liquid will look like a thin syrup at this point.
Stage 3: Uncover and Reduce
After the 10 minutes are up, remove the lid and increase the heat slightly I go from medium to medium-high. This is where the magic happens. The glaze will start bubbling more vigorously, and you’ll see it begin to thicken.
Stir frequently now. You want the glaze to coat every carrot evenly. This is also where you need to keep an eye on things to prevent burning. If the glaze starts looking too dark or smells like it’s caramelizing too fast, turn the heat down a notch.
Continue cooking uncovered for 5 to 7 minutes. You’re looking for the carrots to be fork-tender a fork should slide in easily but the carrot should still hold its shape. The glaze should be thick enough that it coats the back of a spoon.
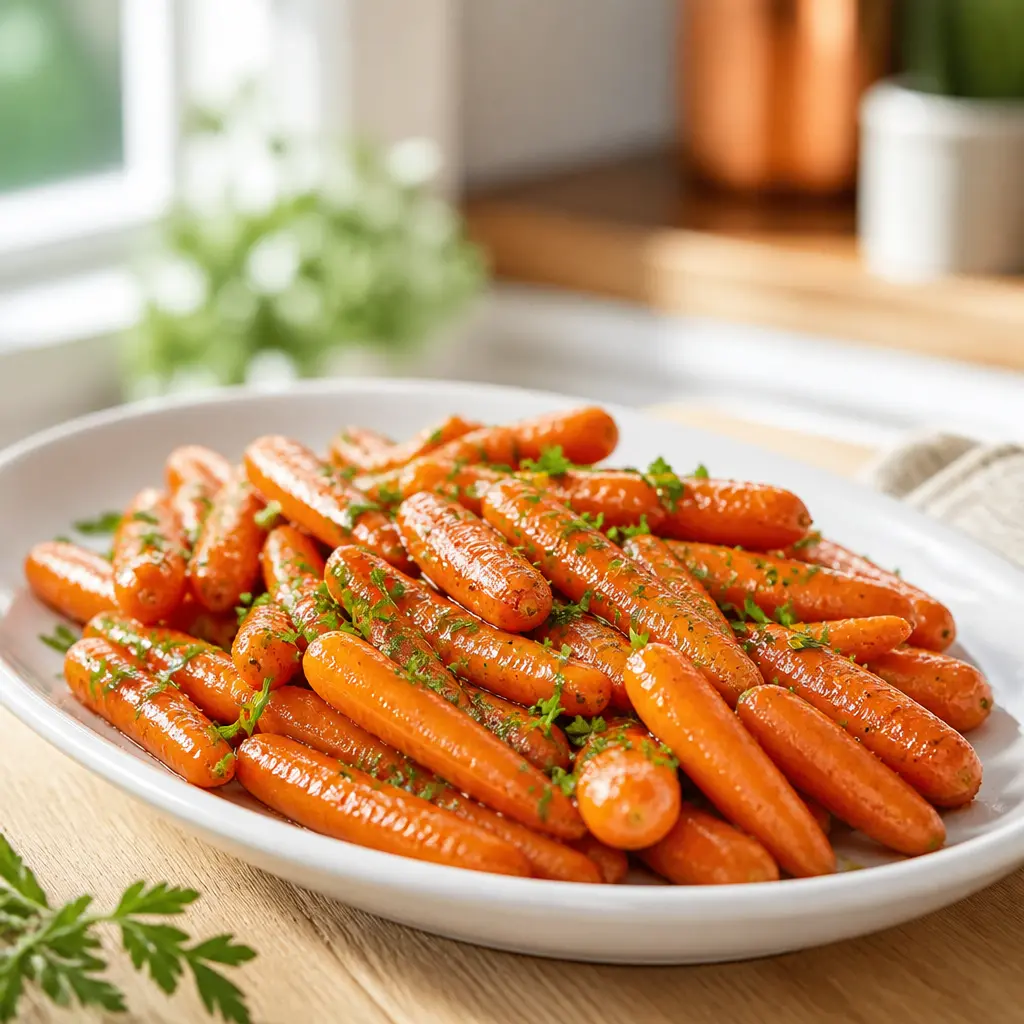
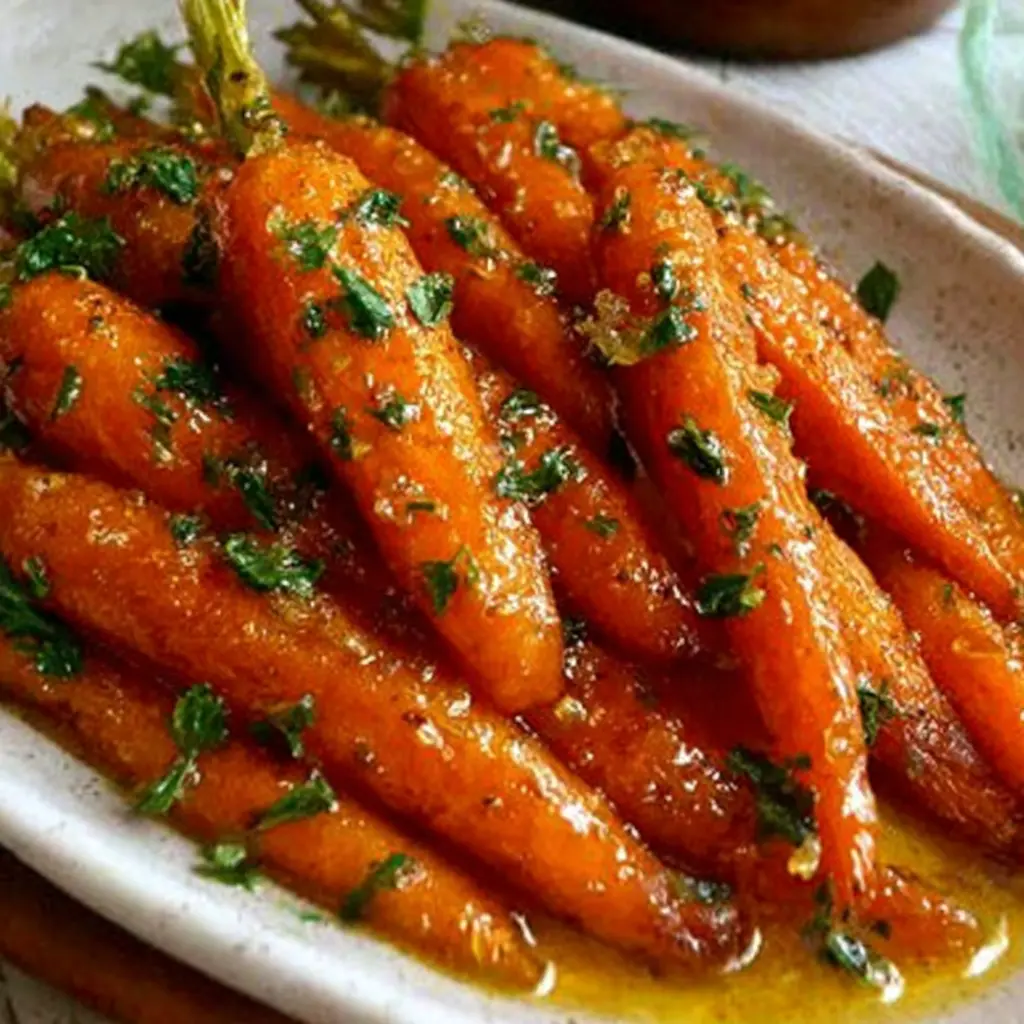
Stage 4: Finish and Serve
Turn off the heat and stir in the chopped fresh parsley. The parsley adds a nice fresh contrast to all that sweetness. Give everything a final stir to make sure the parsley is evenly distributed.
Serve immediately, spooning any extra glaze from the skillet over the top of the carrots. That extra glaze is the best part, honestly. Don’t waste a drop.
And there you have it. Perfect brown sugar glazed carrots in about 20 minutes. See? Told you it was easy.
Tips for the Best Glaze
Over the years, I’ve figured out a few things that make these glazed carrots turn out perfectly every time. Here are my best tips.
- Don’t overcrowd the pan. If you’re doubling the recipe, use a larger skillet or cook in batches. Too many carrots in the pan means they’ll steam instead of caramelize, and you won’t get that beautiful glossy glaze.
- Cut carrots uniformly. If you’re using whole carrots instead of baby carrots, cut them into similar-sized pieces. Thicker pieces will take longer to cook, and you’ll end up with some mushy and some crunchy carrots.
- Watch the heat. I’ve said it before, but it’s worth repeating burnt sugar happens fast. Keep an eye on the pan during the uncovered stage and adjust the heat if needed.
- Don’t stir too often during the uncovered stage. Let the carrots sit for a minute or two between stirs so they can get some caramelization on the edges. That’s where the flavor lives.
- Use the right pan. A wide skillet is better than a tall saucepan because it gives the liquid more surface area to evaporate. More evaporation means thicker glaze, faster.
- Taste as you go. Everyone’s palate is different. If you want it sweeter, add a little more brown sugar. If you want more savory, add another pinch of salt.
Flavor Variations
Once you’ve mastered the basic glazed carrots recipe, feel free to mix things up. Here are some variations I’ve tried and loved.
Honey glazed carrots: Swap the brown sugar for honey. Use about 2 tablespoons of honey instead of 3 tablespoons of brown sugar. The flavor will be a little lighter and more floral.
Maple glazed carrots: Replace the brown sugar with maple syrup. Same amount, same method. The maple flavor pairs beautifully with the butter.
Garlic glazed carrots: Love garlic? Add an extra clove or two. I’ve done this when I wanted a more savory spin on the dish.
Herb swap: Not a parsley fan? Use fresh thyme or dill instead. Both work wonderfully with the sweet glaze.
Spiced version: Add a pinch of cinnamon or nutmeg along with the brown sugar. This is great for fall or holiday meals.
Citrus twist: Add a splash of orange juice along with the water. The acidity cuts through the sweetness and adds brightness.
These are all optional additions, of course. The base recipe is already perfect as is. But it’s fun to experiment once you’ve made it a few times.
Storage and Reheating
Got leftovers? No problem. These glazed carrots store beautifully.
Let the carrots cool completely, then transfer them to an airtight container. They’ll keep in the refrigerator for up to 4 days. I wouldn’t recommend freezing them, though the texture gets a bit weird when thawed.
To reheat, I use the stovetop method. Just put them in a skillet with a splash of water and warm them over medium-low heat, stirring occasionally. The water helps rehydrate the glaze so it doesn’t get sticky or dry. Takes about 3 to 5 minutes.
You can also microwave them in 30-second bursts, stirring between each. Just be careful not to overheat them or they’ll get mushy.
What to Serve with Glazed Carrots
These sweet glazed carrots are incredibly versatile. They pair well with so many main dishes.
- Roast chicken: The classic pairing. The savory chicken balances the sweet carrots perfectly.
- Grilled steak: For a summer barbecue, these carrots are a great alternative to the usual potato salad.
- Baked ham: If you’re doing a holiday meal, these carrots fit right in alongside the ham.
- Salmon: The sweetness of the carrots complements the rich, fatty fish beautifully.
- Thanksgiving turkey: Swap out the usual marshmallow-topped sweet potatoes for these glazed carrots.
- Pork chops: Another classic pairing that just works.
Basically, if you’re serving a protein that could use a sweet, buttery side dish, these carrots are your answer.
Frequently Asked Questions
Final Thoughts
These brown sugar glazed carrots have saved me more times than I can count. They’re the side dish I turn to when I need something reliable, delicious, and fast. And they always get compliments.
Your family is going to devour these. Maybe make extra. Trust me on that.
If you try this recipe, I’d love to hear how it goes. Drop a comment or tag me in your photos. And if you’re looking for more easy side dishes, check out my Pinterest board where I save all my favorites.
Brown Sugar Glazed Carrots
Ingredients
Method
- Place the baby carrots, butter, brown sugar, minced garlic, and water in a large skillet set over medium heat.
- Stir everything together until the butter melts and the ingredients are evenly combined. Bring the liquid to a gentle simmer.
- Cover the skillet with a lid and cook for 10 minutes, stirring once halfway through to ensure even cooking.
- Remove the lid and increase the heat slightly. Stir frequently as the glaze begins to bubble and reduce.
- Continue cooking uncovered for 5 to 7 minutes, until the carrots are fork-tender and the glaze has thickened to a syrupy consistency.
- Turn off the heat and stir in the chopped fresh parsley until well distributed.
- Serve immediately, spooning any extra glaze from the skillet over the top of the carrots.
Nutrition
Notes
Tried this recipe?
Let us know how it was!Source: Nutritional Information
Leave a Reply