
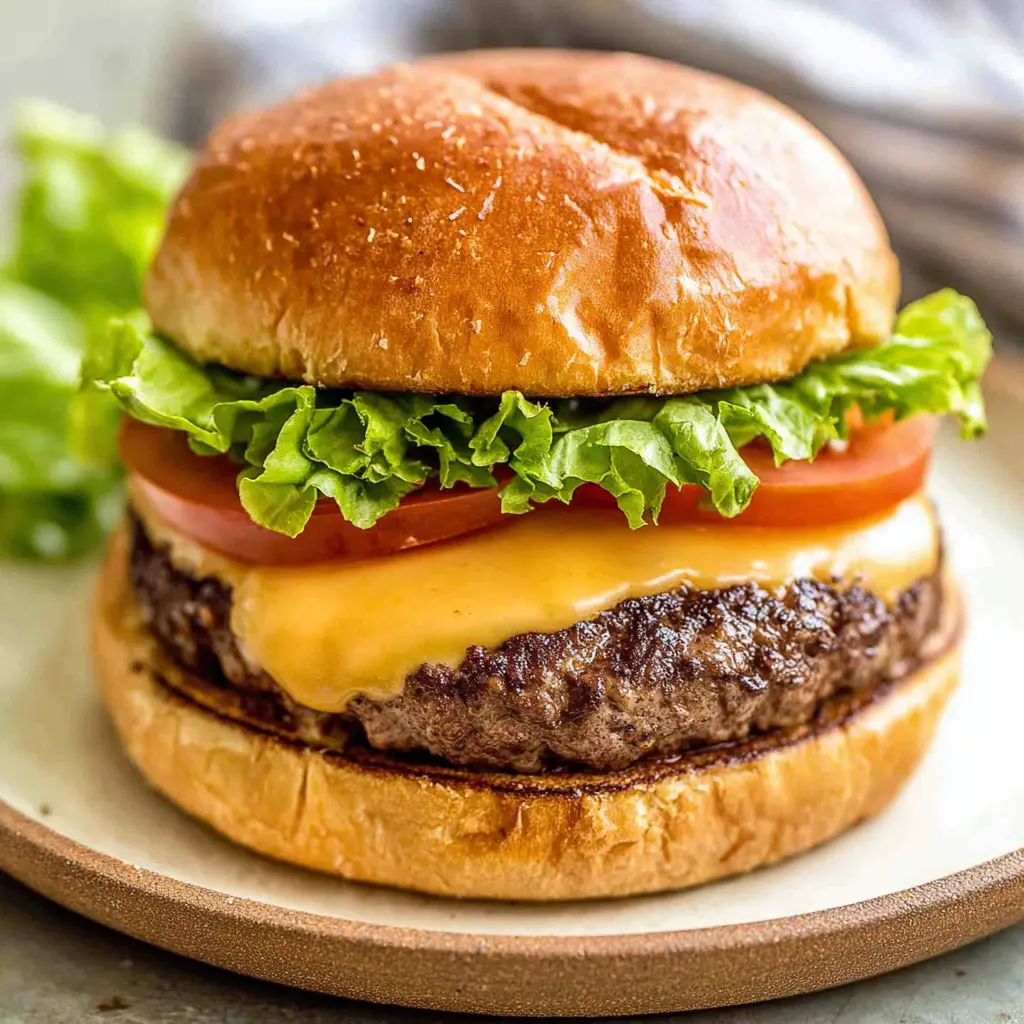
How Long to Grill Burgers: The Simple Answer
You know that moment when you’re standing over the grill, flipping burgers, and you just hope they’re done? Yeah, been there. I once served charcoal patties to my in-laws on a sweltering July afternoon in my California backyard. The smoke alarm went off. The burgers were gray. My father-in-law smiled politely and reached for the ketchup. It was a low point.
But here’s the thing about grill burgers time it’s not a mystery. It’s a formula. And once you know it, you’ll never guess again. For a standard 1-inch thick 80/20 patty on a gas grill preheated to 500°F, the magic numbers are 5 minutes on the first side, 3 minutes on the second side, then a quick rest. That’s medium. Want medium-rare? Pull it a minute earlier. Well-done? Give it an extra minute or two. Simple, right?
But wait there’s more to it than just minutes. Your grill temperature, patty thickness, and even whether you close the lid all change the burger grilling time. So let me walk you through everything so you can nail it every single time. Trust me, you’ve got this.
What Affects Burger Grill Time
Not all burgers cook at the same speed. I learned this the hard way when I tried to cook thick pub-style patties using the same timing as thin diner-style ones. Disaster. Here’s what actually changes how long to grill burgers:
- Patty thickness: A 1-inch patty is the sweet spot. Thicker means longer cook time, thinner means shorter. Stick to 1 inch for the best beef burgers grilling time per side balance.
- Meat fat content: 80/20 ground beef (80% lean, 20% fat) is ideal. It cooks evenly and stays juicy. Leaner blends like 90/10 cook faster but dry out easier.
- Grill temperature: High heat (around 500°F) gives you that perfect sear. Lower temps like 350°F mean longer cooking and less crust. Best grill temperature for burgers is definitely high heat.
- Lid open or closed: Always grill with the lid closed. It traps heat, cooks the patty through, and prevents flare-ups. Lid open or closed grilling burgers closed wins every time.
- Starting temperature: Cold patties straight from the fridge take longer to cook through. Let them sit at room temp for 10-15 minutes before grilling for more even cooking.
Choose the Best Burger Meat
Let me save you some heartache. The best burger meat isn’t the leanest or the most expensive. It’s 80/20 ground chuck. That 20% fat content is what makes burgers juicy and flavorful. I’ve tried 93/7 lean ground sirloin for a “healthier” option, and honestly? Dry, crumbly, sad. Not worth it.
When you’re at the grocery store Ralphs, Vons, Trader Joe’s, wherever look for ground beef labeled 80/20 or 85/15 at most. The fat renders as the burger cooks, basting the meat from the inside. That’s where the flavor lives. And if you’re wondering how thick should burger patties be, aim for about 1 inch. Any thinner and they cook too fast. Any thicker and you risk burning the outside before the inside is done.
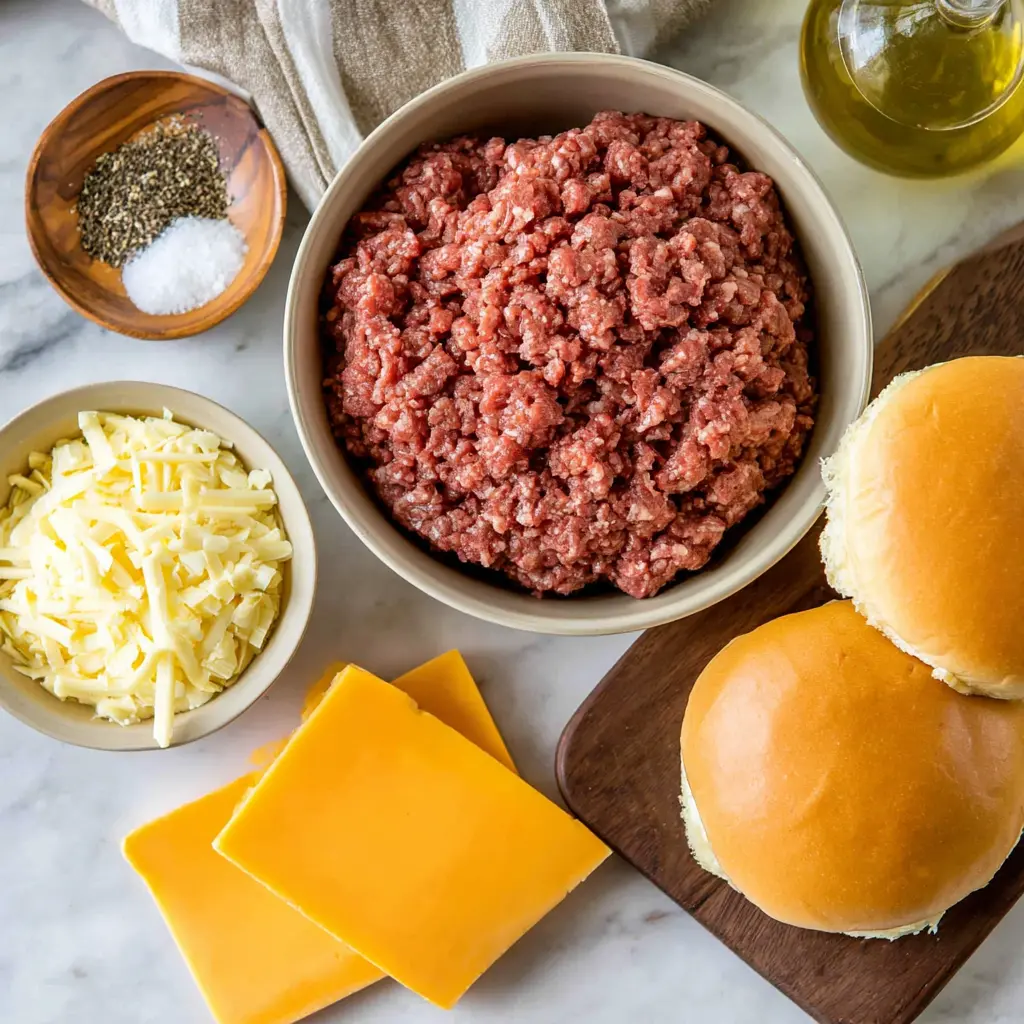
For this recipe, I use just three ingredients for the patties: ground beef, kosher salt, and freshly ground black pepper. That’s it. Simple seasoning lets the beef shine. You can add garlic powder or smoked paprika if you want, but honestly, salt and pepper are all you need.
Internal Temperature of Burgers (Chart)
Here’s where precision meets peace of mind. A meat thermometer is your best friend when it comes to burger doneness temperature. Forget cutting into the patty to check that just releases all the juices. Use a thermometer and you’ll know exactly when to pull the burgers off.
Here’s a quick reference for internal temp for ground beef patties:
- Rare: 120-125°F (not recommended for ground beef due to safety)
- Medium-rare: 130-135°F warm red center, very juicy
- Medium: 140-145°F pink center, juicy
- Medium-well: 150-155°F slight pink, less juicy
- Well-done: 160°F+ no pink, can be dry
The USDA recommends cooking ground beef to 160°F for safety. But honestly? I pull my patties at 135-140°F for medium, then let them rest. The temperature rises another 5 degrees during resting (that’s called carryover cooking). So if you pull at 135°F, it’ll reach 140°F by the time you serve. Perfect medium.
And if you don’t have a thermometer? Use the touch test. Press the center of the patty with your finger. For medium-rare, it should feel like the fleshy part of your palm when you touch your thumb and index finger together. For medium, like touching thumb to middle finger. For well-done, like touching thumb to pinky. It takes practice, but it works.
How to Grill Burgers Step-by-Step
Alright, let’s get into the actual process. This is where how to cook burgers on charcoal grill or gas grill comes together. I’ll walk you through the four major stages.
Stage 1: Form and Chill the Patties
Start by gently mixing the ground beef with salt and pepper. Don’t overwork it that’s one of the most common burger grilling mistakes. Overmixing makes burgers tough and rubbery. Just combine until the seasoning is distributed, then divide into equal portions.
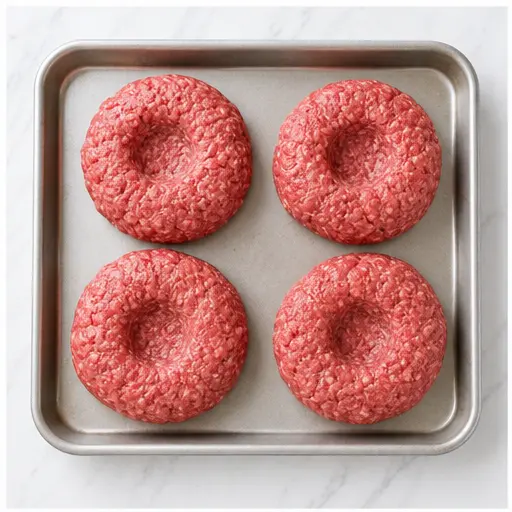
Form each portion into a ball, then flatten into a patty about 1 inch thick and slightly larger than your buns. Here’s the trick: press a shallow indent in the center with your thumb. This prevents the patty from puffing up into a dome shape during cooking. It’s called dimpling, and it’s a game-changer.
Chill the patties in the fridge for at least 15 minutes. This helps them hold together on the grill. If you’re making them ahead, you can refrigerate them up to 24 hours. Just let them sit at room temp for 10 minutes before grilling.
Stage 2: Preheat and Sear
Preheat your gas grill to high heat around 500°F. While it’s heating up, brush the cut sides of your burger buns with California olive oil. Set those aside for now.
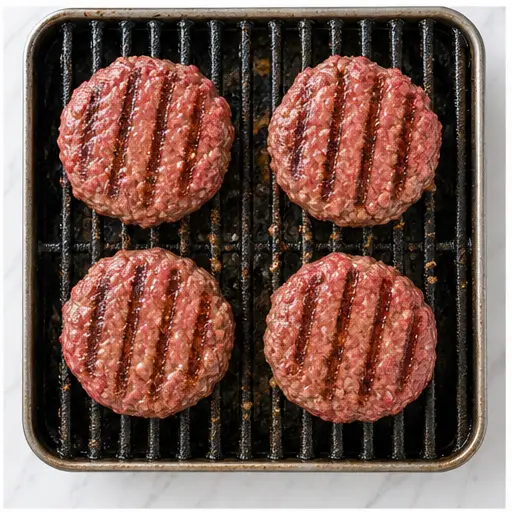
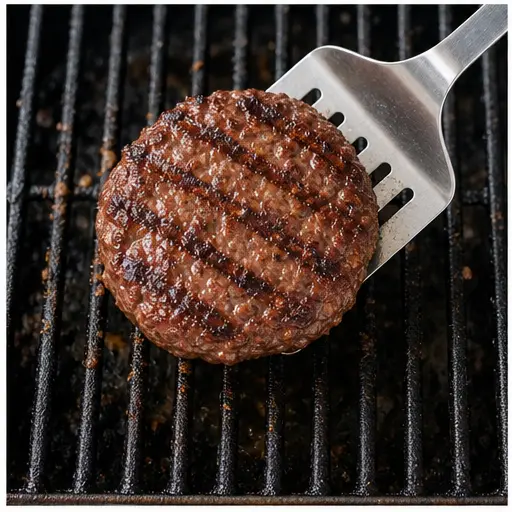
Place the patties directly over the flames. Close the lid. Here’s where the grill burgers time starts ticking. Grill for 5 minutes without flipping. Don’t touch them. Don’t peek. Let that first side develop a beautiful crust. The sizzle you hear? That’s the Maillard reaction happening the chemical process that creates all that deep, savory flavor.
After 5 minutes, rotate each patty 90 degrees (don’t flip them yet). This creates those fancy crosshatch grill marks that make everyone think you’re a pro. Close the lid and grill for another 2 minutes.
Now flip the patties. Close the lid and grill for 3 more minutes. For medium, you’re aiming for an internal temperature of about 135°F at this point.
Stage 3: Add Cheese and Rest
Move the patties to indirect heat the top rack or a cooler zone of the grill. Top each with a slice of cheese. American cheese melts beautifully, but cheddar or Monterey Jack work great too. Close the lid and cook for 1-2 minutes, until the cheese is melted and gooey and the internal temperature reaches 140°F.
Transfer the burgers to a cutting board. Let them rest for 5-10 minutes. I know it’s hard to wait, but this step is crucial. Resting allows the juices to redistribute throughout the patty. If you cut into it immediately, all those juices run out onto the plate, leaving you with a dry burger.
While the burgers rest, place the buns oiled-side down on the indirect heat section of the grill. Toast for 1-3 minutes until you see nice grill marks. Toasted buns make a huge difference they add texture and prevent the bun from getting soggy from the burger juices.
Stage 4: Assemble and Serve
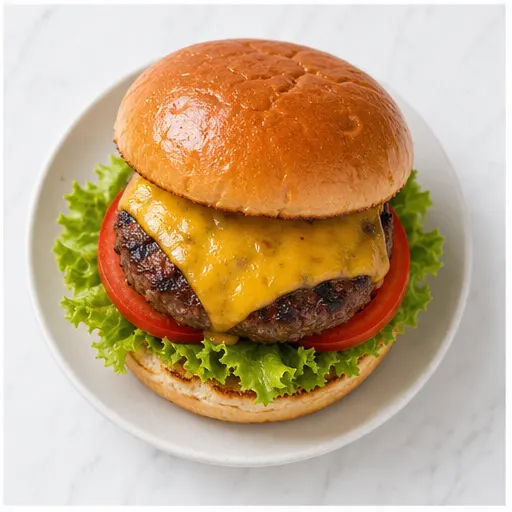
Now for the fun part. Assemble your burgers with your favorite toppings. For a classic California twist, I love avocado slices, lettuce, tomato, and red onion. The creamy avocado pairs perfectly with the juicy beef and melted cheese.
Serve immediately. That first bite the crunch of the toasted bun, the saltiness of the beef, the creaminess of the cheese and avocado that’s what it’s all about. You did it. You nailed the grill burgers time.
The Best Burger Toppings
Toppings are where you can really make a burger your own. Here are some ideas beyond the standard lettuce and tomato:
- Classic California: Avocado slices, lettuce, tomato, red onion, and a smear of mayo
- Spicy: Pickled jalapeños, pepper jack cheese, and a chipotle mayo
- Mushroom Swiss: Sautéed mushrooms, Swiss cheese, and a touch of Dijon mustard
- BBQ: Crispy onion rings, cheddar cheese, and a drizzle of BBQ sauce
- Breakfast: A fried egg, crispy bacon substitute (like turkey bacon), and cheddar
For the buns, sourdough or brioche are my go-to choices. They hold up well to the juicy patty and add their own flavor. Sesame seed, potato, pretzel, and whole wheat are all great options too.
And if you want to make a homemade sauce, mix ketchup, mayo, a little honey, relish, salt, and apple cider vinegar. It’s tangy, sweet, and perfect on any burger.
Charcoal Grill vs Gas Grill
Both charcoal and gas grills can make amazing burgers. The main difference is in the flavor and the technique. Here’s what you need to know:
Gas grill: Easier to control temperature. Preheat to high (500°F), cook as described above. The how long to grill burgers on gas grill timing is consistent and reliable. Great for weeknight cooking when you don’t want to mess with charcoal.
Charcoal grill: More flavor from the smoke. You need to set up a two-zone fire pile the coals on one side for direct heat, leave the other side empty for indirect heat. This lets you sear the patties over the coals, then move them to the cooler side to finish cooking.
For charcoal, the grill burgers time is similar. Sear for 4-5 minutes per side over direct heat, then move to indirect heat to finish cooking through. The lid should be closed for both zones. The smoky flavor is unbeatable, but it takes a bit more practice to get the temperature right.
Whichever grill you use, the principles are the same: high heat for searing, don’t flip too often, use a thermometer, and let the burgers rest.
Why Burgers Turn Out Dry (And How to Fix It)
Dry burgers are the number one complaint I hear from friends and readers. And it’s almost always one of these mistakes:
❌ Using too lean beef: 90/10 or leaner just doesn’t have enough fat to stay moist. ✅ Stick with 80/20 ground chuck for the juiciest results.
❌ Overmixing the meat: Working the ground beef too much makes it dense and tough. ✅ Mix gently until just combined. Less is more.
❌ Pressing down on patties while cooking: This squeezes out all the flavorful juices. ✅ Should you press down on burgers while grilling? Never. Let them be.
❌ Flipping too often: Every flip interrupts the searing process and releases moisture. ✅ Flip only once, or at most twice. The 5-6-7 rule works because it minimizes flips.
❌ Overcooking: The most common mistake. ✅ Use a meat thermometer and pull the patties 5 degrees before your target temperature.
❌ Skipping the rest: Cutting into a hot burger immediately loses all the juices. ✅ Let it rest for 5-10 minutes. Patience pays off.
If you’ve already made dry burgers, don’t worry. You can reheat them gently in a skillet with a splash of water or broth, covered, over low heat. It won’t bring back all the moisture, but it helps.
How to Store and Reheat Leftover Burgers
Leftover burgers are a gift. Here’s how to handle them so they taste almost as good the next day:
Storage: Place cooked burgers in an airtight container and refrigerate for up to 3-4 days. Keep the patties separate from the buns and toppings to prevent sogginess. Raw ground beef should be refrigerated no more than two days before cooking.
Freezing: You can freeze uncooked patties separated by parchment paper in an airtight container for up to four months. Thaw in the fridge overnight before grilling. Cooked burgers can also be frozen, but the texture won’t be quite as good.
Reheating: The best way to reheat a burger is in a skillet over medium-low heat. Add a tiny splash of water and cover the pan. The steam helps rehydrate the patty without drying it out. Microwave works in a pinch but can make the meat rubbery. Avoid the oven for single burgers it’s too slow and dries them out.
And if you’re like me and keep forgetting, bookmark this page. You’ll thank yourself later.
Frequently Asked Questions
Now go fire up that grill and make some magic! You’ve got all the knowledge you need to serve perfect, juicy burgers every time. And if you want to save this guide for later, pin it to your favorite grilling board on Pinterest.
How Long to Grill Burgers: A California-Style Guide
Ingredients
Method
- Place the ground beef in a large bowl. Add salt and pepper, then gently mix with your hands until just combined. Avoid overworking the meat to keep the burgers juicy.
- Divide the seasoned beef into two equal portions. Form each into a ball, then flatten into patties about 1 inch thick and slightly larger than your buns. Press a shallow indent in the center of each patty with your thumb to prevent puffing during grilling.
- Chill the patties in the refrigerator for at least 15 minutes or up to 2 hours. This helps them hold together on the grill.
- Preheat your gas grill to high heat, around 500 degrees F. Meanwhile, brush the cut sides of the burger buns with olive oil and set aside.
- Remove the patties from the fridge. If you haven't already seasoned the meat, sprinkle both sides with salt and pepper now.
- Place the patties directly over the flames. Close the lid and grill for 5 minutes without flipping.
- After 5 minutes, use a spatula to rotate each patty 90 degrees (do not flip). Close the lid and grill for another 2 minutes to create crosshatch marks.
- Flip the patties. Close the lid and grill for 3 more minutes, or until they reach an internal temperature 1-2 degrees below your target. For medium, aim for about 135 degrees F.
- Move the patties to indirect heat (like the top rack or a cooler zone). Top each with a slice of cheese if desired. Close the lid and cook for 1-2 minutes, until the cheese melts and the internal temperature reaches 140 degrees F.
- Transfer the burgers to a cutting board and let them rest for 5-10 minutes. While resting, place the buns oiled-side down on the indirect heat section of the grill. Toast for 1-3 minutes until grill marks appear.
- Assemble the burgers with your favorite toppings and serve immediately.
Nutrition
Notes
Tried this recipe?
Let us know how it was!Source: Nutritional Information













4 responses to “How to Grill Burgers: Time, Temp, and Tips”
Solid recipe overall, but I think the article could have mentioned resting the patties after grilling more prominently. I skipped that step the first time and they were a bit dry. Second time I let them rest for 5 minutes under foil and they were much juicier. Also, the honey in the sauce was a nice touch – unexpected but good!
I made these for a family BBQ last weekend and they were a hit! I added a bit of Worcestershire sauce to the meat mix, which gave them a nice savory kick. The only thing I’d change is maybe using a little less salt – 1 teaspoon seemed a bit much for my taste, but that’s probably just personal preference.
Great tips! I’ve always struggled with getting the timing right on my gas grill. I tried your 5-and-3 minute method yesterday with 80/20 chuck and they came out perfectly medium. One question though – my patties were closer to 1.5 inches thick. Should I adjust the timing for thicker burgers?
Great question, Mike! For 1.5-inch patties, I’d add about 2 minutes per side. Start with 6-7 minutes on the first side and 4-5 on the second, then check with a thermometer (130°F for medium). Let me know how it goes!