Why This Recipe Works
I’m just going to say it. The first cranberry orange cheesecake I ever made looked like the San Andreas Fault ran right through the middle of it. A deep, ugly crack, a slightly browned edge, and a center that was… well, done in some places and practically raw in others. It tasted fine, but I was embarrassed to bring it to the dinner party.
That was years ago, and I’ve come a long way since then. This cranberry orange cheesecake is the recipe I now bring to every fall gathering, every Friendsgiving, every single Thanksgiving. It’s the one people text me about the next day, asking for the recipe. And honestly, it’s easier than it looks. The whole thing comes together with a simple ginger snap crust, a silky orange-scented filling, and a bright, tangy cranberry topping that honestly does half the heavy lifting for you.
Here’s the secret you need to know right now: this recipe was designed to be forgiving. Even if you’re nervous, even if you’ve never made a cheesecake in your life, the steps below give you a clear path to a dessert that looks bakery-worthy. And if the top cracks a little? The cranberry layer literally hides it. No one will ever know. I promise.
Cranberries and orange are a match made in heaven. The tart pop of the berries cuts right through the velvety, rich cream cheese filling, and the whisper of orange zest on the finish keeps everything bright and fresh. It’s not cloying, it’s not heavy, it’s just perfectly balanced. The kind of dessert where you take a bite, close your eyes, and sigh a little.
Ingredients: What You Need
This cranberry orange cheesecake uses a short, simple list of ingredients. Nothing weird, nothing hard to find. The original recipe calls for Neufchatel cream cheese, which is just a lower-fat version of regular cream cheese. It works beautifully here, giving you a lighter result that still feels incredibly creamy. You can absolutely swap in full-fat blocks if you prefer a richer, more indulgent texture.
Let me walk you through the three components, because each one matters.
For the crust: You’ll need about 1 3/4 cups of ginger snap crumbs, which is roughly 25 cookies crushed up. The spicy, warm notes of the ginger snaps are incredible against the tangy cranberries. A third of a cup of melted unsalted butter and a pinch of salt bring it all together.
For the filling: This is where the orange magic happens. You need 3 (8-ounce) blocks of softened Neufchatel cream cheese, 1 cup of granulated sugar, 1 cup of plain Greek yogurt (whole milk or 2% both work), 2 teaspoons of vanilla extract, 3 large eggs, and the finely grated zest of one orange.
For the topping: The star of the show. You’ll need 4 cups of fresh cranberries (that’s one 12-ounce bag), 1 cup of granulated sugar, 1 cup of water, and the zest of another orange for sprinkling on top.

Before you start, pull the cream cheese, yogurt, and eggs out of the fridge. Let them sit on the counter for at least 30 minutes. This is not a suggestion. Room temperature ingredients blend into a smooth, glossy batter. Cold ingredients give you a lumpy, curdled mess that bakes up with a weird texture. It’s the single most important rule in any cheesecake recipe, and it’s the easiest one to follow.
How to Make Cranberry Orange Cheesecake
Think of this as a five-step success roadmap: crust, filling, cranberry sauce, water bath, and the cool-down. We’ll tackle each one in order, and I’ll tell you exactly what to look for at every stage. You’ve got this.
Stage 1: The Gingersnap Crust
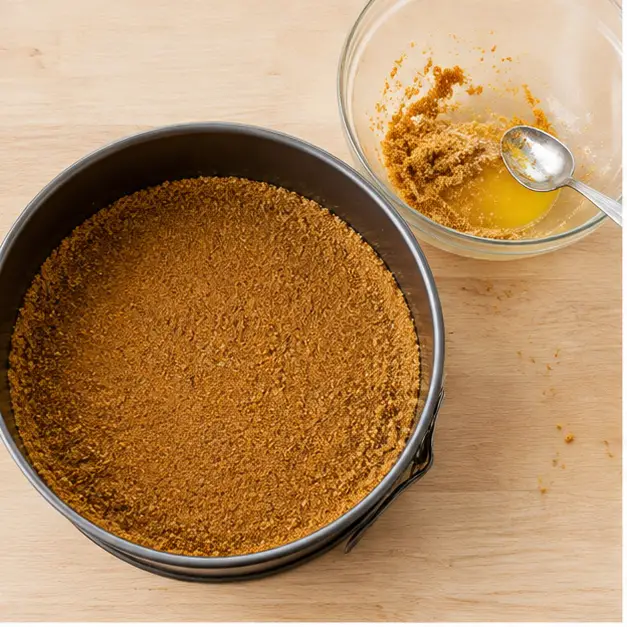
Heat your oven to 350°F. You can pulse the ginger snap crumbs, melted butter, and salt in a food processor until they’re evenly moistened, or just stir them together in a bowl with a fork. I’ve done both, and honestly, the bowl method works just fine. The mixture should look like wet sand that holds together when you squeeze it in your fist.
Press the mixture firmly into the bottom of a 9-inch springform pan. You can go slightly up the sides if you like a more traditional look, but a flat crust is easier and still pretty. Bake it for 10 minutes, then set it aside to cool completely. Turn the oven down to 325°F.
Stage 2: The Silky Filling
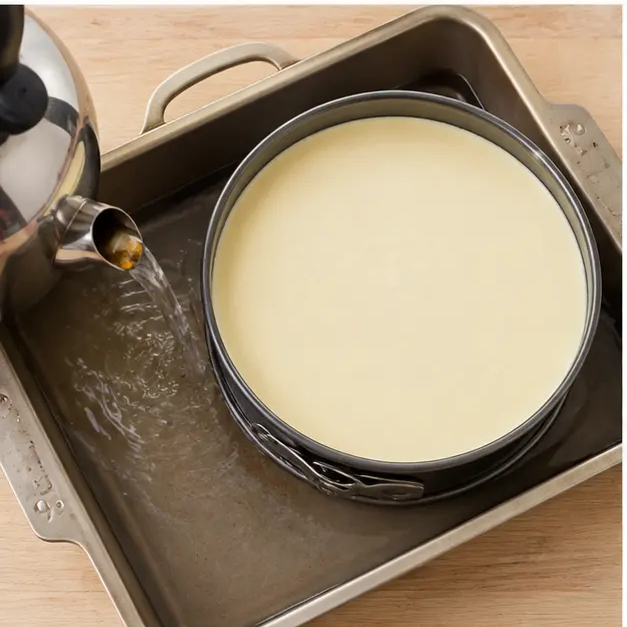
Once the pan is cool to the touch, wrap the outside tightly with two layers of heavy-duty aluminum foil. Make sure the seams are secure and there are no tears. This is the step everyone messes up. If water gets in, you get a soggy crust, and nobody wants that. When the pan is wrapped, set it in a large roasting pan and bring a kettle or pot of water to a boil. Set it aside for now.
For the filling, beat the softened Neufchatel cream cheese on medium speed until it’s completely smooth. This takes about 3 minutes. Don’t rush it. Then add the sugar and beat for another minute. Scrape down the bowl, add the Greek yogurt and vanilla, and beat for one more minute. Add the eggs one at a time on low speed, mixing just until each one is incorporated. That’s it.
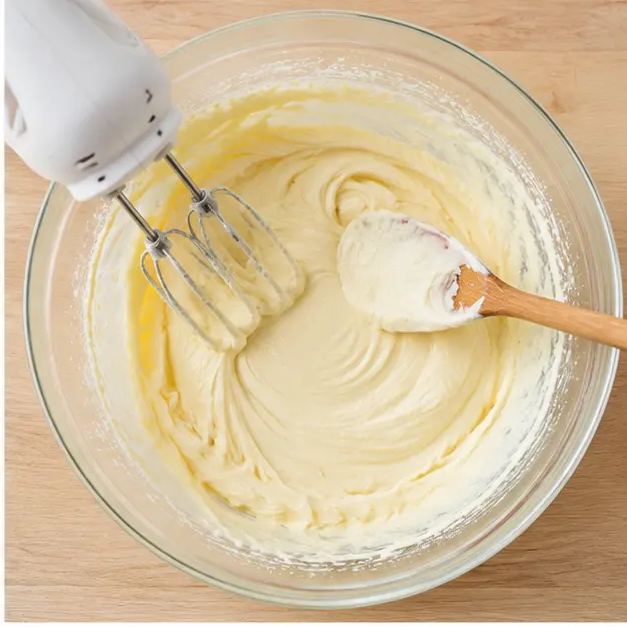
Here’s the thing you need to remember. The mixture should look like thick pudding, not soup. If you whip it too much, you’re beating air into the batter, and that air will expand in the oven and cause cracks. So mix gently, mix slowly, and stop as soon as the last streak of egg disappears. The batter should be velvety and smooth, with a beautiful pale yellow color and tiny orange zest flecks running through it.
Stage 3: The Water Bath
Pour the filling over the cooled crust. Put the roasting pan on the lower third of the oven rack, then carefully pour the boiling water into the roasting pan until it reaches about 1 inch up the sides of the springform pan. Then shut the oven door quickly, and try not to slosh.
This is the magic that prevents cracks. The steam from the water bath keeps the oven environment moist and gentle, so the cheesecake bakes evenly without the top drying out. If the foil leaks, you get a soggy crust. Double-check your wrapping.
Stage 4: Bake, Then Cool Slowly
Bake the cheesecake for about 1 hour and 30 minutes, until the center is almost set but still has a slight jiggle. The jiggle test is key. You want the edges to be puffed and set, but the center should wobble like Jell-O when you gently shake the pan. If it’s totally firm, it’s overbaked. If it’s rippling like liquid, it needs more time.
If you like precise numbers, an instant-read thermometer should register 145°F by the time it’s done. This is the golden internal temperature where the center is set but still silky.
Then, resist the urge to pull it out. Turn off the oven, crack the door open, and leave the cheesecake in there for a full hour. This gradual cooling is the final piece of the crack-prevention puzzle. It prevents the sudden temperature change that causes the top to collapse and tear. After an hour, remove it from the water bath, run a thin knife around the edge (this releases the suction), and cool it completely on a wire rack.
Stage 5: The Cranberry Topping
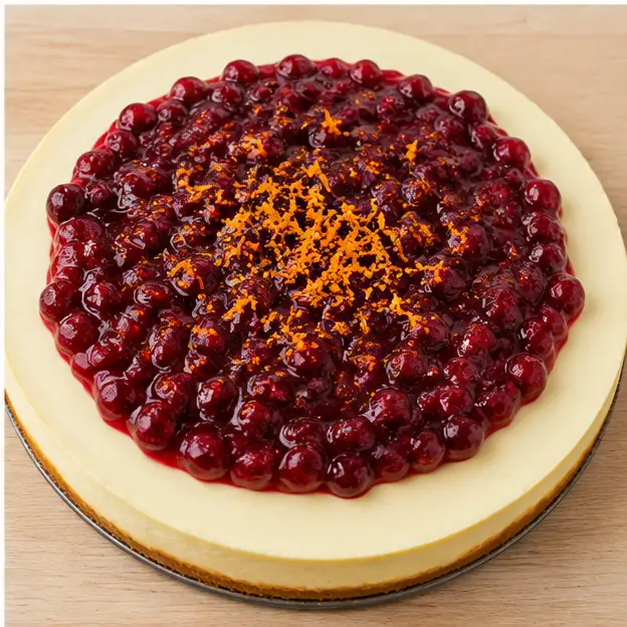
While the cheesecake cools, make the topping. In a medium saucepan over medium-high heat, bring the water and sugar to a boil. Add the fresh cranberries, cover the pan, and cook for about 5 minutes, just until the berries pop. The sound is wonderful, you’ll hear them gently popping as they release their juice.
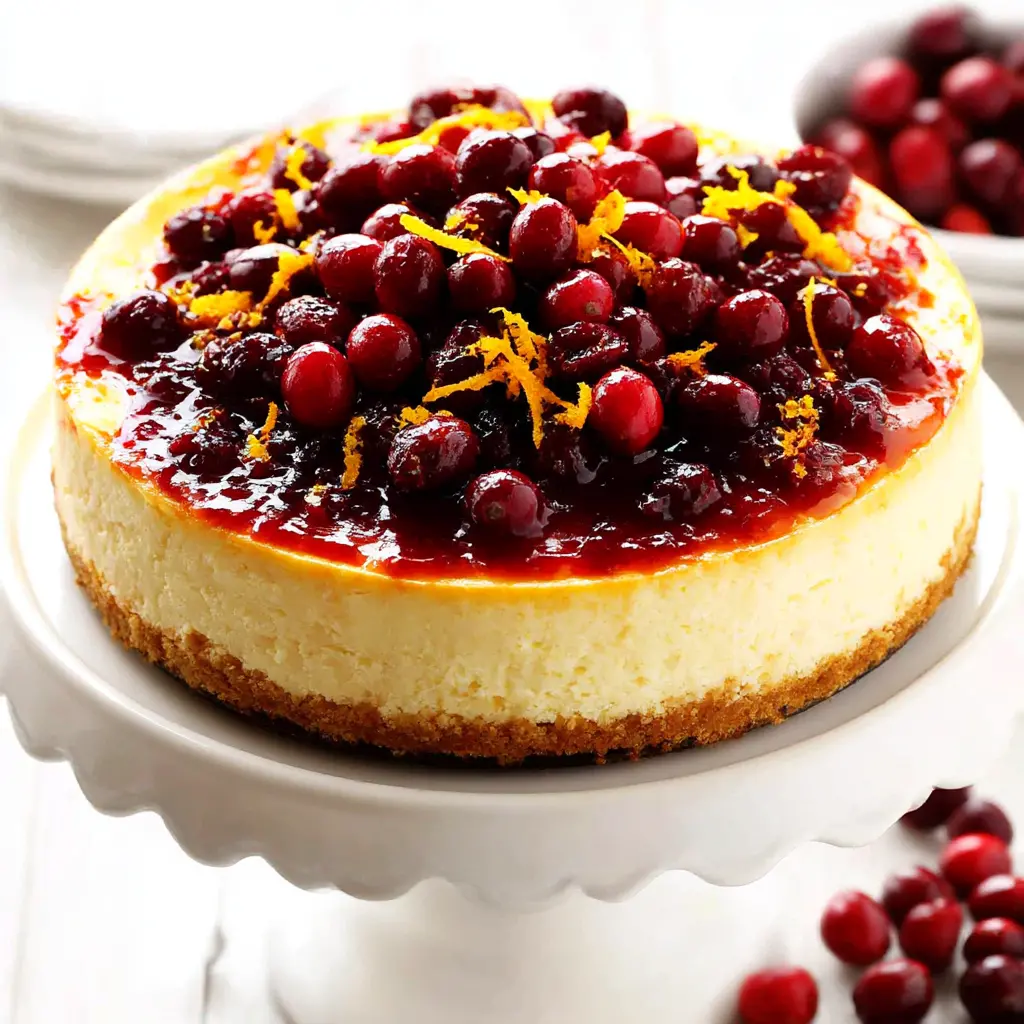
You want to stop right as they crack open, so you get a beautiful whole-berry texture rather than a mushy sauce. Take the pan off the heat and let it cool to room temperature. The mixture will have extra syrup. Use a slotted spoon to scoop the cranberries out and arrange them over the cheesecake. Sprinkle generously with the remaining orange zest.
Refrigerate the cheesecake for at least 4 hours, preferably overnight. I know it’s hard to wait, but this is non-negotiable. Chilling sets the filling completely so it slices cleanly.
Pro Tips for a Perfect Cheesecake
After years of baking cheesecakes, I’ve learned that success is all in the details. Here are the non-negotiables for this cranberry orange cheesecake:
- Room temperature everything: Take the cream cheese, yogurt, and eggs out of the fridge 30 to 60 minutes before you start. This is the single best way to avoid a lumpy batter.
- Don’t overmix: Once the eggs go in, keep the mixer on low and stop as soon as the batter comes together. Overmixing whips in air, and air causes cracks.
- Water bath, done right: Use two layers of heavy-duty foil around your springform pan. If you’re not confident wrapping it, there’s an even easier fallback. Just place a baking dish filled with boiling water on the rack below the cheesecake. The steam will do the same job.
- Cool in the oven: After baking, turn the oven off and let the cheesecake sit inside with the door cracked for an hour. This gradual cool-down is the best crack-prevention method I know.
- Never cut a warm cheesecake: It needs at least 4 hours in the fridge, but overnight is better. A well-chilled cheesecake cuts like a dream.
Common mistakes to avoid:
❌ Overmixing the batter → ✅ Mix on low speed just until incorporated. A smooth batter gives a dense, creamy texture.
❌ Using cold ingredients → ✅ Wait for them to come to room temperature for a perfectly smooth, lump-free filling.
❌ A leaky water bath → ✅ Wrap the pan in two layers of heavy-duty foil, or use the rack-below method for no-fail steam.
❌ Pulling the cheesecake out too quickly → ✅ Let it rest in the turned-off oven for a full hour.
❌ Cooking the cranberries too long → ✅ Stop right when the berries pop. Overcooking turns them to mush.
Cranberry Orange Cheesecake Variations
This recipe is a fantastic base, and there’s plenty of room to play if you feel like mixing things up. Here are some of my favorite ways to adapt it, all of which I’ve tested in my own kitchen.
Crust swaps: The ginger snap crust is spicy and fragrant, but you can absolutely swap in an equal amount of graham cracker crumbs for a more classic cheesecake flavor. If you want a slightly sweeter, more neutral base, shortbread crumbs work well too. Just keep the same proportions and the same bake time.
Topping variations: The recipe calls for fresh cranberries, which is perfect for the season. But if you have leftover cranberry sauce in the fridge from Thanksgiving, you can absolutely use that instead. Just spoon it over the top of the cooled cheesecake. If you want a more classic, jammy cranberry sauce texture, you can cook the berries until they’re completely soft and mushy instead of stopping at just-pop.
Extra orange flavor: If you’re a citrus lover (like me), you can add a splash of fresh orange juice to the cranberry sauce, replacing some or all of the water. Just be aware that you’ll need to cook it slightly longer to reduce the extra liquid. A little orange zest in the custard base also amps up the citrus note. This is the quickest route to what I call the zesty cranberry orange cheesecake.
Lighter and richer versions: The recipe as written calls for Neufchatel cream cheese and Greek yogurt, which keeps things a bit lighter. For a decadent, classic cheesecake, use full-fat blocks of regular cream cheese and swap the Greek yogurt for full-fat sour cream. Both versions work beautifully, it just depends on your mood.
Storage & Make-Ahead: Plan Your Holiday Dessert
One of the best things about this cranberry orange cheesecake is how well it plays with your schedule. This is the ultimate make-ahead dessert. You can bake it two days before you need it, and the flavor only gets better as it sits.
To store in the fridge: Once the cheesecake has chilled and set, cover it (or transfer leftovers to an airtight container) and keep it in the refrigerator. It will stay fresh for up to 4 days. I actually think it tastes even better on day two, once the cranberry topping has had time to meld with the citrus-scented filling.
To freeze the cheesecake: If you want to get ahead of the holiday rush, this cheesecake is a champion freezer resident. Wrap the whole cheesecake (without the cranberry topping) tightly in plastic wrap, then again in a layer of aluminum foil. It’ll keep well for up to 6 months in the freezer. When you’re ready to serve it, let it thaw in the refrigerator overnight. Add the cranberry topping just before serving. Actually, I’d recommend you hold the cranberries and spoon them on after it thaws for the freshest look.
Make the cranberry topping ahead: The topping can be cooked up to 2 days in advance and kept in a covered container in the fridge. The berries will macerate in their syrup and get even more deeply flavored. Just let it come to room temperature (or spoon it straight from the fridge) over the cheesecake right before you bring it to the table.
Serving Suggestions: The Grand Reveal
Presentation is half the battle with a dessert this pretty. When you’re ready to serve your cranberry orange cheesecake, use a thin, sharp knife. Dip it in hot water and wipe it dry between cuts. The hot blade glides through the cold filling, giving you those stunning, clean bakery-style slices that photograph beautifully.
This dessert is a star on its own, but it also loves a little company. Serve each slice with a dollop of lightly sweetened whipped cream or a spoonful of the leftover syrup from the cranberry sauce, if you have any. That extra syrup is liquid gold, by the way. Don’t throw it out. I like to drizzle it over vanilla ice cream, stir it into a glass of sparkling water, or pour it over morning yogurt and granola.
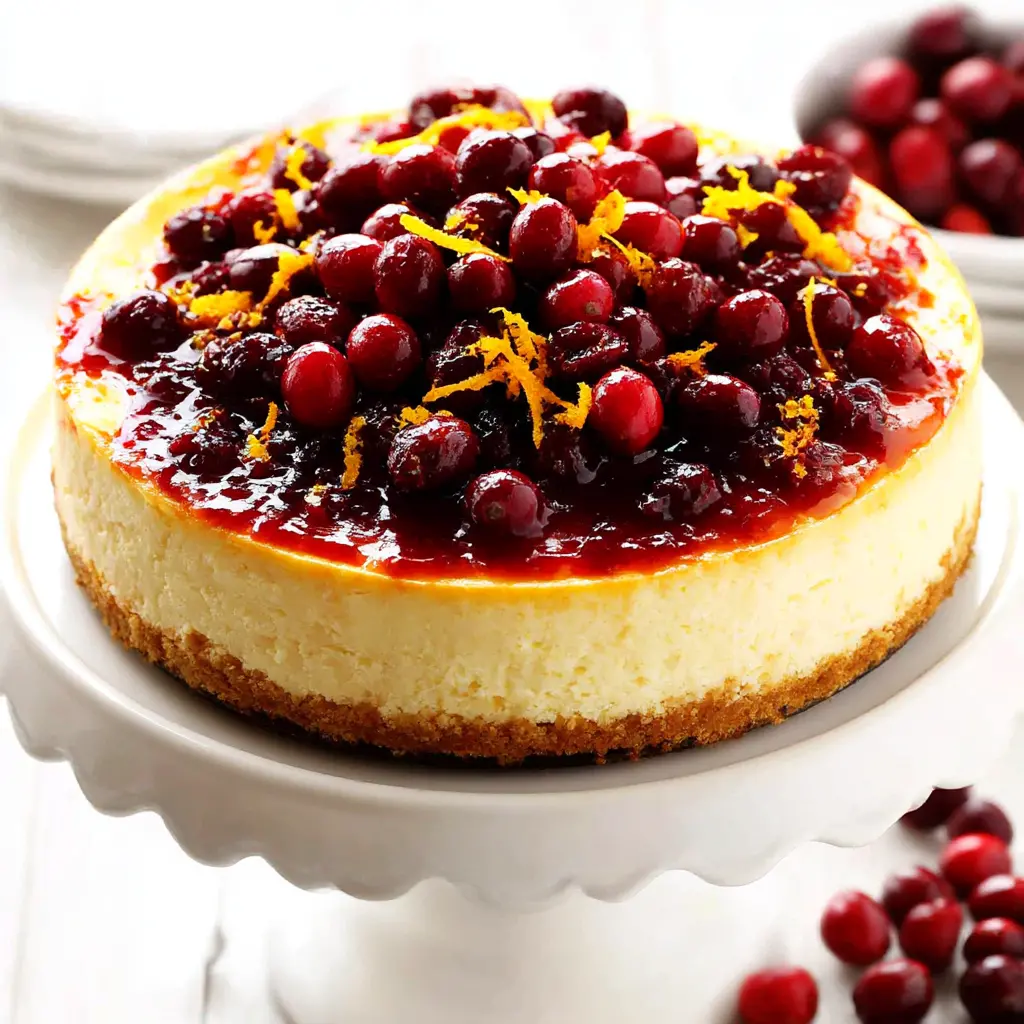
For a festive touch, scatter a few extra fresh cranberries and some finely grated orange zest over the top right before serving. It adds a pop of color and a hint of what’s inside.
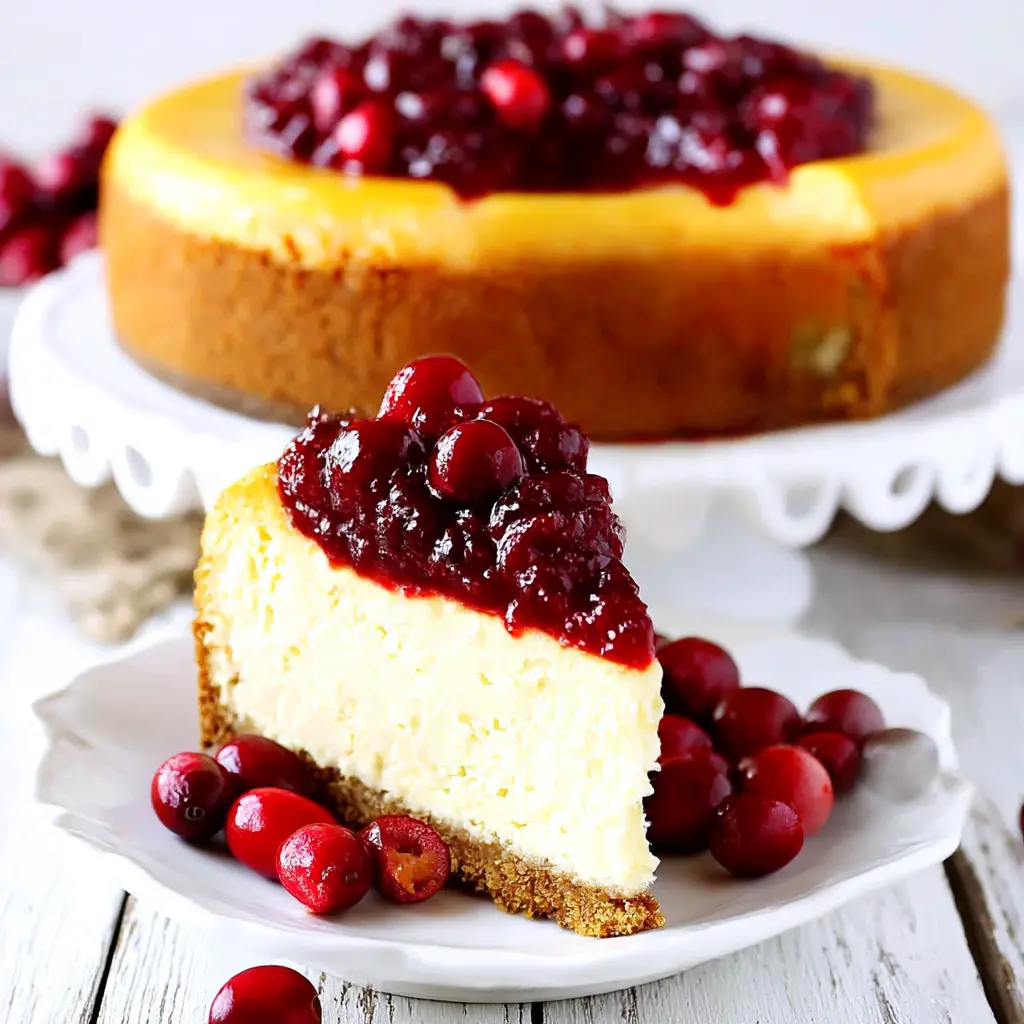
The texture is the real payoff. The gingersnap crust is crisp and slightly spicy, the filling is dense, velvety, and almost cloud-like in your mouth, and the cranberries provide that bright, tart, jammy counterpoint that wakes up your taste buds on the finish. It’s a lot of textures and flavors happening at once, but they all work in perfect harmony.
Frequently Asked Questions
Why This Will Be Your New Holiday Tradition
As a California girl, I’m used to mild seasons, but there’s nothing like the first hint of fall to get me in the kitchen. This cranberry orange cheesecake is always the first thing I bake when the weather starts to cool down. It’s a little taste of Thanksgiving cheer that you can pull out even before the holiday chaos begins.
I still remember the first time this came out perfectly. The top was smooth as glass, the spiral of cranberries was gorgeous, and when I cut into it, the clean slice just held its shape, so beautiful I almost didn’t want to eat it. Almost. That moment when the tart cranberries hit the rich, creamy filling? Pure magic. It’s the kind of dessert you savor slowly, with a cup of coffee and the good company around the table.
What I love most about this recipe is how empowering it is. You’re making a “fancy” dessert that feels impressive, but the steps are so clear. It’s a confidence booster. And if you’re also dreaming of those perfect, crack-free layers, remember, the cranberry sauce is your safety net. It makes every cheesecake look intentional.
If you make this recipe, I’d love to see your creation! Tag me in your photos or drop a comment below telling me how it turned out. And if you’re looking for even more festive, showstopper desserts for your fall table, make sure to follow me on Pinterest for a constant stream of seasonal baking inspiration.
There’s nothing quite like pulling a perfectly chilled, beautifully topped cranberry orange cheesecake out of the fridge, knowing you made it yourself. When you cut that first clean slice, you’ll understand why this is the dessert I bring to every fall gathering. This is the recipe you’ll come back to year after year.
Source: Learn More About This Dish
Classic Cranberry Orange Cheesecake
Ingredients
Method
- Heat the oven to 350°F. In a food processor, pulse the ginger snap crumbs, melted butter, and salt until evenly moistened. Alternatively, stir them together in a bowl. Press the mixture firmly into the bottom of a 9-inch springform pan, going slightly up the sides if you like. Bake for 10 minutes, then set aside to cool. Lower the oven temperature to 325°F.
- Once the pan is cool to the touch, wrap the outside tightly with two layers of heavy-duty aluminum foil, making sure no seams or tears could let water inside. Place the wrapped pan in a large roasting pan. Bring a kettle or pot of water to a boil for the water bath, then set aside.
- Using an electric mixer, beat the softened Neufchatel cream cheese on medium speed until completely smooth, about 3 minutes. Add the sugar and beat for 1 more minute. Scrape down the bowl, then add the Greek yogurt and vanilla and beat for another minute. Add the eggs one at a time on low speed, mixing just until each is incorporated. Avoid overmixing. Pour the filling over the cooled crust.
- Put the roasting pan with the cheesecake on the lower third of the oven. Carefully pour the boiling water into the roasting pan until it reaches about 1 inch up the sides of the springform pan. Shut the oven door.
- Bake for about 1 hour 30 minutes, until the center is almost set but still has a slight jiggle. Turn off the oven and crack the door open. Leave the cheesecake in the oven for 1 hour. Remove it, run a thin knife around the edge, and cool completely on a rack. Refrigerate for at least 4 hours or overnight.
- Release and remove the springform ring. Spoon the cranberry orange topping over the cheesecake just before serving. Cover and refrigerate any leftovers.
- In a medium saucepan over medium-high heat, bring the water and sugar to a boil. Add the cranberries, cover, and cook about 5 minutes, just until the berries pop. Take the pan off the heat and cool to room temperature.
- Since the mixture will have extra syrup, scoop the cranberries out with a slotted spoon and arrange them over the cheesecake. Sprinkle with the orange zest.