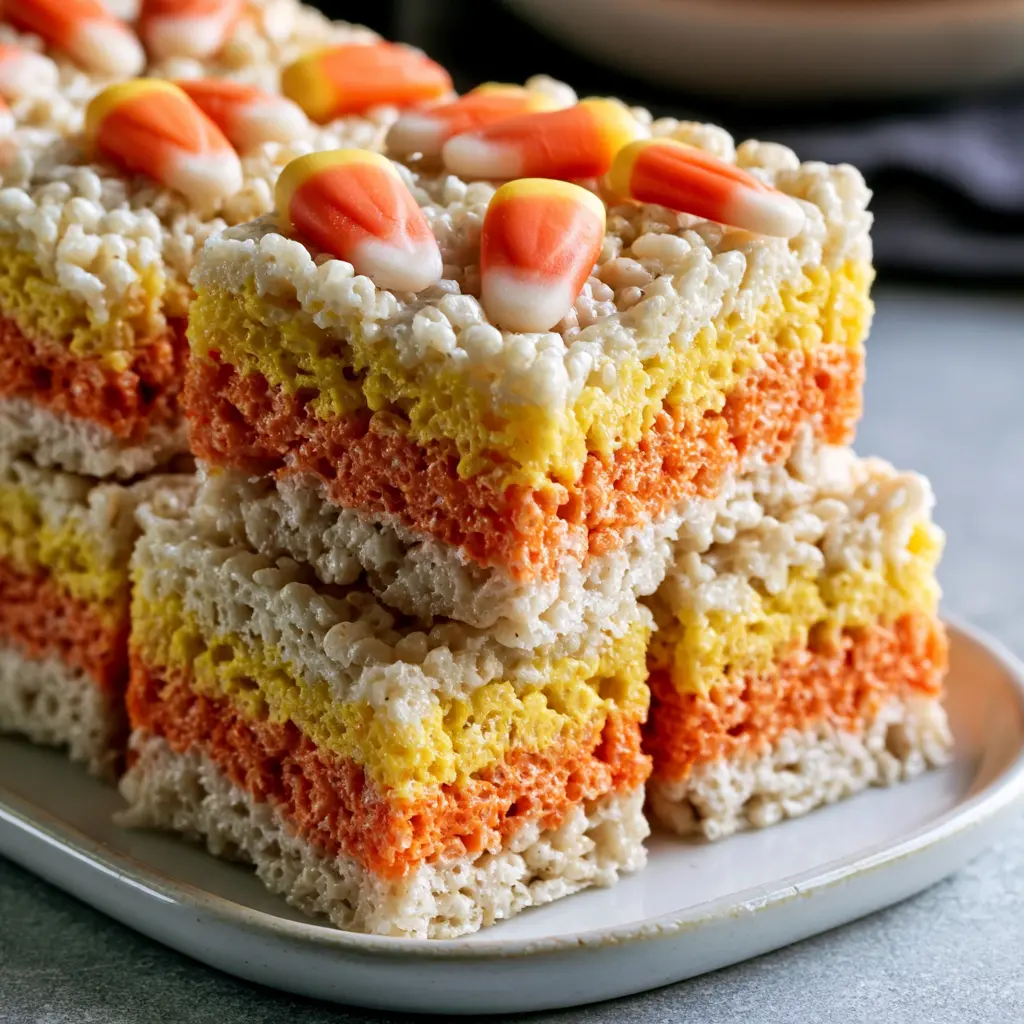
Candy Corn Rice Krispie Treats (Layered Halloween Bars)
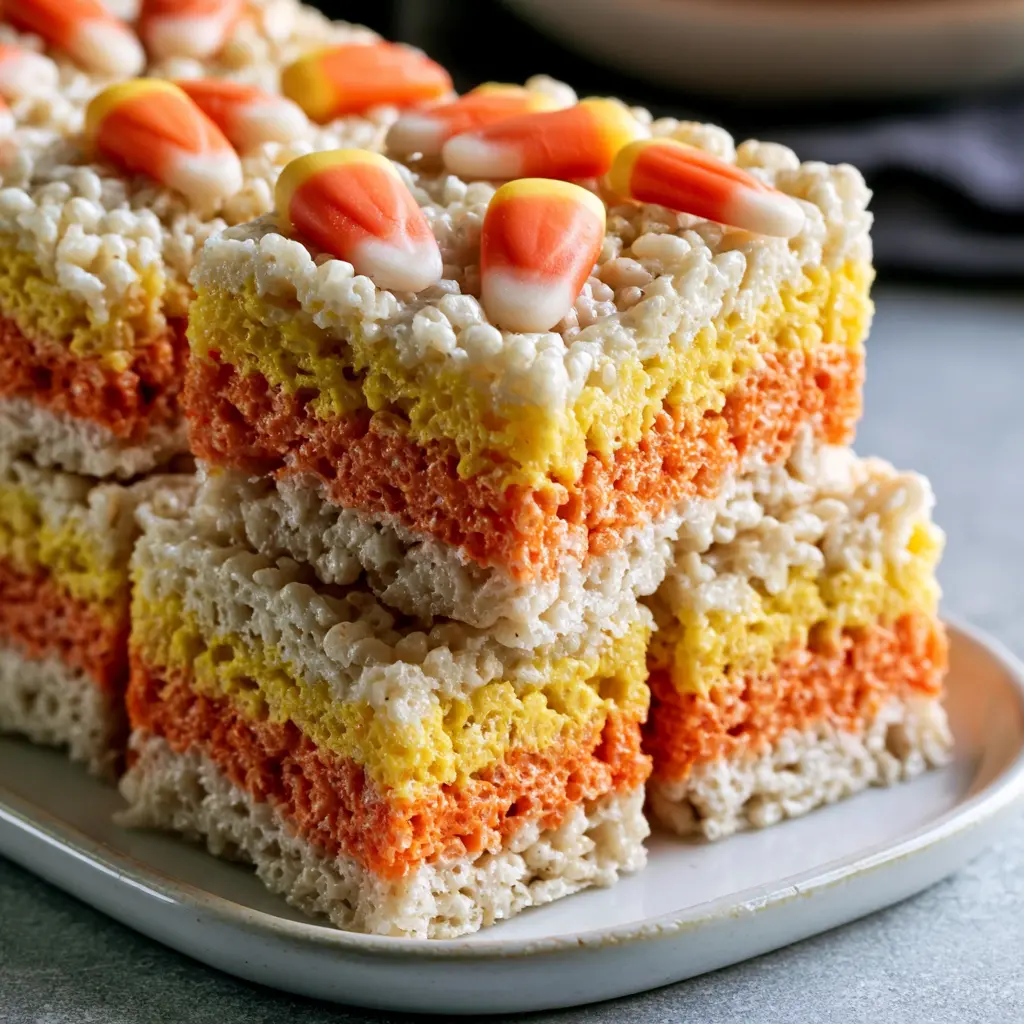
These no-bake candy corn rice krispie treats stack yellow, orange, and white layers into one playful Halloween dessert.
Ingredients
Method
- Set a large heavy-bottomed saucepan over low heat and melt the butter completely, stirring now and then.
- Add the marshmallows and stir without stopping until they are fully melted and the mixture looks glossy and smooth.
- Take the saucepan off the heat and fold in the crisp rice cereal until every piece is well coated.
- Divide the warm cereal mixture evenly between three mixing bowls. Tint one bowl with yellow coloring, tint a second bowl with orange coloring, and leave the third bowl plain.
- Press the yellow mixture evenly into the bottom of a lightly buttered 9 x 13-inch baking pan, then add the orange mixture over the top, and finish with the plain white mixture, gently pressing each layer into place.
- Lightly press candy corn into the top layer in a single layer or in a simple pattern.
- Let the pan cool completely at room temperature until firm, then cut into squares with a buttered knife.
Nutrition
Notes
Grease your hands with a little butter or cooking spray before pressing the sticky mixture into the pan.
Make the layers slightly cool before assembling so they stack more neatly, but don't let them harden.
Store leftovers in an airtight container at room temperature for up to 3 days, with parchment or waxed paper between layers.
For extra Halloween flair, arrange the candy corn to form a candy corn shape or make stripes across the top.
Use salted butter if you prefer a touch of saltiness to balance the sweetness.
To make ahead, prepare the bars the day before and keep them covered until serving.
For cleaner cuts, wipe the knife with a damp paper towel between slices.
Tried this recipe?
Let us know how it was!Why You’ll Love These Candy Corn Rice Krispie Treats
The candy corn hit the shelves in August. You bought it. You have no plan. I got you. These candy corn rice krispie treats are the answer to that very specific fall problem. No oven, no stand mixer, no Pinterest-level piping skills. Just a saucepan, a bag of marshmallows, and six cups of crisp rice cereal doing their thing. Honestly? They’re the most fun I’ve had in the kitchen with my kids in ages. The layering feels like a craft project. The colors glow like a Halloween sunset on a plate. Here’s what you’re getting:- 15 minutes of work, no baking required
- That classic Rice Krispie texture: crisp snap, chewy stretch, candy corn crunch
- A nut-free school treat that’s classroom-party approved
- Zero special equipment, just a saucepan and a 9×13 baking pan
Ingredients for Layered Halloween Bars
You only need five things for these candy corn rice krispie treats. Five. That’s it.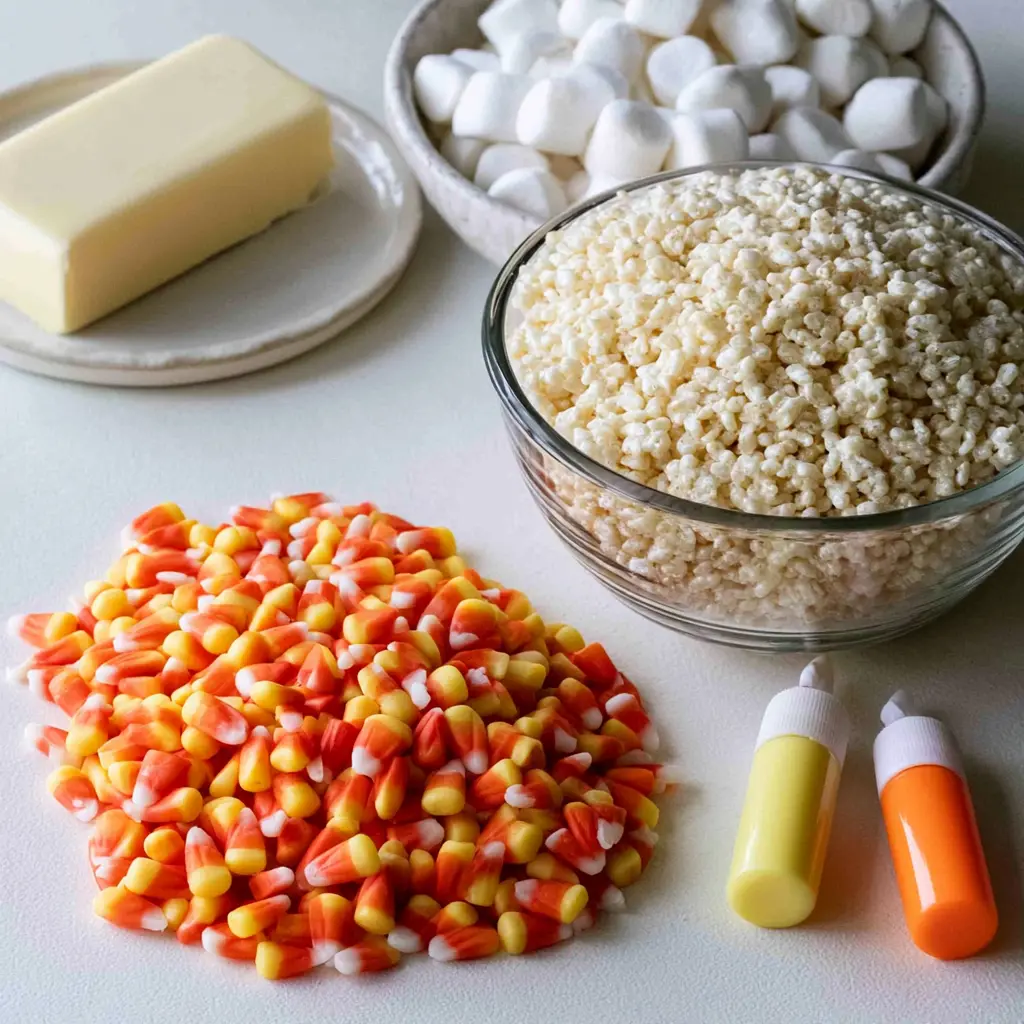
- 3 tablespoons butter: salted or unsalted both work. I like salted for a tiny balance against all that sweetness.
- 1 package (10 oz) marshmallows: standard or mini mallows both work. Mini melts faster.
- 6 cups crisp rice cereal: brand-name Rice Krispies cereal or store-brand, nobody cares once it’s coated in marshmallow.
- 1 package (12 oz) candy corn: use as many or as few as you like for the top.
- Yellow and orange gel food coloring: one bottle of each. Liquid works too, but gel gives brighter colors without making the mixture soggy.
How to Make Candy Corn Rice Krispie Treats
The full recipe card is right up top with exact measurements. Down here is the walkthrough with all my hard-won tips. Melt. Stir. Press. Cool. Cut. Done. That’s the rhythm.Melt the Butter and Marshmallows
Set a large heavy-bottomed saucepan over low heat. Melt the butter completely, stirring now and then. Then add the marshmallows and stir without stopping until the mixture looks glossy and smooth. Don’t rush this part. Low heat is the secret. Crank the heat and your marshmallows turn stiff and rubbery. You want a melted marshmallow that looks like thick whipped cream. Shiny, stretchy, impossible to resist dipping a spoon into. (I don’t judge.)
Divide and Color the Mixture
Take the pot off the heat. Fold in the cereal until every piece is well coated. Then divide the warm mixture evenly between three mixing bowls. Tint one bowl yellow. Tint a second bowl orange. Leave the third bowl plain white. This is where the magic starts. Small tip: make the yellow layer first, then reuse that bowl for the orange. Always use a clean bowl for the white layer. Yellow-tinted white ruins the whole candy corn illusion.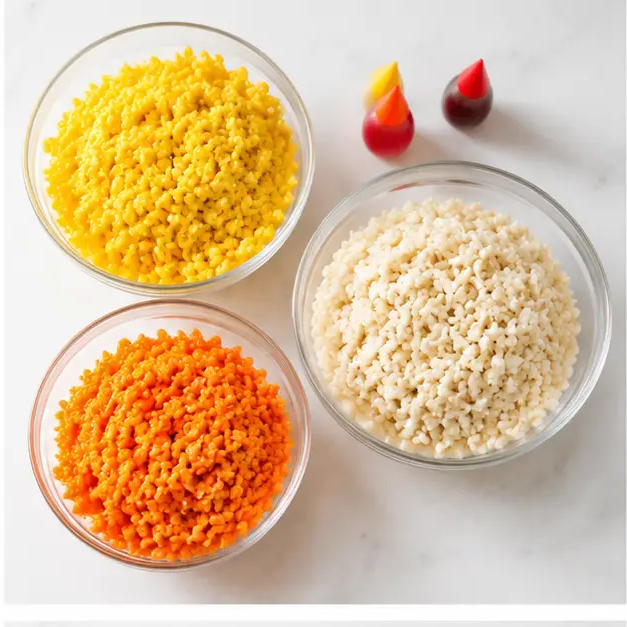
Press the Layers Into the Pan
Lightly butter your 9×13 baking pan. Press the yellow mixture evenly into the bottom. Add the orange mixture over the top. Finish with the plain white layer. Press each layer gently. Here’s the deal with pressing. Firm enough to hold together, but not so hard you crush the cereal into dense bricks. The chew depends on this. Here’s your sticky marshmallow fix: coat your hands with non-stick cooking spray first. The stickiness is real, and this saves your sanity. Also, don’t let the layers fully harden before stacking. Slightly warm layers bond together. Too cool and they’ll separate. Too hot and they’ll smear into one muddy color. Slightly warm is the sweet spot.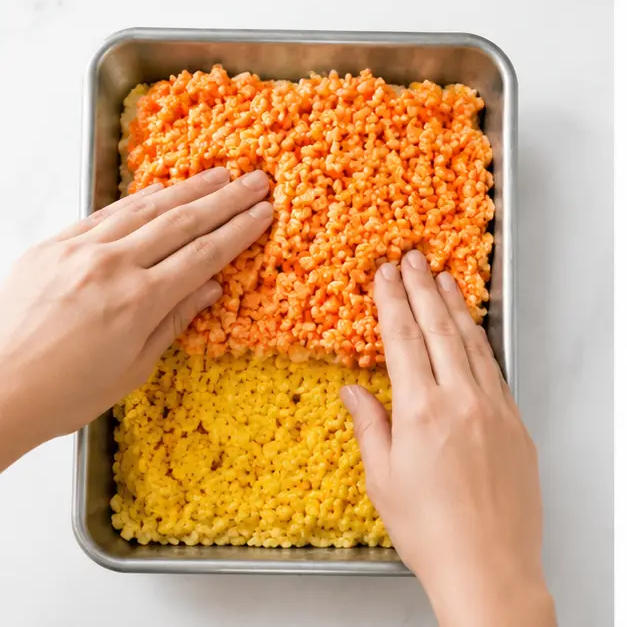
Top With Candy Corn and Cut Cleanly
Lightly press candy corn pieces into the white top layer. Single layer or a simple pattern, whatever sparks joy. I like doing a little grid so every square gets at least two pieces. Let the pan cool completely at room temperature until firm. Then cut into squares with a buttered knife. Wipe the knife with a damp paper towel between slices. Your lines will come out so clean you’ll want to take photos.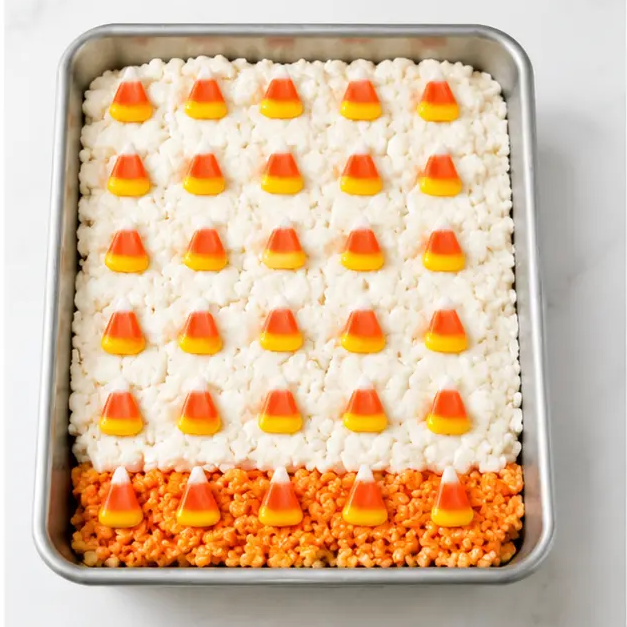
Tips for Perfect Candy Corn Rice Krispie Treats
I’ve made these candy corn rice krispie treats maybe four times in the last two weeks. Here’s what I learned the messy way.- Grease everything: hands, knife, spatula, the pan. Marshmallow sticks to everything it touches.
- Cool the layers slightly: just a few minutes so they stack cleanly without melting into each other.
- Don’t overheat the marshmallows: low and slow. Scorched marshmallow tastes burnt and turns stiff.
- Use a clean bowl for the white layer: residual food coloring will tint it, and then you have pink ghosts.
- Wait before cutting: I know it’s hard. Slicing too early gives you sticky, ragged edges.
Fun Variations and Halloween Decorating Ideas
Once you master the base candy corn rice krispie treats recipe, the sky’s the limit. These are all optional additions, by the way. The classic version is already fantastic.- Cookie cutters: cut into ghost, pumpkin, or cat shapes instead of squares. Kids lose their minds.
- Candy corn designs: arrange the candy corn on top to form a giant candy corn outline or make stripes across the surface.
- Fall sprinkles: press orange and black sprinkles into the top layer before it sets.
- Salted peanuts: press extra peanuts and candy corn into the top for a candy-bar-inspired finish.
- White chocolate drizzle: melt some white chocolate and drizzle it over the top. Optional, but delicious.
How to Store, Make Ahead, and Serve
These candy corn rice krispie treats keep beautifully, which is a lifesaver during busy Halloween week. Store leftovers in an airtight container at room temperature for up to 3 days. Layer them with parchment paper or wax paper layering so they don’t stick together. Don’t refrigerate, it makes them hard. If you must, let them come back to room temperature before serving. To make ahead: prep the bars the day before and keep them covered. They’re one of those make-ahead party treats that actually tastes better after resting. The layers settle, the flavors mingle, the texture gets that perfect chew. Freezing works too. Wrap the uncut slab tightly in plastic wrap, then foil. Freeze for up to 2 months. Thaw overnight in the fridge, then bring to room temperature. Quality holds up surprisingly well.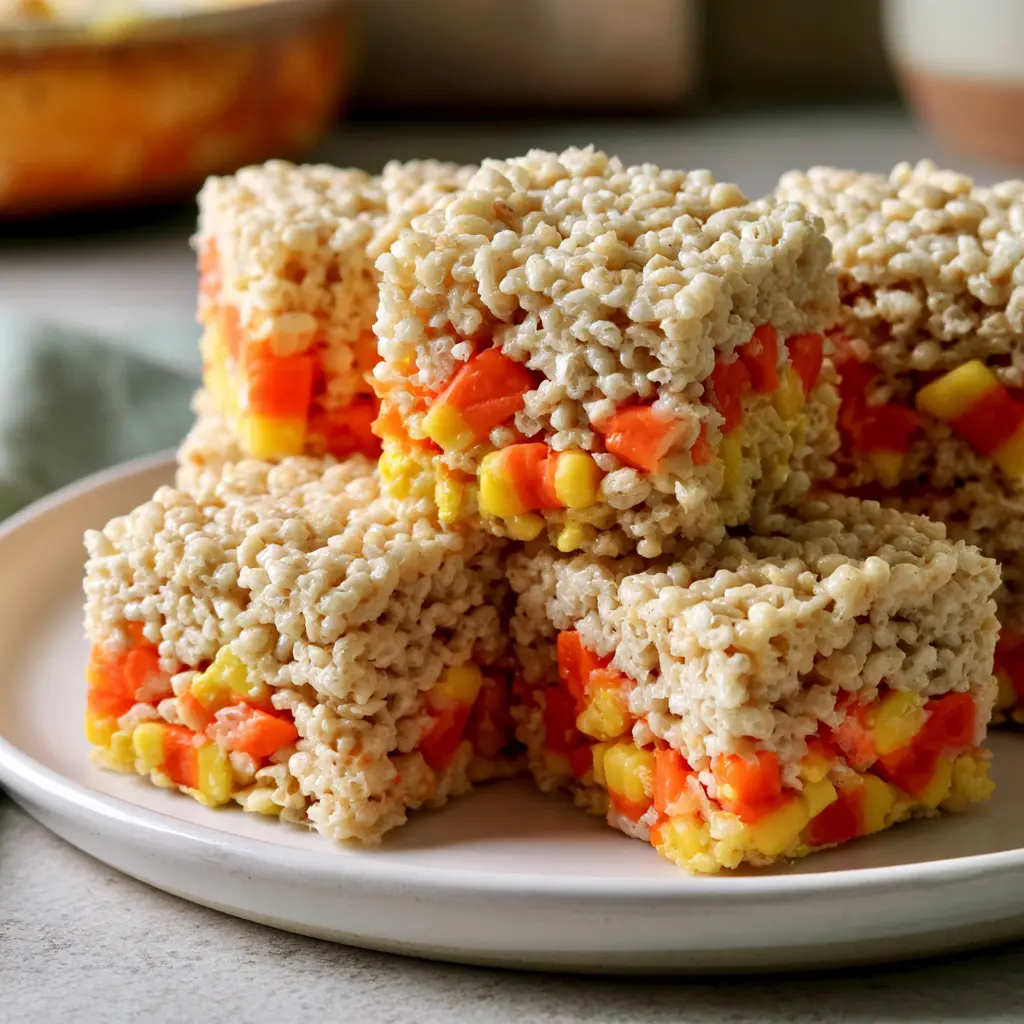 For serving, stack them on a white platter with a few extra candy corn pieces scattered around. They look incredible on a Halloween party dessert table. You can also wrap individual squares in treat bags tied with orange ribbon. Instant party favors.
Candy Corn Rice Krispie Treats FAQ
Make These Your Halloween Tradition
If you’ve made it this far, you’re already picturing that plate of tri-color squares disappearing at the party. The compliments. The “wait, YOU made these?” reactions from other parents who assumed you bought them. Yes, this is a cereal bar. No, I won’t tell anyone it took 15 minutes. These candy corn rice krispie treats are the kind of recipe that becomes a family fall tradition. The kids help with the layering, you handle the hot marshmallow, everyone fights over the corner pieces. It’s sticky, it’s messy, it’s exactly what Halloween should be. One more thing. If you’re a visual planner like me, check out my Halloween dessert board on Pinterest. I’ve saved this recipe along with a ton of other no-bake Halloween treats. It’s basically my fall bucket list, and you’re welcome to steal it. Now go make them this weekend, and tell me how fast they disappear. I’m betting on before the night ends.Source: Learn More About This Dish
How do you make candy corn rice krispie treats with even layers?
Divide the cereal mixture evenly between three bowls before coloring. When pressing, use the bottom of a buttered measuring cup to level each layer flat. Don’t pack it down hard, just smooth it out evenly. Slightly warm layers bond better without smearing.
Can you use regular food coloring instead of gel for candy corn rice krispies?
Yes, liquid food coloring substitutes fine. You’ll just need more drops to reach a vibrant yellow and orange, and it adds a tiny bit of extra liquid to the mixture. Gel is more concentrated, so I prefer it for the brightest tri-color layers.
How do you keep candy corn rice krispie treats from sticking to the pan?
Butter the 9×13 baking pan generously before pressing the layers in. You can also line it with parchment paper, leaving overhang on two sides. That way you can lift the whole slab out for clean cutting. Grease your hands or spatula too, marshmallow sticks to everything.
How long do candy corn rice krispie treats stay fresh?
About 3 days in an airtight container at room temperature. Layer them with wax paper so they don’t stick together. After day two they start losing that fresh chewy snap, so they’re best enjoyed within a day or two. They rarely last that long in my house anyway.
Can you freeze candy corn rice krispie treats for later?
Absolutely. Wrap the uncut slab tightly in plastic wrap followed by foil, then freeze for up to 2 months. Thaw overnight in the fridge and bring to room temperature before serving. The texture holds up surprisingly well, which makes them perfect for planning ahead.