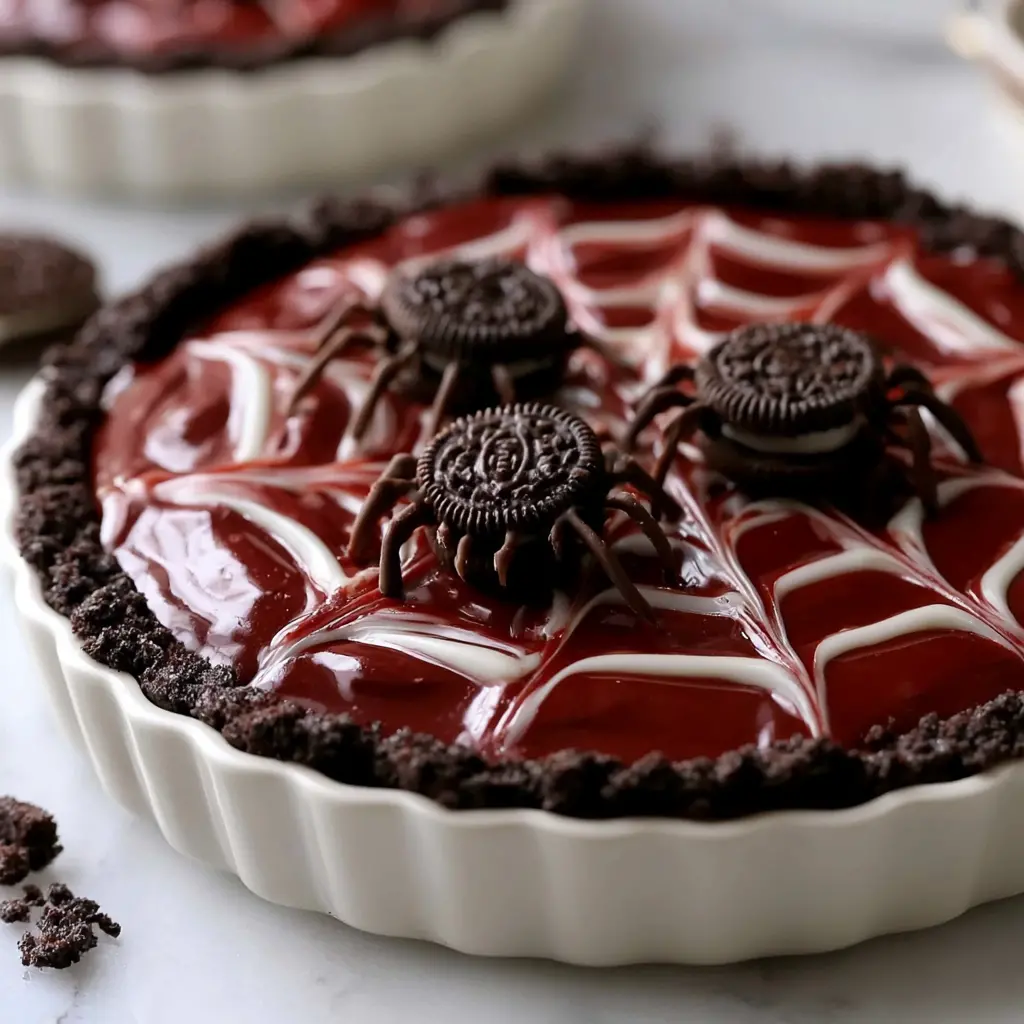
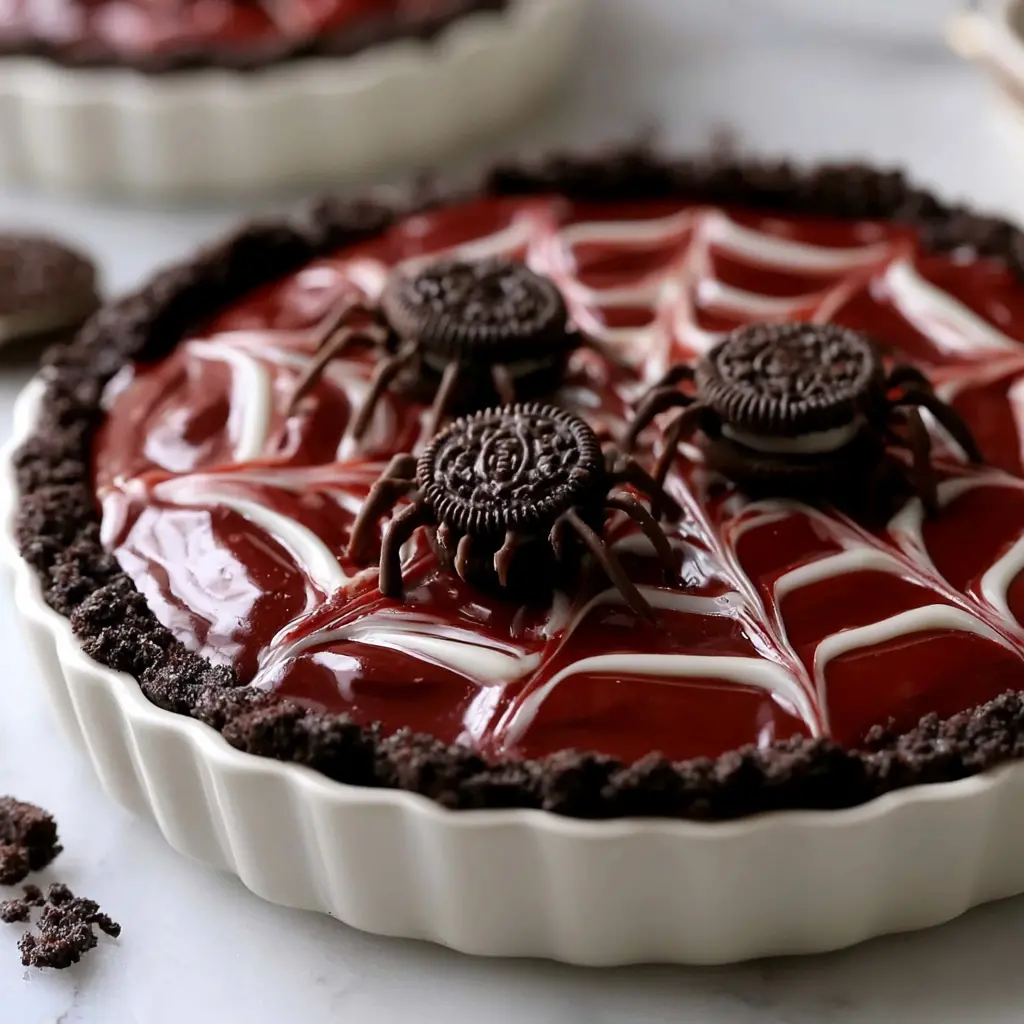
Vegan Spider Web Cookie Cake
Ingredients
Method
- Pulse the chocolate sandwich cookies in a food processor until they become fine crumbs.
- Melt the vegan butter in a small saucepan over low heat on the stovetop.
- Pour the melted butter into the cookie crumbs and pulse until the mixture looks like wet sand and holds together when pressed.
- Press the crumb mixture evenly into the bottom and up the sides of a lightly greased 9-inch tart pan. Refrigerate while you make the filling.
- Use store-bought or homemade vegan caramel sauce.
- In a bowl, stir the caramel with one drop of red food coloring gel until the color is completely uniform.
- Pour the red caramel over the chilled crust and level it with an offset spatula or the back of a spoon.
- Return the tart to the fridge to set while you prepare the ganache.
- Melt the dark chocolate in a heatproof bowl set over a saucepan of gently simmering water (a double boiler). Once smooth, whisk in the coconut cream until glossy.
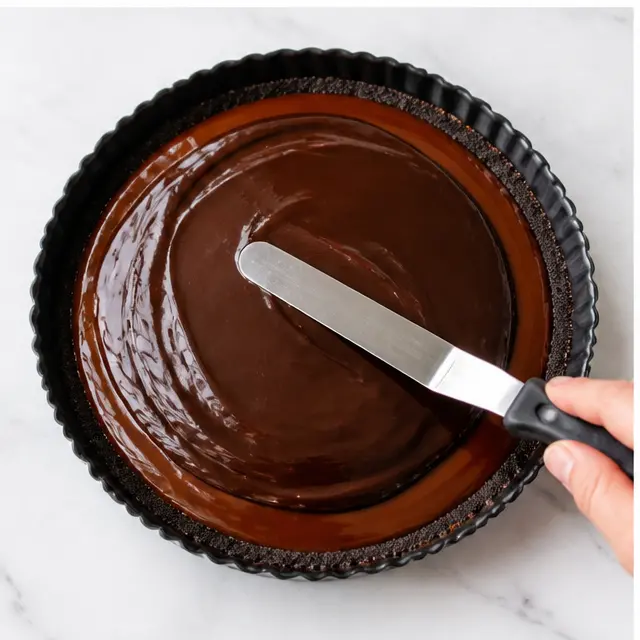
- Pour the ganache over the caramel layer and spread it evenly with a spoon or offset spatula. You will add the spider web while it is still soft.
- Melt the white chocolate in the same double boiler method, then transfer it to a piping bag and snip off a small tip.
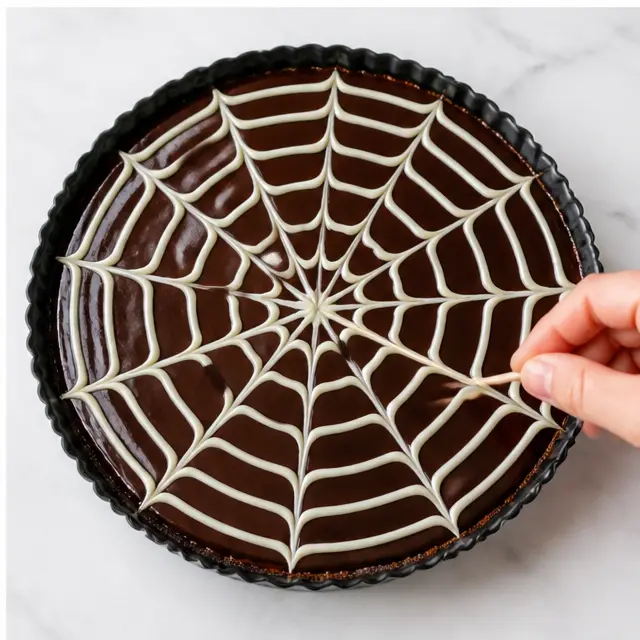
- Pipe concentric lines of white chocolate across the tart, then pipe curved lines between them to create a spider web pattern. See the photos or video for guidance.
- Refrigerate the tart for about 2 to 3 hours until fully set.
- While it chills, make the mini Oreo spider decorations.
- Split each mini sandwich cookie in half. Melt a little dark and white chocolate separately in the double boiler, then spoon into piping bags and snip the tips.
- Place a cookie half cut-side up on parchment paper. Pipe small lines on each side for spider legs. Add a bit of dark chocolate to the cookie and press the other half on top to form a sandwich.
- Pipe two tiny white chocolate dots with dark chocolate centers on top for eyes. Freeze or chill until the chocolate hardens and the spiders can be lifted off the paper.
- Arrange the chilled spider decorations on top of the finished tart.
- Use a sharp knife to slice the tart into wedges and serve.
Nutrition
Notes
Tried this recipe?
Let us know how it was!Why You’ll Love This Spider Web Cookie Cake
Okay, I’ll just say it. Most Halloween desserts look incredible in the photo and then fall apart in real life. This spider web cookie cake is not that. It’s a no-bake showstopper with a fudgy chocolate cookie crust, a weirdly fun slime caramel layer, and a glossy ganache top that looks like serious pastry school skills went into it.
Here’s the truth, though. It didn’t take pastry school. The whole web design comes down to one gentle toothpick drag. My first attempt was a complete zigzag mess. I panicked, dragged too fast, and tore right through the chocolate. Then I stepped back and thought, honestly? Spiders don’t do straight lines anyway. The wobble makes it look real.
If you’ve been hunting for a spider web cookie cake that’s actually doable on a busy weeknight, this is it. No oven. No fancy piping equipment. Just a fridge, a food processor, and about 20 minutes of active work. The spiders approve of chaos, and so will your kids.
- 100% vegan and dairy-free. Everyone at the party can have a slice.
- A true make ahead halloween cake. It needs fridge time anyway, so the chill does the work for you.
- A seriously kid friendly halloween treat. Little hands can press the crust and place the spiders.
Ingredients & Substitutions
Here’s the best part about this giant cookie cake recipe. There’s no giant cookie to bake. The base comes from chocolate sandwich cookies and melted vegan butter, pulsed until the mixture feels like wet sand. Pressing it into the tart pan is weirdly satisfying, by the way.

You’ll also need vegan caramel sauce, one drop of red food coloring gel, dairy-free dark chocolate, full-fat coconut cream, dairy-free white chocolate, and mini sandwich cookies for the spider decorations. Most of it is easy to find at Ralphs, Trader Joe’s, or Whole Foods. The coconut cream is the one item I’d hunt for specifically, since it gives the ganache that thick, glossy body.
- Chocolate sandwich cookies. Classic Oreos work alongside vegan brands. For a gluten-free spider web cookie cake, swap in GF sandwich cookies.
- Coconut cream. No can? Chill full-fat coconut milk and scoop out only the solid portion on top.
- Vegan caramel. Store-bought is perfectly fine. Homemade works too. Just double-check the label so it’s plant-based.
How to Make a Spider Web Cookie Cake
Alright, let’s make some magic. Follow these four stages in order, and you’ll be staring at a spooky masterpiece before the oven even thinks about preheating. Which it never will.
Stage 1: The Cookie Crust
Pulse the chocolate sandwich cookies in a food processor until they become fine crumbs. Melt the vegan butter in a small saucepan over low heat, pour it into the crumbs, and pulse again until the mixture holds together when pressed. You want that wet sand feel between your fingers.
Press the crumb mixture evenly into the bottom and up the sides of a lightly greased 9-inch tart pan. Here’s a comparison from years of testing. A tart pan with a removable bottom gives you clean, sharp edges for that bakery look. A springform pan works too, but grease it generously. Perforated pans? Avoid them completely, because moisture leaks through and your crust never sets properly.
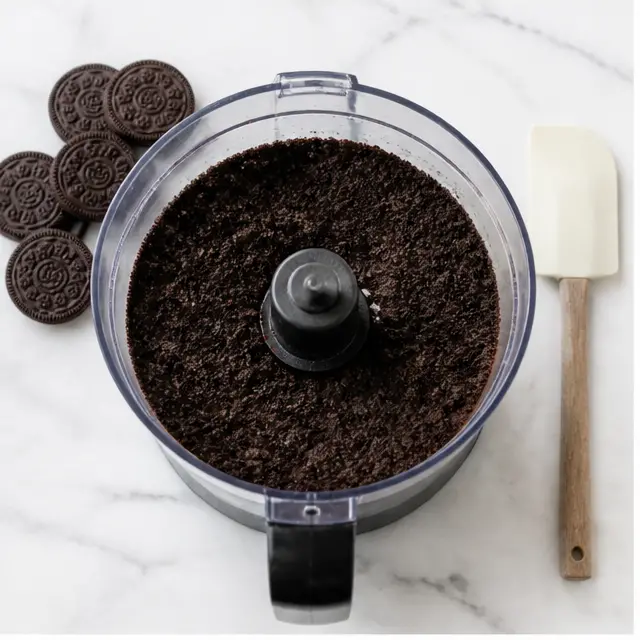
Texture Targets
Listen for: the soft squish of butter hitting the cookie crumbs, not a crackle. There’s no bake, so no sizzle. Look for: the crust turning into wet sand, glossy ribboning in the ganache, and white web lines that sink just slightly into the dark top. Smell: deep chocolate and sweet caramel, with a faint coconut warmth.
Stage 2: The Slime Caramel
This layer is dangerously easy. Stir your vegan caramel sauce with one drop of red food coloring gel until the color is completely uniform. Just one drop, I mean it. Too much and you lose that spooky translucent slime vibe and end up with muddy brown.
Pour the red caramel over the chilled crust and level it with an offset spatula or the back of a spoon. Back into the fridge it goes while you melt the chocolate. The cold crust matters here, because it keeps the caramel from soaking in and holds the layers distinct.
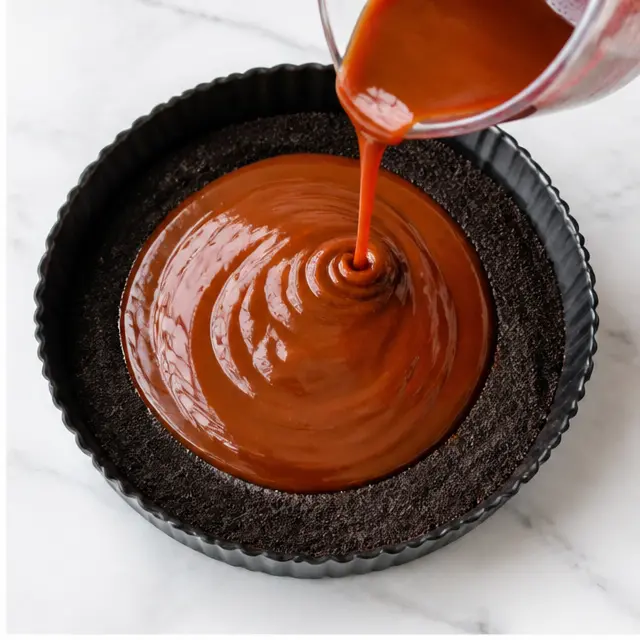
Stage 3: Ganache and the Spider Web
Melt the dairy-free dark chocolate in a double boiler, then whisk in the full-fat coconut cream until the mixture is glossy and smooth. Pour the ganache over the caramel layer and spread it evenly. This is the moment to enjoy, that luxurious swoosh as chocolate settles into place.
Now for the magic. Melt the dairy-free white chocolate and transfer it to a piping bag with a tiny snipped tip. Pipe concentric circles across the tart, working from the center outward. Then pipe slightly curved lines between the circles to connect them, like a real web. Work while the ganache is still soft, so the white chocolate sinks in just a little and creates that marbled web effect.
Prefer the viral toothpick drag decor method? Pipe the concentric circles only, then gently drag a toothpick from the center all the way to the edge. Wipe the toothpick clean after every single drag. That’s the secret to clean frosting lines. And hey, no piping bag on hand? The ziplock bag icing hack works beautifully. Just fill a sturdy bag, snip one tiny corner, and you’re in business.
Stage 4: The Mini Oreo Spiders
While the cake chills, make the spiders. Split each mini sandwich cookie in half, cut side up. Melt a little dark and white chocolate separately, spoon each into a piping bag, and snip tiny tips.
Pipe small lines on each side for legs, add a dot of dark chocolate to the cookie half, then press the other half on top to form a sandwich. Pipe two tiny white dots for eyes, then add a pinprick of dark chocolate in the center. Freeze or chill until hard, and they lift right off the parchment. Arrange them on top of the set cake. Yes, they’re almost too cute to eat. Almost.
Expert Tips & Troubleshooting
Even a simple spider web cookie cake has a few moments that can go sideways. Here are the fixes I’ve learned the hard way, so you don’t have to.
- ❌ Pipe tip too big. The white chocolate blobs out and ruins the delicate web. ✅ Snip the tiniest corner possible. You can always re-snip bigger, but you can’t unsnip.
- ❌ Dragging too hard. The toothpick tears the ganache like a knife. ✅ Use feather-light pressure and slow pulls. Wipe the toothpick clean between each drag.
- ❌ Ganache too warm. The white web bleeds and feathers into the dark layer. ✅ Wait 5 to 10 minutes after spreading, so the surface sets softly before you pipe.
- ❌ Leaky pan. Perforated or ungreased pans give you a crumbly disaster. ✅ Grease generously and use a solid-bottom tart pan with a removable base.
- ❌ Plastic spider decorations. They’re not edible. ✅ If you use them, remove them before serving, especially around kids. The mini Oreo spiders taste better anyway.
One more thing. If your ganache or web starts melting in the summer heat, pop the cake in the fridge for 10 minutes. Patience saves the web. Then carry on like nothing happened.
Halloween Variations
This spider web cookie cake is a fantastic base to play with. Here’s how I’d twist it depending on the occasion, whether it’s Halloween or just a rainy Saturday.
- Go gluten-free. Use gluten-free chocolate sandwich cookies and certified GF dairy-free chocolate. Same texture, same drama.
- Swap the web color. Traditional white is gorgeous, but a mint green or pastel purple web turns the whole cake into a totally different spooky vibe. Use vegan-friendly gel colors.
- Deploy more spiders. Make an extra batch of mini Oreo spiders and let a few crawl off the cake onto the serving board. It’s a tiny detail that makes people do a double take.
- Canned frosting shortcut. In a rush? Swap the ganache for canned chocolate frosting. Chill the frosted cake for 15 minutes before piping so the web lines stay crisp.
- Party dessert tray energy. Set the tart on a dark slate board with a few extra chocolate sandwich cookies scattered around. Instant spooky centerpiece.
Serving & Storage
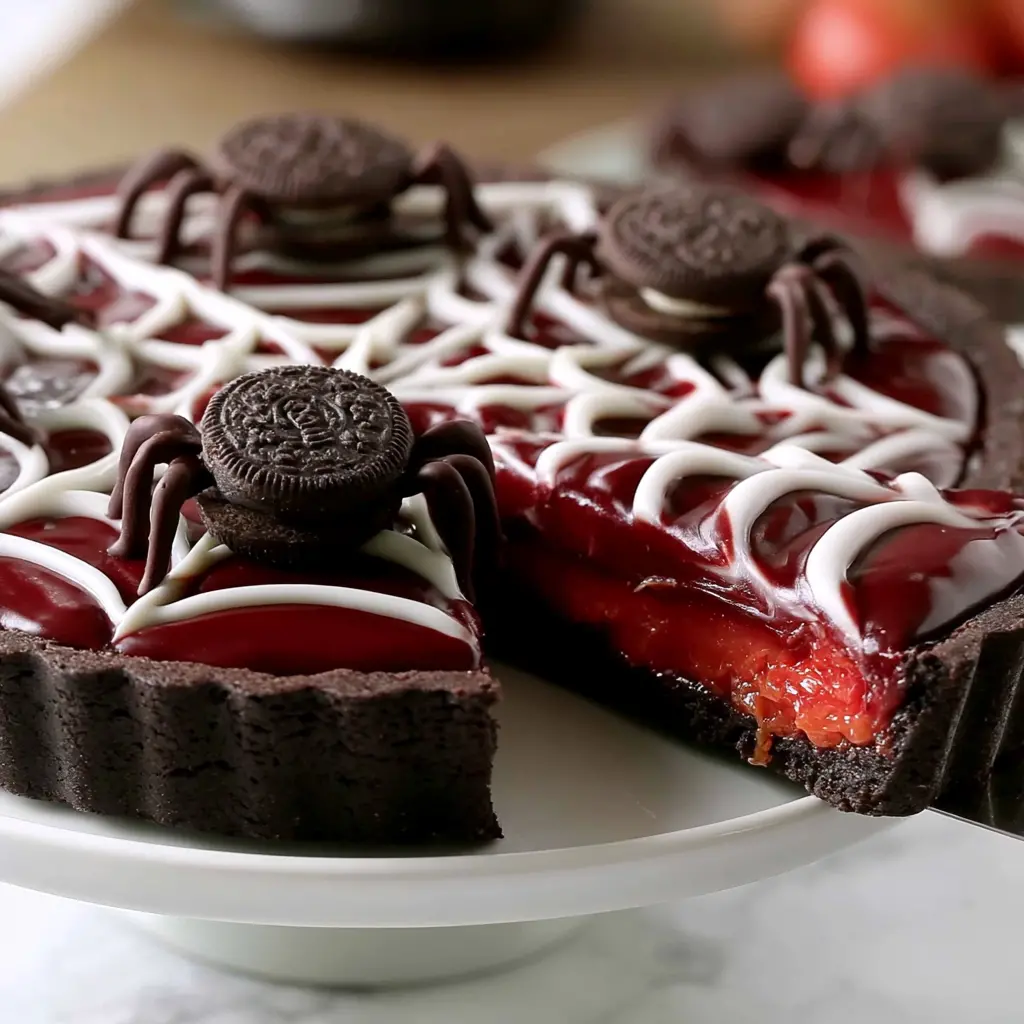
Serve this halloween spider web cake chilled, straight from the fridge. That’s when the layers hold their shape and the ganache slices cleanly. Use a hot, dry knife to cut through without dragging the web, and wipe the blade between slices. You’ll get those perfect wedges that make the whole table stop.
For cookie cake storage, keep leftovers in an airtight container in the fridge for up to 5 days. Five days, I promise. You can also freeze the whole cake for up to 2 months. Wrap it well in plastic and foil, then thaw overnight in the fridge before serving. The web stays intact through a freeze, which still surprises me every time.
Taking it to a party? Chill it thoroughly first, then transport on a flat, stable board. Keep it out of direct sunlight and it’ll hold for the entire event. It slices like a pizza, which means it pairs perfectly with pumpkin spice lattes or whatever fall drink you’re currently obsessed with.
Frequently Asked Questions
Make It Yours
That’s the whole thing. A spooky, gorgeous, completely doable spider web cookie cake that makes you look like a Halloween hero. No piping degree required. No oven required. Just a fridge, some plant-based chocolate, and one very brave toothpick.
I genuinely want to see how yours turns out. Tag me when you make it, and please share the messiest web you’ve got. The wobblier, the better. For more spooky dessert ideas and Halloween baking inspiration, I’m pinning old favorites and new experiments all season long. Come find me on Pinterest and let’s fill the board with webs.
Source: Learn More About This Dish