


Cheesecake Factory Crusted Chicken Romano (Easy Copycat Recipe)
Ingredients
Method
- Slice each chicken breast in half horizontally to make 4 thin cutlets. Lay a sheet of parchment paper over the pieces and gently pound them to an even 1/4-inch thickness.
- Set up a breading station with three shallow bowls. In the first bowl, whisk together the flour, garlic powder, onion powder, salt, and black pepper. In the second bowl, beat the eggs. In the third bowl, combine the panko breadcrumbs and grated Romano cheese.
- Working with one cutlet at a time, dredge it in the seasoned flour and shake off any excess. Dip it into the beaten eggs, then press it firmly into the panko-Romano mixture so the crust adheres. Place the coated chicken on a plate.
- Pour enough olive oil into a deep, rimmed skillet to cover the bottom by about 1/4 inch and heat over medium-high. Fry the chicken in batches of 1 or 2 pieces until golden brown and cooked through, about 4 minutes per side.
- Transfer the cooked chicken to a paper-towel-lined plate to drain. Repeat with the remaining cutlets, allowing the oil to reheat between batches.
- Sprinkle the warm chicken with flaky sea salt and serve immediately with lemon wedges and chopped parsley alongside.
Nutrition
Notes
Tried this recipe?
Let us know how it was!Why This Cheesecake Factory Copycat Works
I still remember the first time I ordered the cheesecake factory crusted chicken romano. It was a random Tuesday night, the kind where you just want something that feels special without it being an actual occasion. The plate landed in front of me, and honestly, I wasn’t prepared for the crunch. That shatter when your fork breaks through the golden exterior? Unreal.
I spent the rest of that meal trying to figure out what they did differently. And I’ve been chasing that crust ever since. So I got to work, and this copycat cheesecake factory chicken romano recipe is the result of many, many test runs. The good news? You can get that same crispy, cheesy crunch at home with about 30 minutes of effort and roughly 12 bucks of ingredients.
Here’s what makes this version actually work:
- Romano goes in the crust, not on top. That’s the move that gives the chicken its signature savory depth.
- The chicken gets pounded thin. Even 1/4 inch thickness means the crust crisps up before the middle overcooks.
- You rest the breaded chicken before frying. This is the trick that keeps the crust attached. More on that below.
And the cost? A Cheesecake Factory dinner for two with appetizer and tip is close to 70 bucks. This entire pan? About 12 dollars of ingredients. That math is hard to argue with, especially in August when the last thing you want to do is sit in a packed parking lot.
Ingredients for Crusted Chicken Romano
The ingredient list for this cheesecake factory crusted chicken romano copycat is short, and that’s kind of the point. When something tastes this good, you want to know exactly what’s in it. No mystery powders, nothing from a packet.
Here’s what you’re working with:
- Chicken fillets: 2 large boneless, skinless chicken breasts, halved horizontally so you get 4 thin cutlets
- All-purpose flour: for that first dry dredge that gives the egg something to grab onto
- Garlic powder and onion powder: they season the flour, which means every single layer tastes good
- Eggs: the glue between the flour and the crust
- Panko breadcrumbs: the key to that light, craggy, crunchy texture
- Romano cheese: finely grated and mixed right into the panko
- Olive oil: for frying
- Flaky sea salt, lemon, and fresh parsley: the finish that makes it taste like a restaurant plate
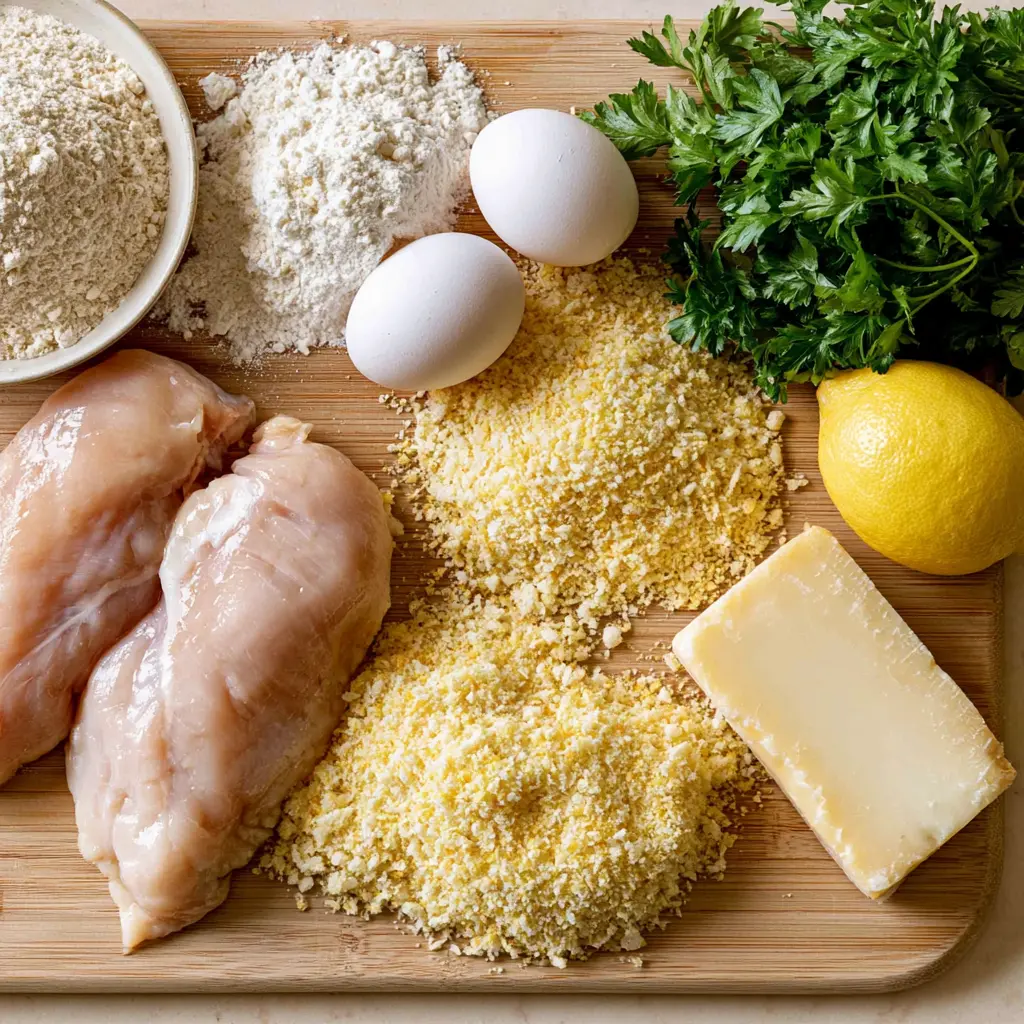
The Romano is non-negotiable here. It has that sharp, salty, almost nutty flavor that Parmesan just doesn’t quite match. And please, grate it yourself. The bagged shredded stuff won’t melt into the crust the same way. You want the fine, fluffy snow that comes from a box grater or microplane. Fresh grated romano cheese is one of those small details that separates a good copycat from a great one.
Essential Tools for the Best Results
You do not need a fancy setup for this. A few basics make a big difference though:
- A deep, heavy skillet. Cast iron or stainless steel work great
- A meat mallet (or a rolling pin in a pinch) for pounding
- Parchment paper, so the chicken doesn’t tear while you pound it
- Three shallow bowls for the breading station
- An instant-read thermometer if you want to be exact
That’s it. Nothing weird, nothing expensive. If you cook chicken at home, you probably own most of this already. Honestly, this is a weeknight dinner that feels fancy, but the equipment list is completely ordinary.
How to Make Cheesecake Factory Crusted Chicken Romano
This is one of those recipes where technique matters more than ingredients. Same chicken, same breadcrumbs, but rush the method and you’ll end up with a pale, soggy crust. Follow these stages and you’ll nail it every single time. I’ve broken it into four phases so it feels manageable, even on a busy night.
Stage 1: Prep the Chicken Cutlets
Slice each chicken breast in half horizontally, so you get two thin pieces from each one. Lay a sheet of parchment over the top and gently pound to an even 1/4 inch thickness. Use the smooth side of a mallet if you have one. This chicken breast pounding technique is worth mastering, trust me.
Why bother? Because uneven thickness is the enemy of crispy chicken. Thin parts cook too fast and burn. Thick parts stay pale while the center finishes. Pounding fixes all of that, and it also tenderizes the meat, which means juicier bites later.
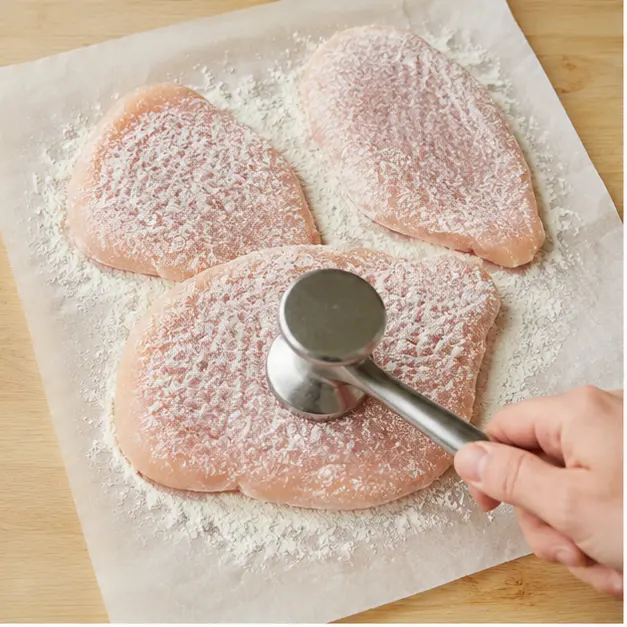
Don’t go overboard with the pounding either. You’re not trying to destroy the meat. You want it uniform, tender, and thin enough to cook in about 4 minutes per side. If it starts to tear, you’ve gone too far. Ease up.
Stage 2: Bread the Chicken
Set up three shallow bowls like a little assembly line. Bowl one has the seasoned flour. Bowl two has the beaten eggs. Bowl three has the panko mixed with the finely grated Romano. This is the classic breading technique for chicken, and it works because each layer has a specific job.
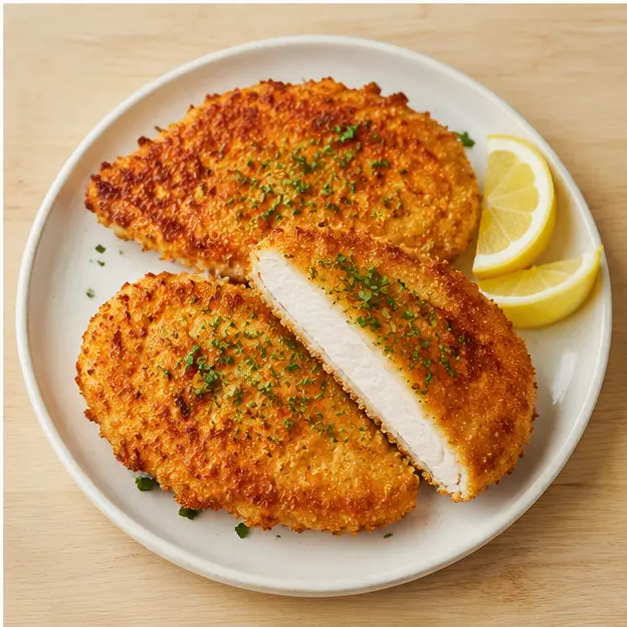
Work one cutlet at a time. Dredge in flour, shake off the excess. Dip in egg, let the extra drip off. Then press firmly into the panko-romano mixture. And I do mean press. You want the coating to feel like fresh snow, not wet sand. If it looks patchy, add more of the crumb mixture and press again. Make sure you coat the entire surface, edges included.
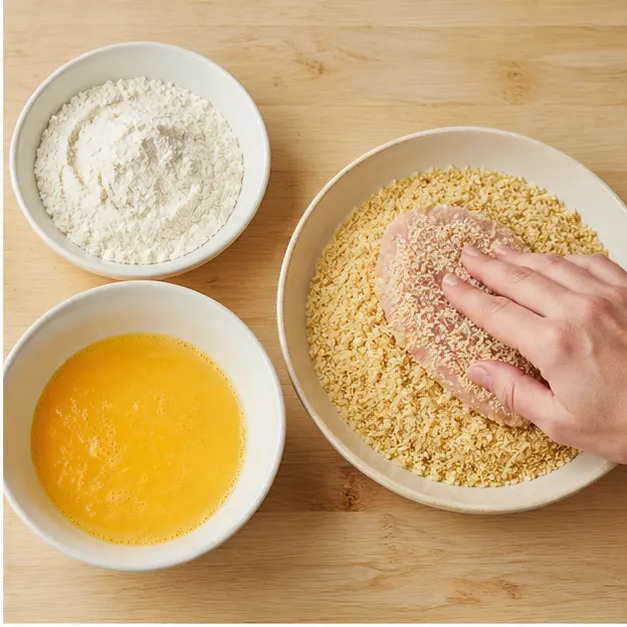
Here’s the counterintuitive part: after breading, let the chicken rest on a plate for about 10 minutes before it hits the pan. This is the trick that keeps the crust attached. It gives the egg time to set and bond with the panko. Skip it and you’ll watch the crust slide off in the pan. I’ve been there. It’s genuinely sad.
Stage 3: Pan-Fry Until Golden
Pour enough olive oil into a deep skillet to cover the bottom by about 1/4 inch. Heat it over medium-high until it shimmers. That shimmer means it’s ready. If you have a thermometer, aim for around 350 degrees F. Hot oil is what creates that golden crispy chicken cutlet exterior instead of a greasy one.
Add the chicken in batches of 1 or 2 pieces. Crowding the pan lowers the oil temperature and leaves you with a pale, soggy crust. Give each piece room to breathe. The sizzle when the first cutlet hits the oil? That’s the sound of dinner going right.
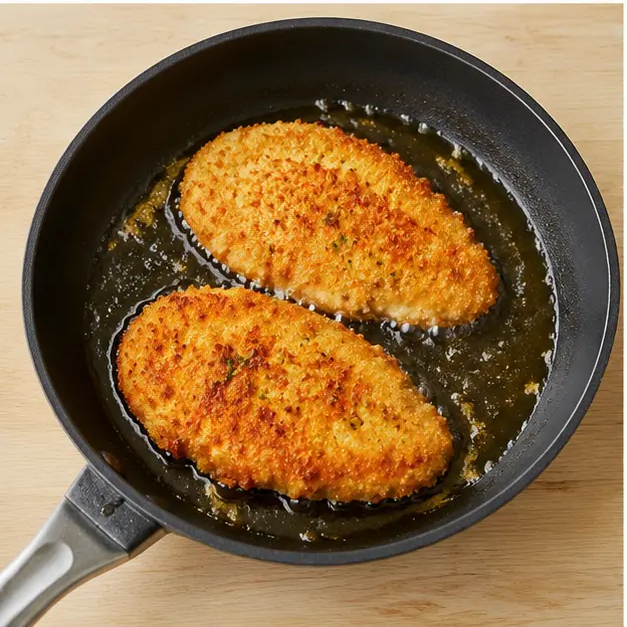
Cook for about 4 minutes per side, until the crust is deep golden brown and the chicken is cooked through to 165 degrees F. The edges should look crispy and release easily from the pan when you flip. If they resist, give them another 30 seconds. Transfer to a paper-towel-lined plate to drain, and let the oil come back up to temperature between batches. That’s the difference between crispy and greasy.
Stage 4: Finish and Serve
This is where the dish goes from good to tastes-like-the-restaurant. Sprinkle the warm chicken with flaky sea salt right out of the pan. The salt hits the hot crust, melts a little, and pulls the whole thing together. It’s a tiny step people skip, and it makes a real difference.
Serve immediately with lemon wedges and a shower of fresh chopped parsley. That squeeze of lemon over the crispy crust? Essential. It cuts through the richness and makes everything taste brighter. This is the finish that makes it feel like an italian restaurant style chicken plate, not just a breaded cutlet from your kitchen.
Cheesecake Factory Crusted Chicken Romano Pro Tips
Alright, here’s where I share everything I’ve learned from repeated testing. Consider this the cheat sheet for perfect parmesan romano crusted chicken. These golden brown crust tips come from the school of hard knocks, and they’ll save you from the most common failures.
- Grate your cheese finely. Big shreds won’t adhere to the chicken, and they’ll fall off in the pan. You want a fine, powdery grate that clings to the panko.
- Don’t skip the rest. That 10 minute rest after breading is the difference between a crust that stays and a crust that peels off. Set a timer. Walk away.
- Watch the oil temperature. Too hot and the crust burns before the chicken cooks through. Too cool and the crust gets greasy. Medium-high heat, shimmering oil. That’s your window.
- Don’t overcrowd the pan. Two cutlets at a time, max. Patience pays off in crunch.
- Salt the hot chicken. Flaky salt on the finished crust is the restaurant secret you didn’t know you were missing.
Common mistakes I see in the comments, and how to fix them:
❌ Not pounding the chicken thin enough, which leads to burnt coating and raw centers.
✅ Pound to an even 1/4 inch, no exceptions.
❌ Frying before the oil is hot enough, so the chicken absorbs oil and tastes heavy.
✅ Wait until the oil shimmers. Then wait another 10 seconds. Use a thermometer if you have one.
❌ Using pre-shredded bagged cheese that doesn’t melt or adhere.
✅ Grate a block of Romano fresh. It changes everything.
And if the crust cracks a little when you flip it? Call it rustic. It’ll still taste incredible, I promise. This is home cooking, not a plating competition.
Quick Shortcuts and Make-Ahead Options
Busy weeknight? You have options. This is one of those copycat cheesecake factory recipes that actually lends itself well to planning ahead.
- Bread the chicken a few hours ahead and keep it uncovered on a baking sheet in the fridge. The cold, dry air helps the crust set even more.
- Ask your butcher to pound the chicken for you, or buy pre-pounded cutlets. Zero shame in that.
- Set up your dredging stations before you even take the chicken out of the fridge. Mise en place makes everything smoother.
- You can even freeze the breaded raw cutlets for up to a month. Fry them straight from frozen, just add a couple extra minutes per side.
Variations and Substitutions
The base recipe is fantastic as written. But let’s talk about ways to make it yours. This chicken romano recipe is flexible without losing its soul.
- Parmesan instead of Romano: Works fine, just a bit less sharp. Use a 50/50 blend if you want the best of both worlds.
- Gluten-free: Use gluten-free panko and swap the flour for a gluten-free all-purpose blend. I won’t pretend it’s identical, but it’s close enough to satisfy the craving.
- Chicken tenders: You can absolutely use tenders for this. Adjust the cooking time down a touch since they’re smaller and thinner.
- Baked version: You can bake these at 375 degrees F for about 20 minutes, flipping halfway. A light spray of oil on top helps the crust crisp up.
- Air fryer: Cook at 375 degrees F for 10 to 12 minutes, flipping once. Extra crispy, less oil.
One note: don’t swap the panko for regular breadcrumbs. Panko is what gives you that light, craggy, shattering crust. Regular breadcrumbs will get you something denser, more like a meatball texture. Not what we’re after here.
Storage and Reheating Leftovers
If you somehow have leftovers, here’s how to keep them worth eating. Proper storage and reheating is where most people lose the magic.
Store the chicken in an airtight container in the fridge for up to 3 days. Make sure it’s completely cool before you seal it, otherwise condensation turns that beautiful panko breadcrumb crust into a soggy mess.

Freezing works too, which is great for meal prep. Wrap each piece individually in plastic wrap, then foil, and freeze for up to 2 months. Thaw in the fridge overnight before reheating.
For reheating, skip the microwave. I know it’s tempting, but it ruins that crispy crust in about 30 seconds. Instead:
- Oven: 375 degrees F for 8 to 10 minutes, until heated through
- Air fryer: 375 degrees F for 8 to 10 minutes, extra crispy
Add the lemon juice fresh after reheating, not before. It keeps the crust crunchy and the flavor bright.
What to Serve with Crusted Chicken Romano
This chicken is the star of the plate. But the right sides make it a full restaurant experience at home, the kind of special dinner for two that feels like an occasion.
- Angel hair pasta tossed with olive oil, lemon juice, and a little pasta water. Light, bright, and perfect with the crispy chicken.
- A simple arugula salad with lemon vinaigrette. The peppery leaves cut through the richness beautifully.
- Roasted asparagus or green beans, a summer side that doesn’t heat up the kitchen too much.
- Crusty bread to soak up every last bit of goodness on the plate.
It’s August in California and the kitchen is already warm, so I keep sides light and quick. This also makes a fantastic date night dinner at home. Light a candle, open a window, and pretend you’re on the patio. No reservation required.
Frequently Asked Questions
Look, I get it. Cheesecake Factory has a menu the size of a novel, and the crusted chicken romano is easy to overlook. But once you’ve had it, you don’t forget it. The good news is you don’t have to wait for your next visit to enjoy it. This homemade restaurant quality dinner is yours any night of the week.
When you take that first bite and the crust shatters, that’s your moment. The golden crunch, the sharp Romano, the bright squeeze of lemon. It’s all there, and you made it in your own kitchen for a fraction of the price. Tell me how it goes. And if you want to keep this one handy for the next time the craving hits, save this cheesecake factory crusted chicken romano recipe to your Pinterest board so it’s waiting for you.
Source: Learn More About This Dish













4 responses to “How to Make Cheesecake Factory Crusted Chicken Romano”
The taste was spot on, but my crust didn’t stay as crispy as I hoped. I think I might have over-breaded or my oil wasn’t hot enough. I’ll try again with a thermometer and maybe pat the chicken drier first. Still a solid recipe!
Made this last night and it was an absolute hit! That crunch is unreal—I finally understand what everyone talks about with Cheesecake Factory’s version. I served it with lemon wedges and a side of spaghetti aglio e olio. Definitely making this again!
Great flavor and the Romano in the crust really makes a difference. One question though—I’m cooking for a crowd and was wondering if the breaded chicken can be prepped ahead of time and fried later? Would the crust still stick if I let it sit in the fridge for a few hours?
Great question, James! You can bread the chicken and refrigerate it for up to 4 hours before frying—actually, the extra rest helps the crust adhere even better. Just let it come slightly to room temp before cooking.