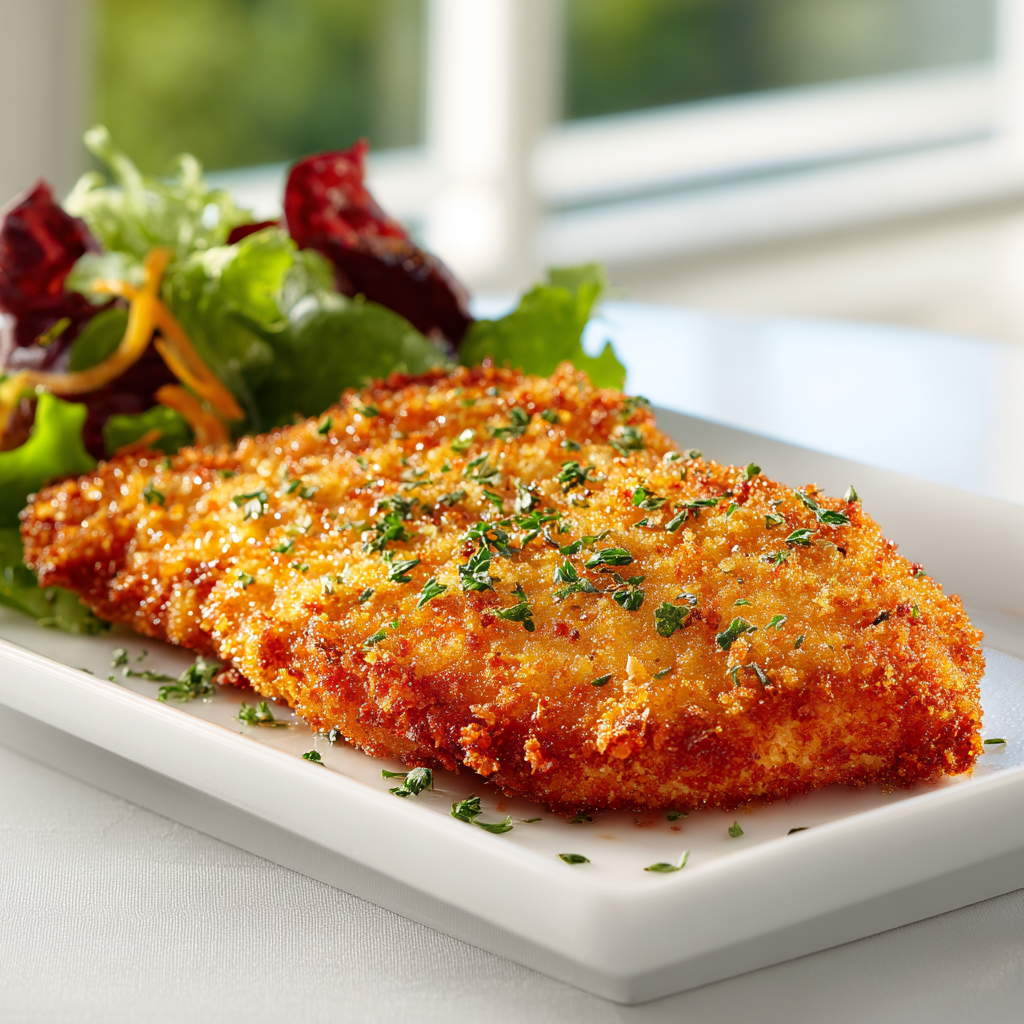
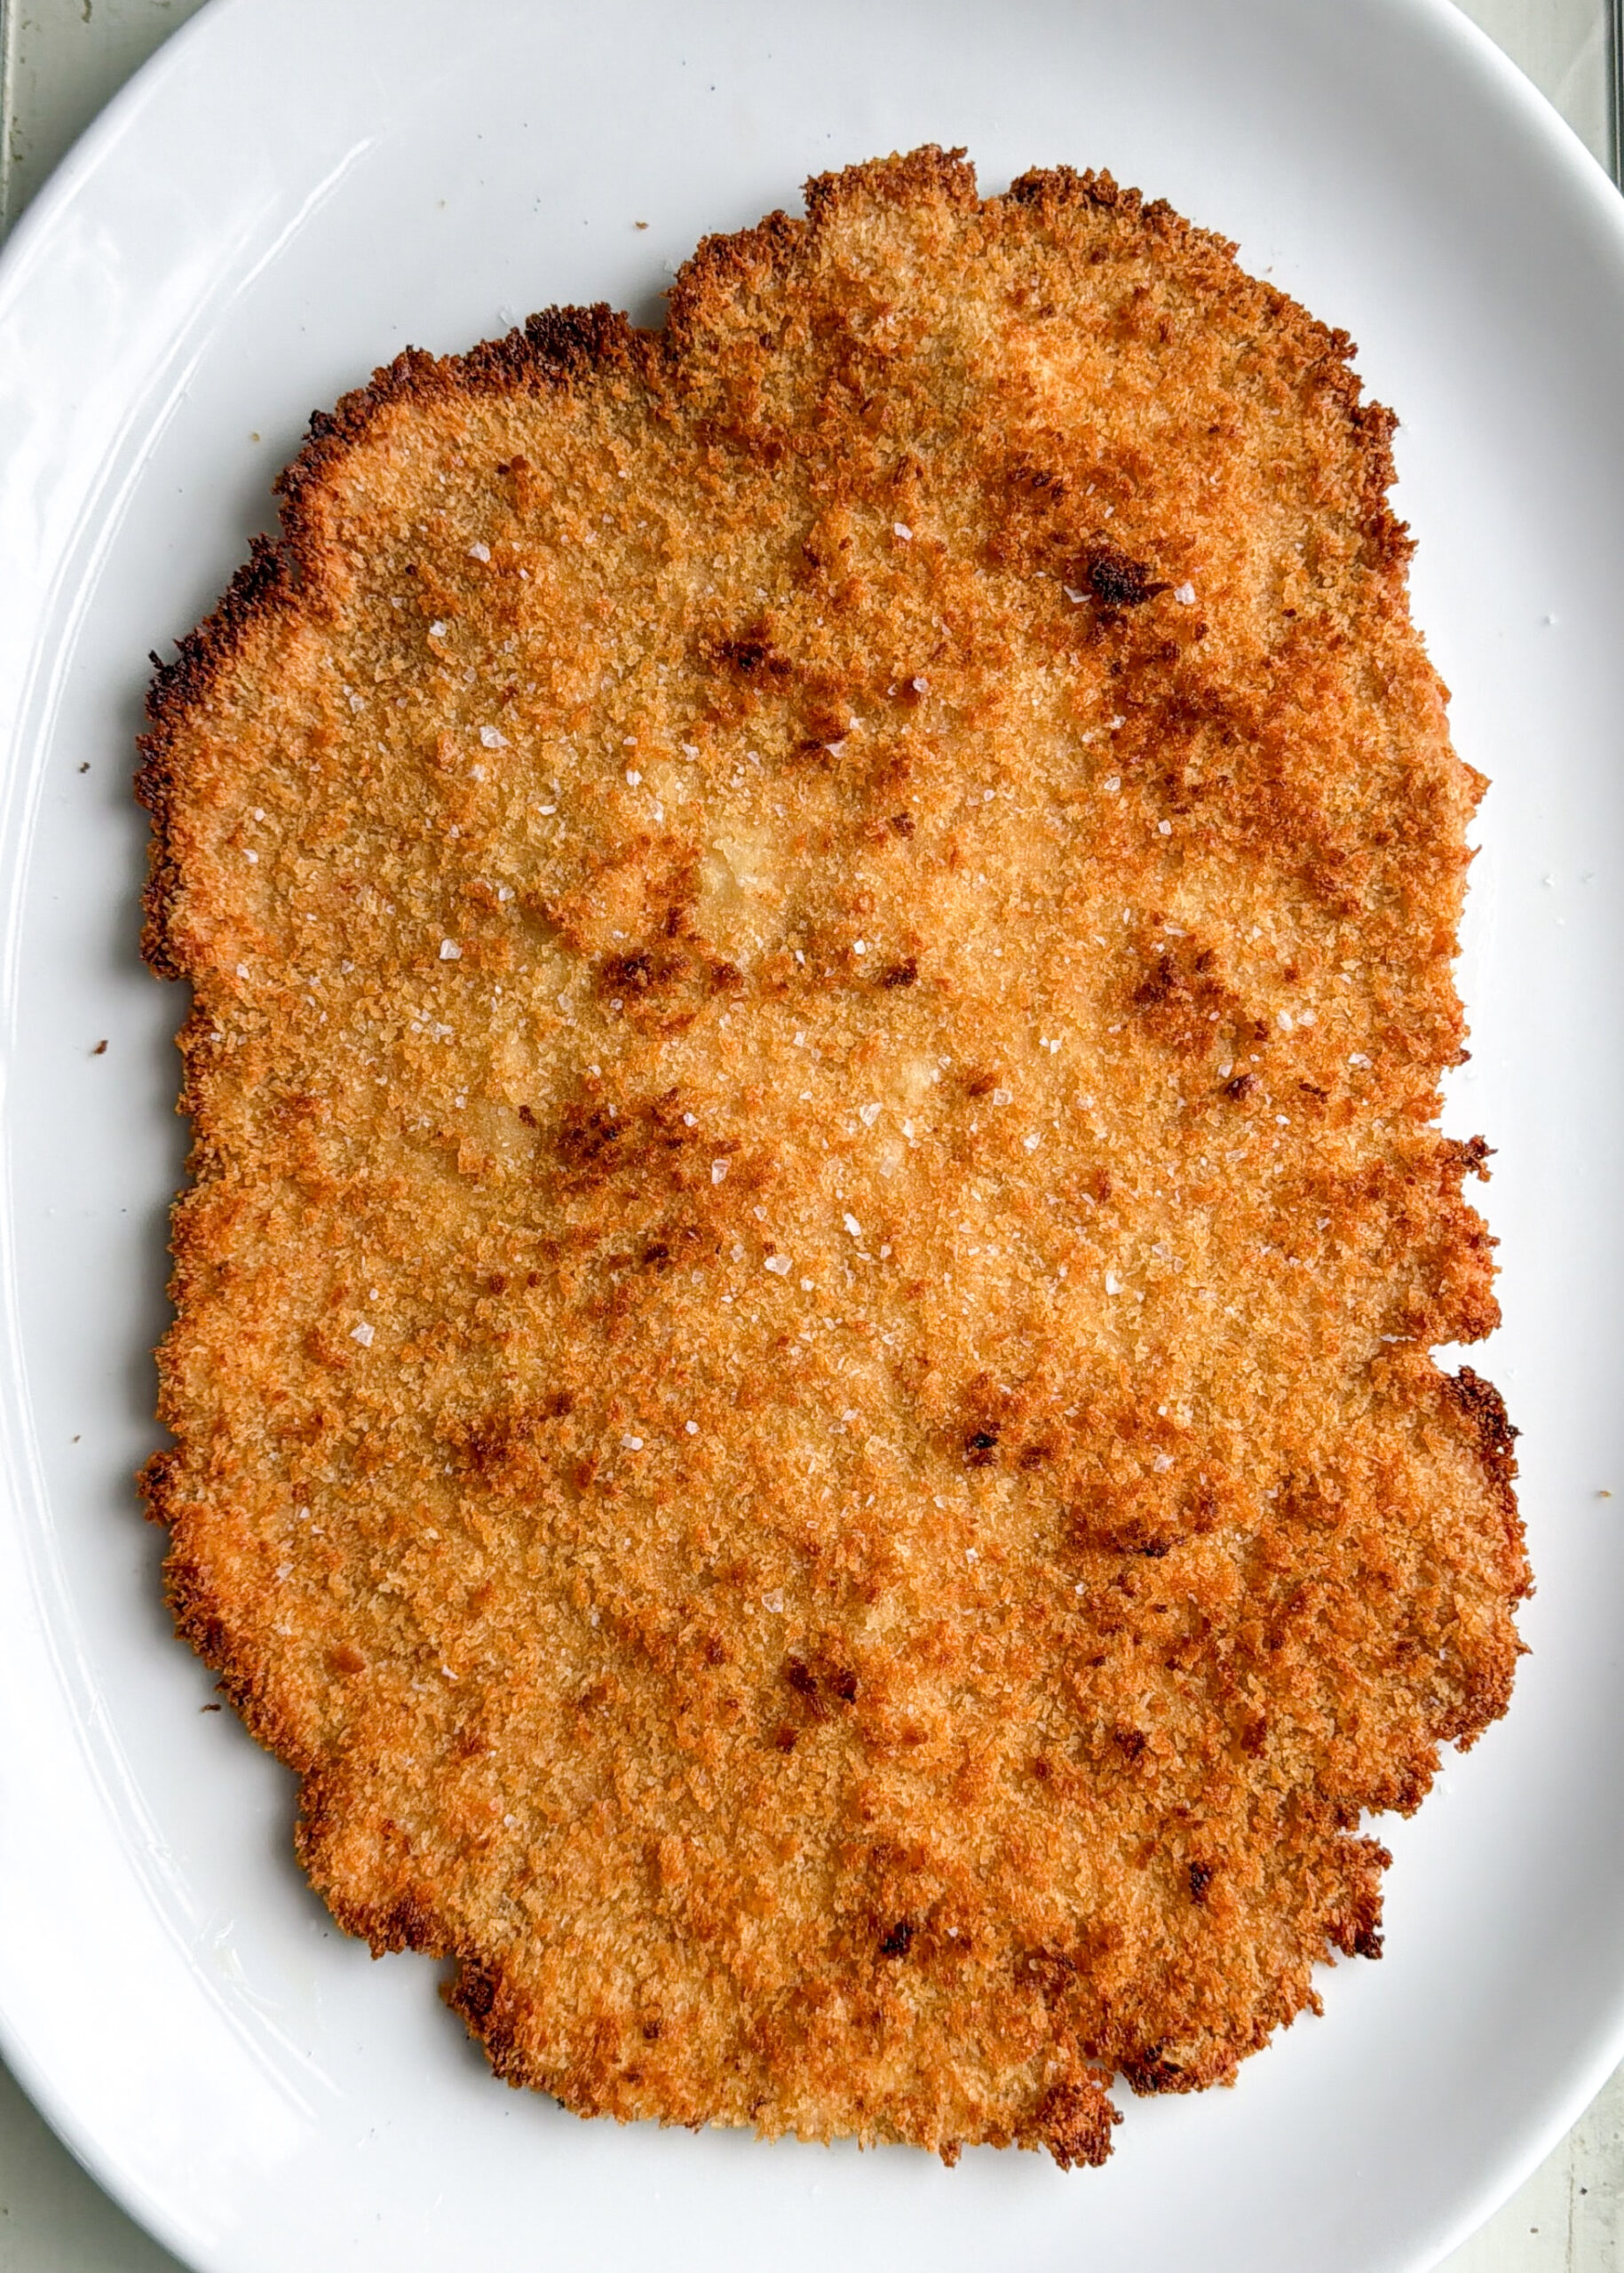
Giant Chicken Cutlet with Crispy Panko Crust
Ingredients
Method
- In a bowl, combine the ground chicken with kosher salt, garlic powder, and onion powder. Mix gently until just combined, then let it rest for a few minutes.
- Lay a large sheet of parchment paper on a work surface and sprinkle generously with flour. Place the meat mixture on top and press it into a very thin, large oval, about 1/4-inch thick, aiming to nearly fill a standard sheet pan. Lightly dust the top with more flour.
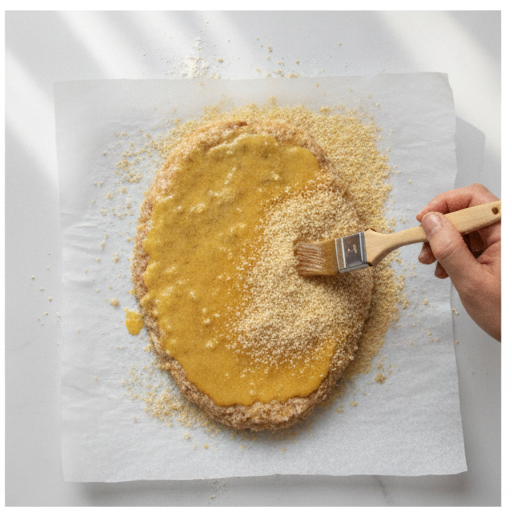
- Brush the top surface of the meat with a thin layer of egg wash. Evenly sprinkle panko breadcrumbs over the egg wash, pressing gently so they adhere. Spray the breadcrumbs generously with avocado oil until they are fully saturated and glistening.
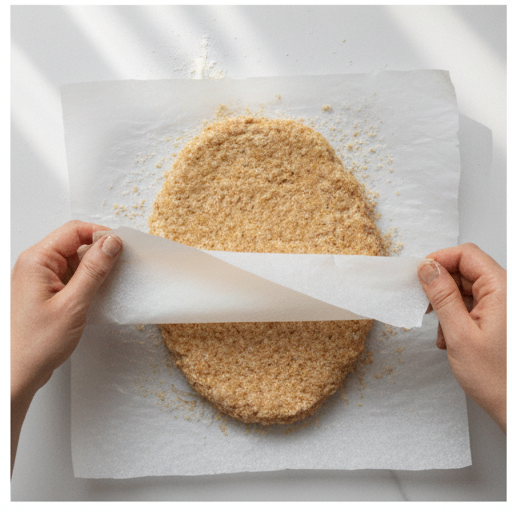
- Place another sheet of parchment on top of the cutlet and carefully flip it over. Peel off the top parchment to reveal the uncoated side. Brush with remaining egg wash, then coat with panko, pressing gently. Spray again with avocado oil until the breadcrumbs are fully hydrated.
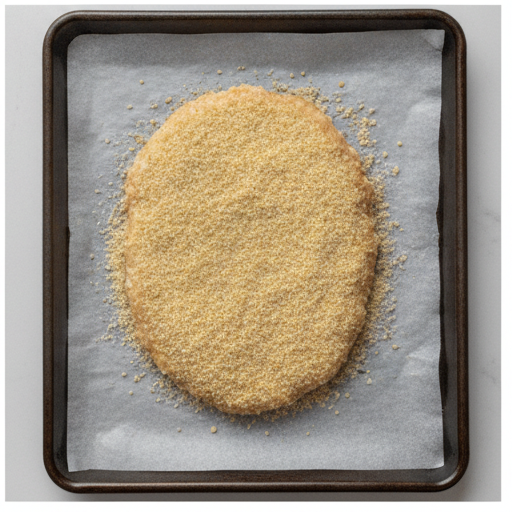
- Lightly spray a large sheet pan with avocado oil. Carefully transfer the cutlet from the parchment to the prepared pan. Bake in a preheated 450°F convection oven (or air fryer) for 15 minutes, until the crust is set and golden.
- Switch the oven to broil and cook for 4–5 minutes, watching closely, until the cutlet is deeply golden brown and shatteringly crispy.
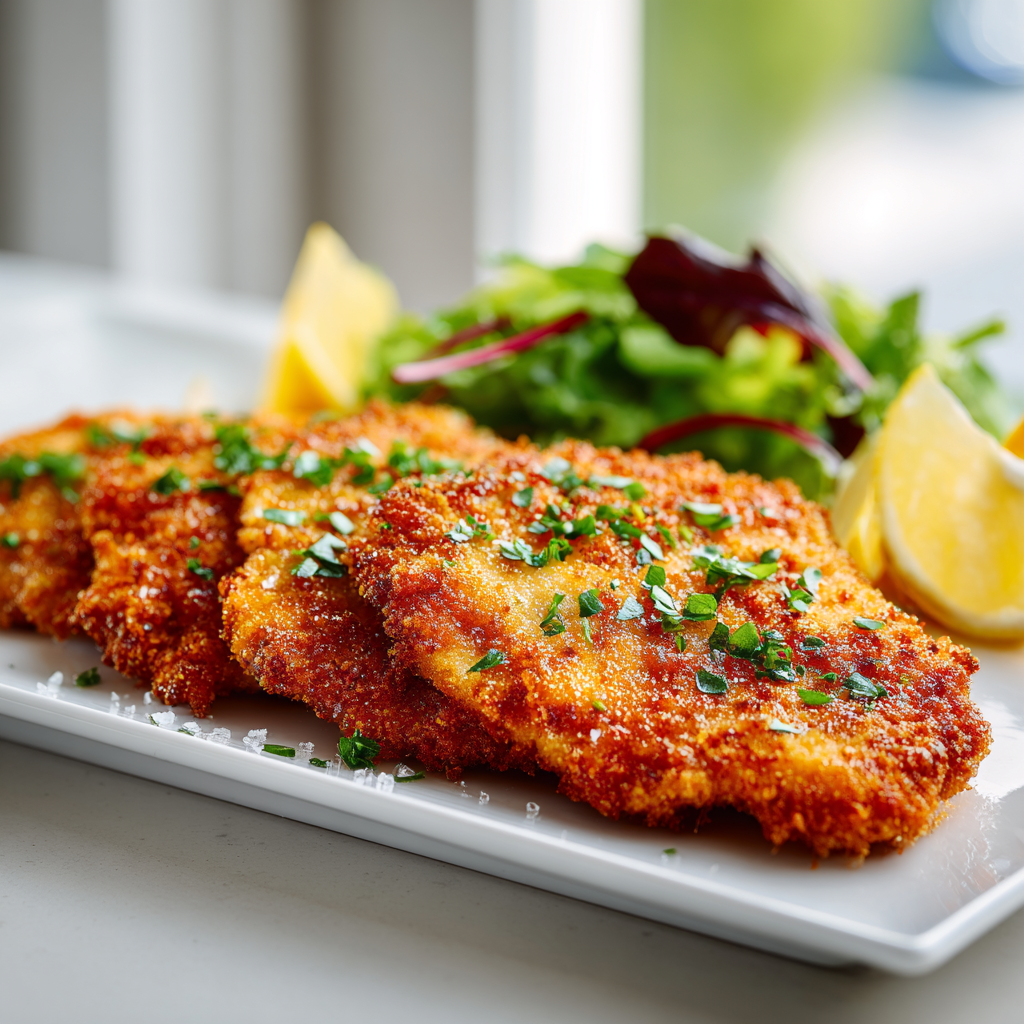
- Remove from the oven and immediately sprinkle with flaky sea salt. Let rest for 1–2 minutes, then slice and serve.
Nutrition
Notes
Tried this recipe?
Let us know how it was!Why This Giant Chicken Cutlet Works
I used to hate making chicken cutlets. Seriously. They always ended up dry, or the breading fell off in the pan, or I’d burn the outside while the inside was still raw. It was a mess. And then I saw this viral chicken cutlet recipe floating around, and I thought, “No way that works.”
But here’s the thing. It does. And it’s not some complicated chef trick either. This giant chicken cutlet is made with ground chicken, shaped into a massive thin oval, coated in crispy panko, and baked until golden. No deep frying, no splattering oil, no soggy breading. Just pure, shatteringly crisp perfection.
The first time I tried to make a giant cutlet, it looked more like a chicken balloon. Seriously. I didn’t press it thin enough, and it puffed up in the oven like a sad, pale football. It burst open and leaked juices everywhere. Not my finest moment. But after a few tries, I figured out the secret: you have to press it super thin, like 1/4-inch thin, and you have to hydrate that panko with oil until it’s glistening. That’s the magic.
So if you’ve been burned by bad cutlets before, I get it. This recipe is different. It’s forgiving, it’s impressive, and honestly, it’s kind of fun to make. You’re gonna love this.
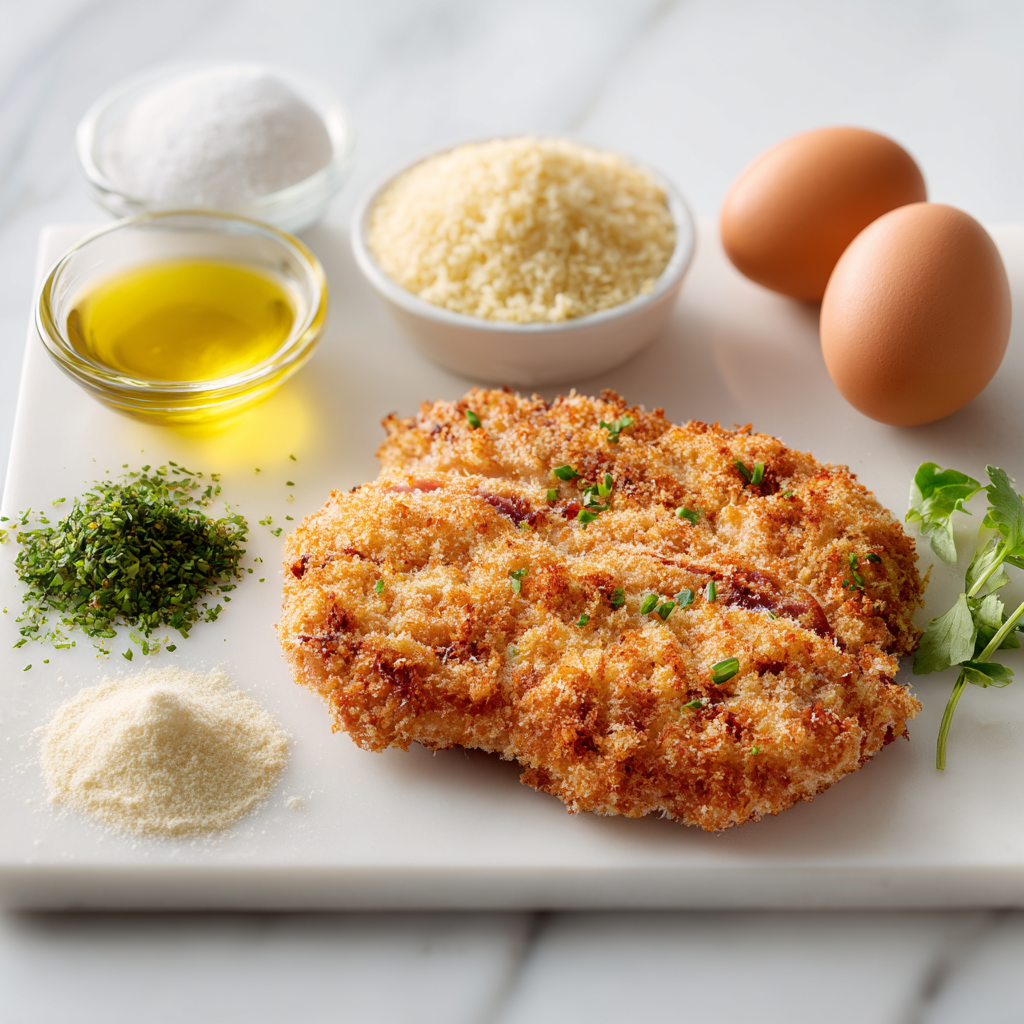
Ingredients You’ll Need
This recipe keeps things simple. No long trips to a specialty store. You probably have most of this in your kitchen right now.
For the meat mixture:
- Ground chicken or ground turkey (1 pound) I prefer 85/15 blend. The little bit of fat keeps it juicy. Super lean 93/7 can dry out, so avoid that if you can.
- Kosher salt (1 teaspoon) for seasoning the meat from the inside out.
- Garlic powder (1 teaspoon) classic. Don’t use garlic salt here, you’ll overdo the sodium.
- Onion powder (1 teaspoon) adds that savory depth without any chunky bits.
For the breading station:
- All-purpose flour (1/4 cup) just for dusting. Helps the egg wash stick.
- Eggs (2 large) beaten with a tablespoon of water for the egg wash.
- Panko breadcrumbs (3 cups, about one full box) this is the key to that extra crispy chicken texture. Panko is flakier and lighter than regular breadcrumbs, so it crisps up way better.
- Avocado oil spray this is what makes the panko turn golden and crunchy in the oven. Don’t skip it.
- Flaky sea salt for finishing right when it comes out of the oven. That little crunch on top is everything.
That’s it. Nine ingredients. No weird stuff. You can find everything at your local Ralphs or Vons, or grab it on an Instacart run.
Step-by-Step Instructions
Okay, let’s walk through this. I’ll break it into four main stages so it doesn’t feel overwhelming. And I’ll tell you exactly what to look for at each step.
Stage 1: Prep and Shape the Meat
First, combine your ground chicken with the salt, garlic powder, and onion powder in a bowl. Mix gently with your hands until everything is just combined. Don’t overwork it, or the meat can get tough. Let it rest for a few minutes while you set up your work station.
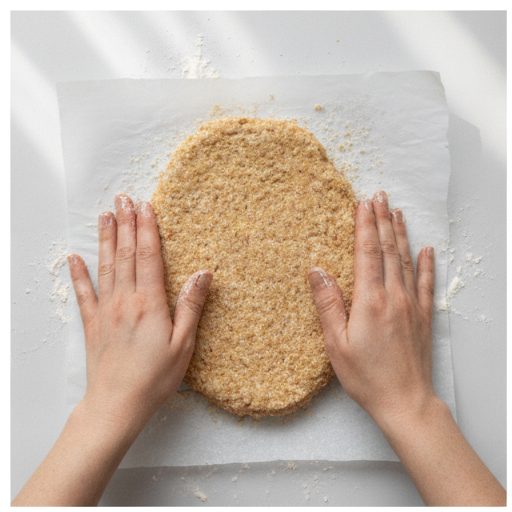
Now for the shaping. Lay a large sheet of parchment paper on your counter and sprinkle it generously with flour. Dump the meat mixture onto the center and start pressing it out into a thin oval. And I mean thin. Aim for about 1/4-inch thick. You want it to almost fill a standard sheet pan. It should look like a giant pancake, but made of chicken. Lightly dust the top with more flour so it doesn’t stick to your hands.
Here’s the trick I learned the hard way: if you leave it too thick in the middle, it won’t cook through evenly. The edges will get crispy and the center will be soft. So press it out evenly. Use your palms, not your fingertips, to avoid tearing.
Stage 2: Bread the First Side
Brush the top surface of the meat with a thin layer of the egg wash. Don’t drown it, just a nice even coat. Then sprinkle the panko breadcrumbs all over, pressing them gently so they stick. You want a nice thick layer, not just a dusting.
Now here’s the most important part: spray the breadcrumbs generously with avocado oil. I mean really saturate them. They should look wet and glistening, not dry and dusty. This is what makes the panko turn into that shatteringly crispy crust instead of staying pale and sad. If you’re worried about using too much oil, don’t be. The panko soaks it up and it bakes off beautifully.
Stage 3: Flip and Bread the Second Side
This is the part that scared me the first time. How do you flip a giant raw chicken cutlet without it falling apart? Easy. The parchment sandwich method.
Place another sheet of parchment on top of the cutlet, like you’re making a sandwich. Then carefully flip the whole thing over. Peel off the top parchment, and now you have the uncoated side facing up. Brush it with the remaining egg wash, coat with panko, and spray generously with avocado oil again.
See? No mess, no broken cutlet. You don’t even touch the meat with your hands after the initial shaping. It’s genius.
Stage 4: Bake and Broil
Lightly spray your sheet pan with avocado oil, then carefully transfer the cutlet from the parchment to the pan. Bake in a preheated 450°F convection oven for 15 minutes. The crust should be set and starting to turn golden.
Then switch the oven to broil and cook for 4 to 5 more minutes. Watch it closely. Broilers are aggressive, and you don’t want to go from golden to burnt in 30 seconds. When it’s deeply golden brown and you can hear it crackle when you tap it, it’s done.
Pull it out and immediately sprinkle with flaky sea salt. Let it rest for 1 to 2 minutes before slicing. I know it’s hard to wait, but trust me, that rest lets the juices settle so they don’t run out all over your cutting board.
Tips for the Crispiest Cutlet
I’ve made this recipe about a dozen times now, and I’ve collected a few hard-won lessons. Here’s what makes the difference between a good cutlet and a great one.
- Press it thin. I cannot stress this enough. If it’s thicker than 1/4 inch, the center won’t cook through before the crust is done. You’ll end up with a soggy middle. Use your palms and press evenly.
- Hydrate the panko. Spray both sides generously with avocado oil until the breadcrumbs are fully saturated and glistening. Dry panko stays pale and dusty. Oiled panko turns golden and shatteringly crisp.
- Use convection if you have it. The circulating air helps the crust brown evenly. If you don’t have a convection oven, bake at 475°F for 18 to 20 minutes, then broil at the end.
- Don’t skip the rest. Let the cutlet sit for 1 to 2 minutes after baking before you slice into it. This lets the juices redistribute so they don’t flood out and soften the crust.
- Watch the broiler. Ovens vary wildly. Your broiler might take 3 minutes or 6. Stay nearby and check it often. You’re looking for a deep golden brown, not black.
Serving Suggestions
This giant chicken cutlet is incredibly versatile. You can serve it as a main dish with a simple side salad, or you can go all out. Here are some of my favorite ways to eat it.
- Classic cutlet sandwich: Slice the cutlet into pieces and pile it on a crusty roll with lettuce, tomato, and a smear of mayo or aioli. It’s a thing of beauty.
- Chicken Parmesan giant: Top the cutlet with marinara sauce and shredded mozzarella, then pop it back under the broiler for a minute until the cheese melts. Serve with pasta or a big salad.
- Chicken Milanese style: Top with a fresh arugula salad, shaved Parmesan, and a squeeze of lemon. The peppery greens and bright citrus cut through the richness perfectly.
- Crunch bowl: Chop the cutlet into cubes and toss it into a grain bowl with quinoa, roasted vegetables, and a tangy dressing. Great for meal prep.
- With dipping sauces: Serve it with ranch, honey mustard, or a spicy aioli. Kids love it, and honestly, so do adults.
How to Store and Reheat Leftovers
If you somehow have leftovers, here’s how to keep them crispy. The fridge is fine, but the microwave is the enemy. Never microwave a chicken cutlet. It turns the crust into a sad, soggy mess.
Storage: Let the cutlet cool completely on a wire rack. Then store it in an airtight container in the fridge for up to 3 to 4 days. Place a piece of parchment between slices to keep the crust from sticking together.
Reheating: The best way to bring back that crunch is in an air fryer at 375°F for 4 to 5 minutes. If you don’t have an air fryer, use a regular oven at 375°F for 5 to 10 minutes, or a toaster oven at 375°F for 8 to 10 minutes. You can even reheat it on the stovetop over medium heat for a few minutes per side.
Freezing: You can freeze the baked cutlet for up to 2 to 3 months. Wrap it tightly in plastic wrap and foil, or use a freezer-safe bag. Reheat from frozen at 400°F for 15 to 18 minutes. It won’t be quite as crispy as fresh, but it’s still pretty darn good.
Common Questions
Variations to Try
Once you’ve mastered the basic recipe, you can start playing around with flavors. Here are a few of my favorites.
- Nashville Hot: After baking, brush the cutlet with a mixture of melted butter, cayenne pepper, and a little brown sugar. Serve on white bread with pickles. It’s spicy, sweet, and incredible.
- Lazy Chicken Parm: Spread a thin layer of marinara over the baked cutlet, top with shredded mozzarella, and broil until bubbly. Serve with pasta or a salad for an easy weeknight dinner.
- Herb and Garlic: Add a teaspoon of dried oregano or basil to the panko breadcrumbs. It gives the crust a lovely fragrant note that pairs beautifully with lemon.
- Gluten-Free: Use gluten-free 1-to-1 flour and gluten-free panko. Everything else stays the same. The texture is slightly different, but still deliciously crispy.
This giant chicken cutlet has honestly become one of my most-requested recipes. It’s the kind of dish that makes people say, “Wait, you made this at home?” And when they take that first bite and hear the crunch, followed by the tender, juicy interior, you’ll feel like a total rockstar.
So go ahead. Give it a try. And tag me when you make your giant cutlet I want to see that golden beauty! Share it on Pinterest and show off your creation.
Happy cooking, friends.
Source: Health & Nutrition Research